The color correction is an essential part of video production and can make the difference between an average video and a visual masterpiece. In this guide, you'll learn how to perform in-depth color corrections using the built-in tools of After Effects as well as the Magic Bullet Looks plugin. You will understand how to optimize colors through targeted adjustments and create impressive looks.
Main Insights
- Color correction with After Effects can be deep and precise.
- It is important to preserve colors and skin tones during correction.
- Magic Bullet Looks offers an efficient way to create and adjust color looks.
- The use of alpha channels and effects like Colorama in After Effects opens up new correction possibilities.
Step-by-step Guide
To enrich your video projects with effective color corrections, follow these steps:
1. Color Correction with After Effects Built-in Tools
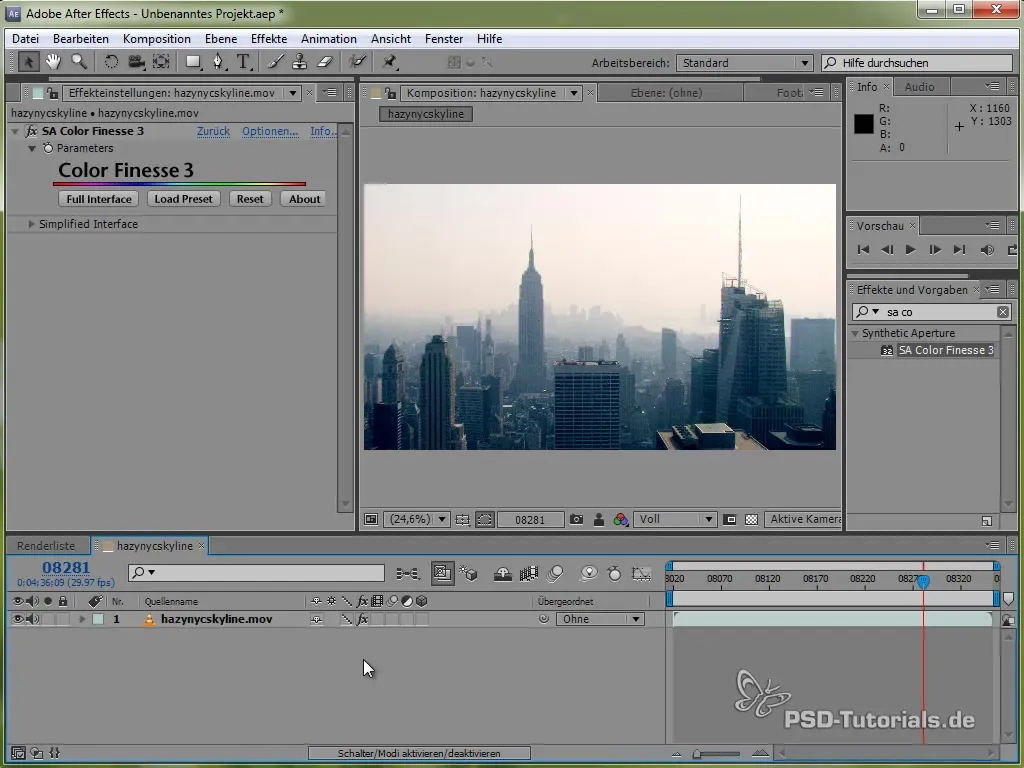
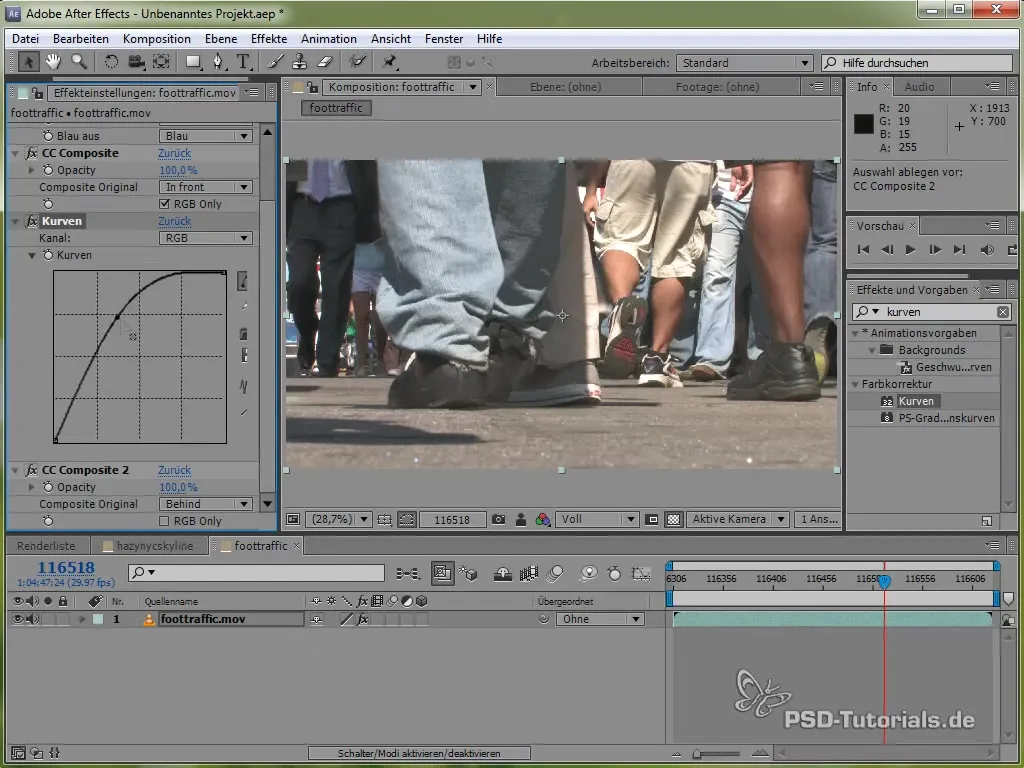
Start by using the Color Corrector in After Effects. You can choose and adjust various color correction effects. Use curves and color balance to specifically edit the highlights, midtones, and shadows of your footage. Make sure to preserve the colors in it so that natural skin tones are not lost.
2. Using the Colorama Effect
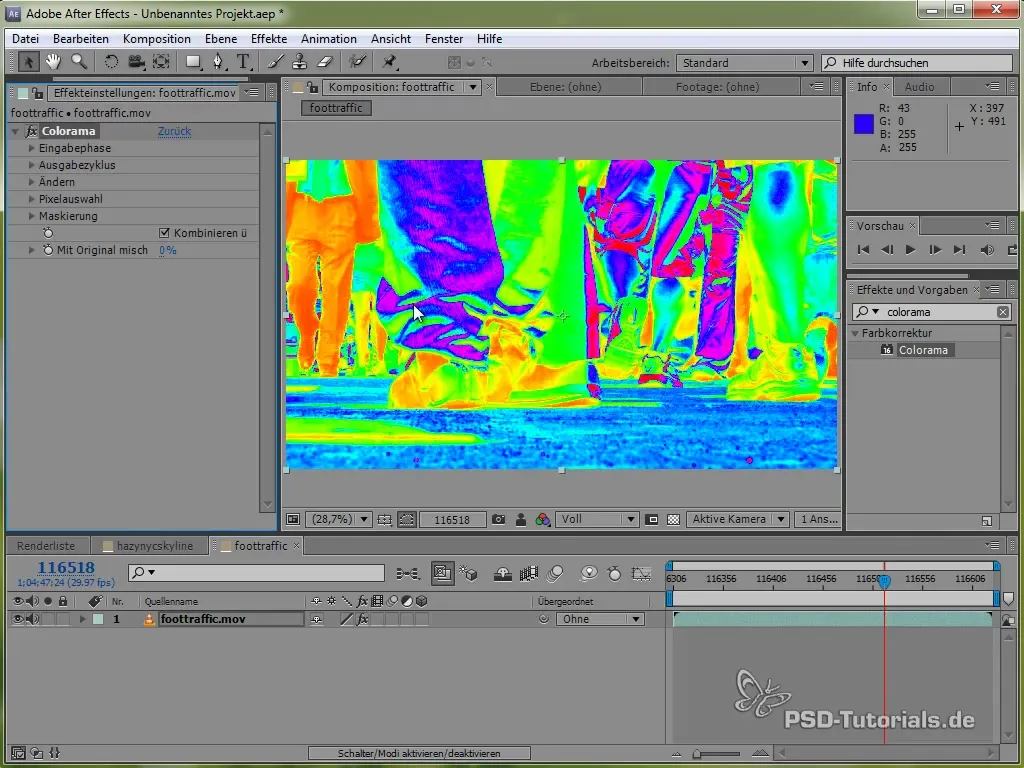
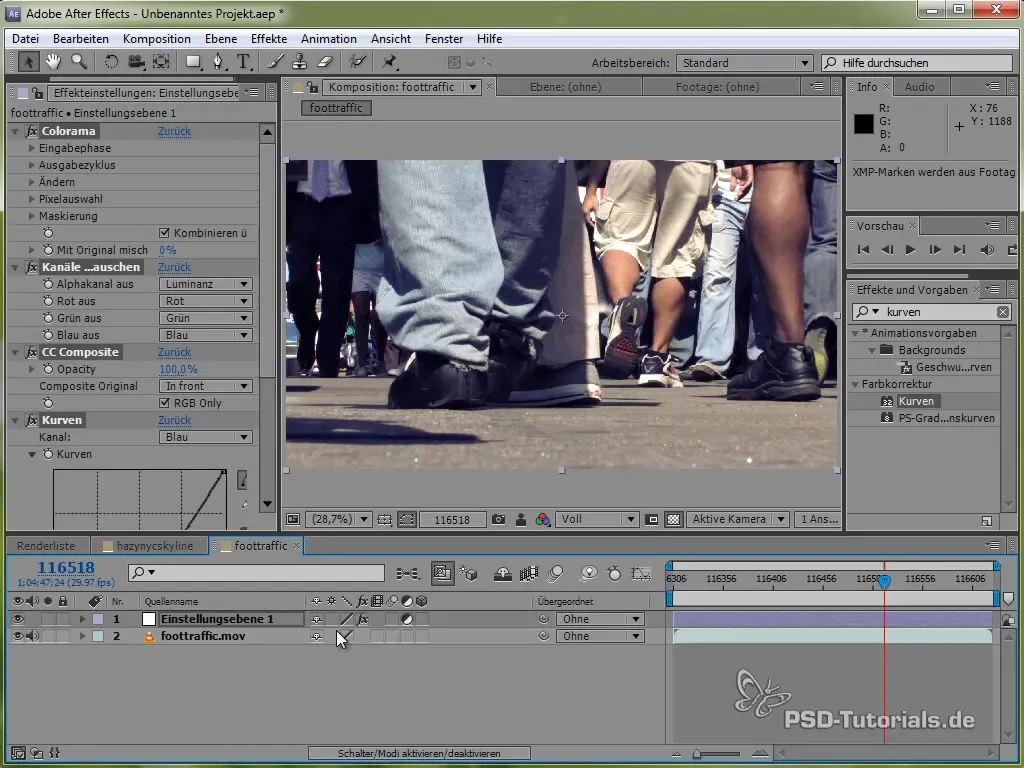
To better separate image information, add the Colorama effect. This allows for easy handling of brightness values and offers various options to adjust the color distribution of the entire image. First, adjust the input area according to the intensity and then match the output from light to dark values.
3. Separating Shadows and Highlights
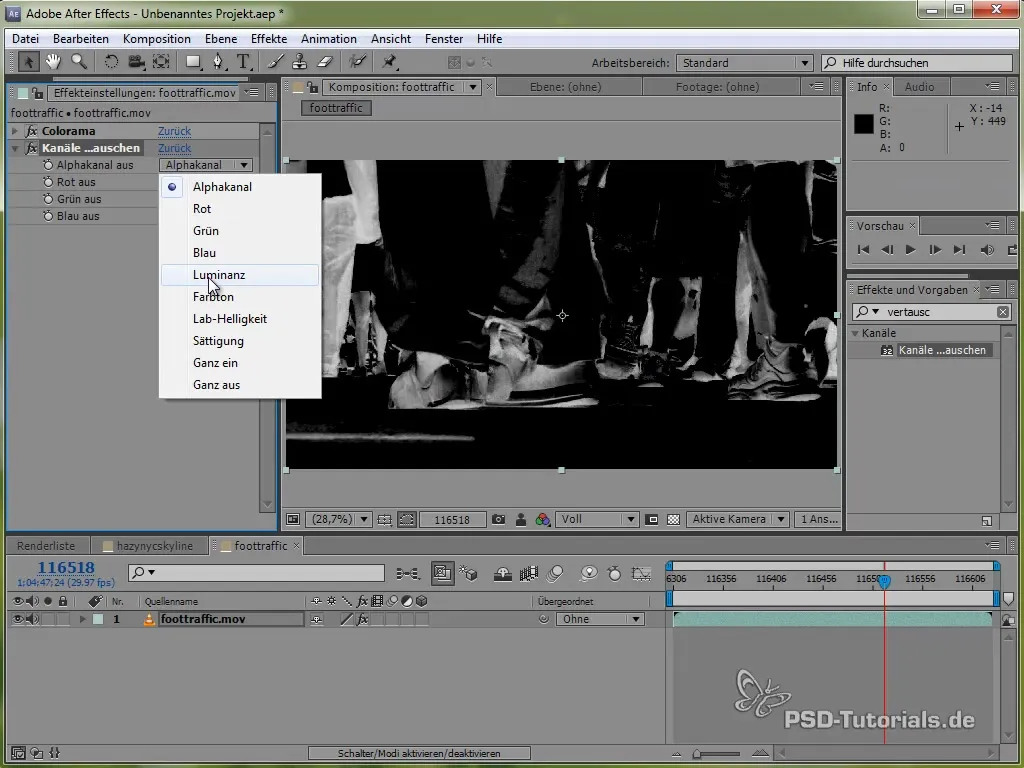
With Colorama, you can clearly separate shadows and highlights. Carefully select the desired colors. Create an alpha mask to ensure only the desired areas of the image are visible. This process clarifies the structure of your shots.
4. Applying Curves to Specific Areas
Use the curves function to make targeted adjustments in the shadows and midtones. You can transform colors in different areas of the image by modifying the curve accordingly. This technique helps refine the overall look of your project.
5. Refining Color Looks through Adjustment Layers
With the help of adjustment layers, you can easily duplicate and adjust your color corrections. This way, you can test and apply different looks at any time without losing the original settings.
6. Using Magic Bullet Looks
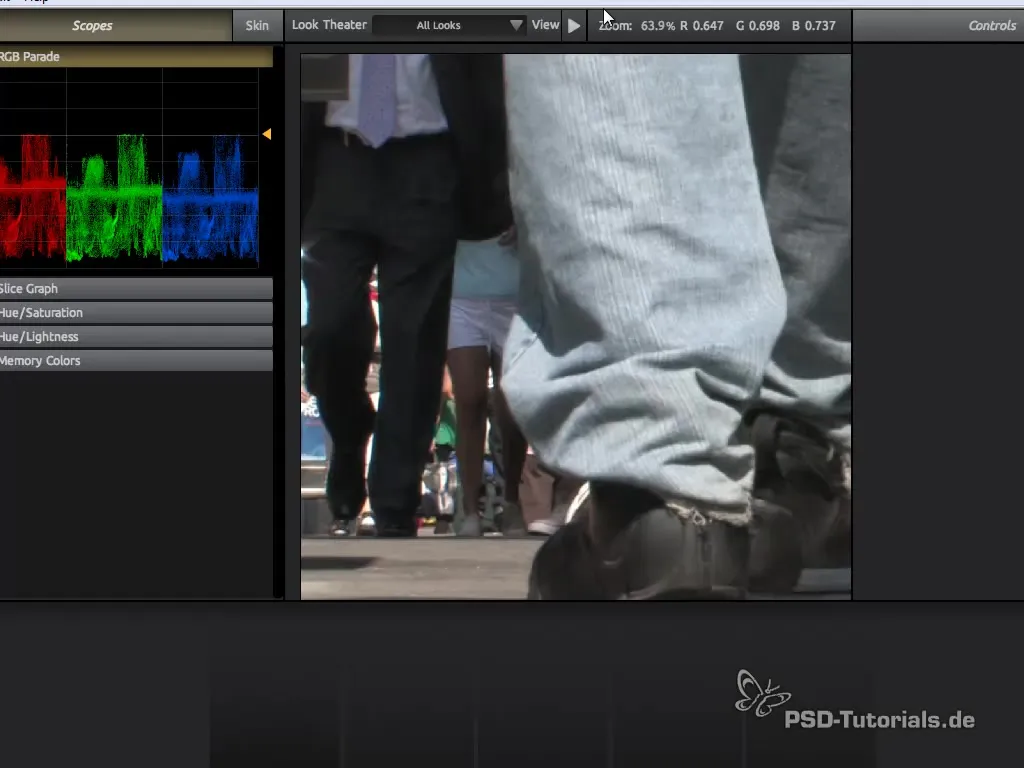
Launch Magic Bullet Looks and select a predefined preset that gives your project immediate character. Adjust the individual settings using the intuitively designed panel and experiment with different color combinations. Make sure to control the saturation and contrast of your clips to ensure they fit harmoniously together.
7. Adjusting Highlights, Midtones, and Shadows
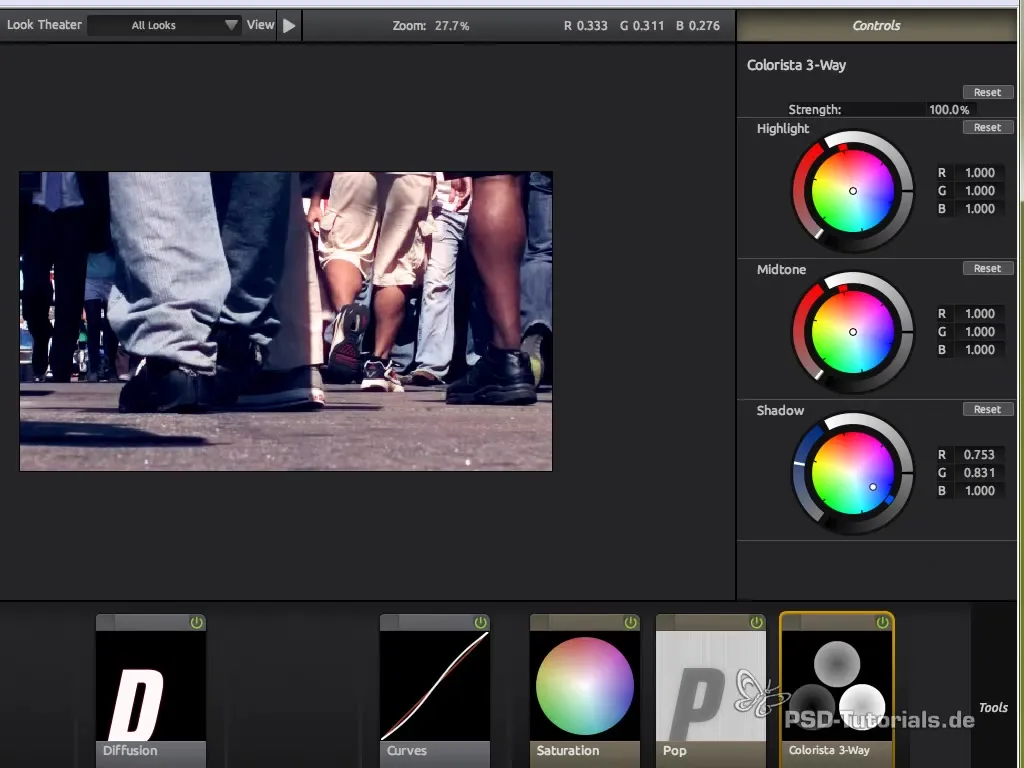
Within Magic Bullet Looks, you can not only make global changes but also adjust highlights, midtones, and shadows individually. This allows you to optimize the overall look of a video and add extravagant effects, such as vignettes or glows, to make the image look professional.
8. Final Comparison and Adjustments
Review the image in a before-and-after comparison to observe the difference your color corrections make. Often, you'll see how subtle yet effective the adjustments are. Continue experimenting with different looks until you find the perfect style for your project.
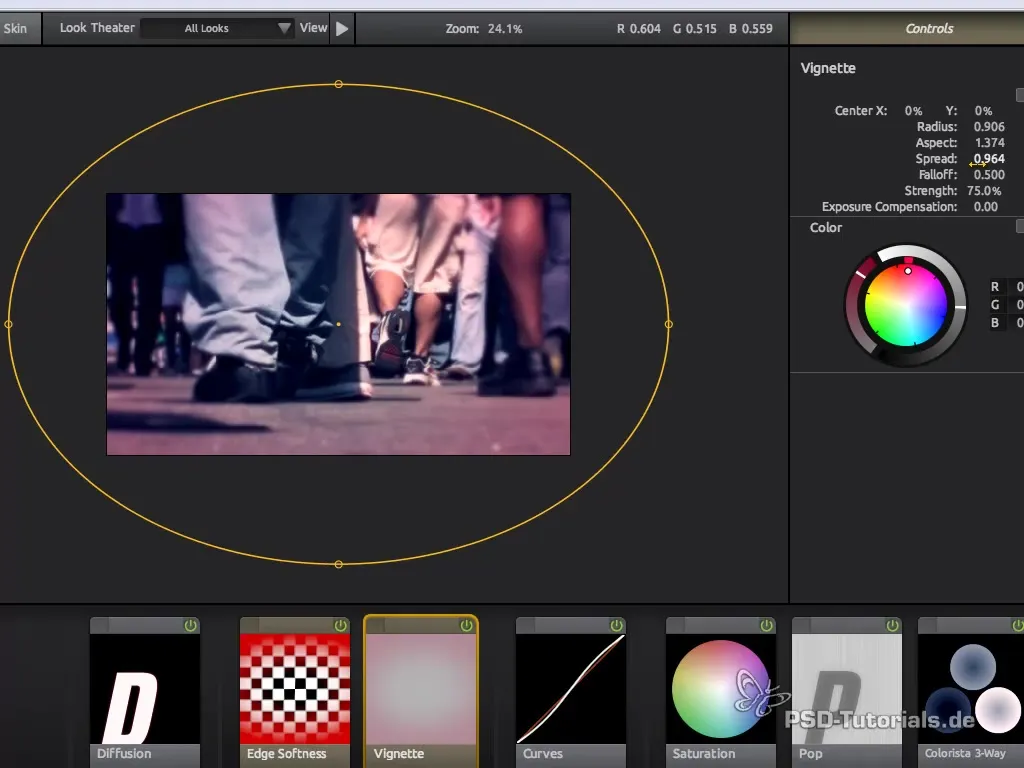
Summary - In-depth Color Correction with After Effects and Magic Bullet Looks
Throughout this guide, you have learned the various techniques for color correction using After Effects and Magic Bullet Looks. You have discovered how to effectively create and adjust color looks to give your video projects a professional touch.
Frequently Asked Questions
How can I save color corrections in After Effects?You can save color corrections in the form of adjustment layers and then apply them to other clips.
What are alpha channels and how do I use them?Alpha channels define which parts of an image are visible or invisible. You can create them using masks and luminance information in After Effects.
Is Magic Bullet Looks a must for color correction?It is not strictly necessary, but it offers a user-friendly interface and a variety of presets that can significantly speed up the process.
