
Imagine you have built an elaborate lower third in After Effects, and in your next project you need exactly this effect again. Instead of laboriously copying the composition and investing the render time again, you save it as an animation preset. That is exactly what I show you in this tutorial. You create a futuristic lower third from rectangles, layers and a 3D camera, animate it, add a text and render the result with an alpha channel. At the end, you insert the finished file into a new project and get your lower third without any further effort.
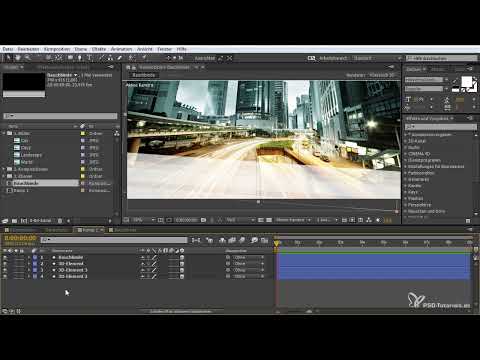
The video is only loaded from YouTube when you play it – data (including your IP address) is then transmitted to YouTube/Google. More in the privacy policy
Key Takeaways
An animation preset is a rendered composition with an alpha channel that you can reuse in any project. This saves you time and avoids errors that would occur when rebuilding it. The 3D function of the layers, the camera and the precomposition are the most important tools for this effect. When rendering, you must choose the "Animation" setting with RGB and alpha channel so that the background stays transparent.
Step 1: Prepare the starting composition and insert the image
Start with a composition in which you have set the appropriate values. Then drag your cityscape into it. It is usually too large, so you scale it down with the S key until the scale fits the format. This image later serves as the background on which the lower third sits.

Step 2: Create a rectangle and adjust transparency
Select the Rectangle tool in the top bar and draw a shape with it. Make sure the cityscape layer is deactivated before you draw. Otherwise, the tool would apply a mask to the image, and we don't want that. Then create a new layer, which you call Bauchbinde, and select the Selection tool. With the T key, you reduce the opacity to about 50 to 70 percent so that the background shows through and the shape still looks good.

Step 3: Set up the 3D camera and 3D layer
For a spatial effect, you need a 3D camera. Right-click in the layer area, choose New and then Camera. After Effects points out that currently only 2D layers are present. In this case that is not a problem; you confirm with OK. Then rename the layer with the Enter key and activate the 3D switch on the lower third. With the P key, you can now change the position, for example on the Z axis, to push the layer into depth.

Step 4: Duplicate elements and stagger them in depth
Duplicate the lower third with Ctrl and D and name the copy, for example, 3D Element. Move it down with the P key and reduce the opacity with T. The trick with the Shift key is important: if you press Shift and T, the options for opacity and position appear at the same time. With Shift and R, you additionally bring up the rotation. With these combinations, you create several elements that lie slightly offset in depth. Repeat the process until you get a hint of different layers.

Step 5: Refine the layout and adjust the resolution
If the display in the preview window looks blurry or slow, set the resolution to Draft or Fast Draft. This speeds up your work considerably without affecting the final result. Add further elements with Ctrl and D and move them until a futuristic-looking structure emerges that harmonizes well with the cityscape. You can temporarily deactivate the 3D switches to see how the layers behave without depth effect. This consideration is important later when you use additional rotations.

Step 6: Transfer layers into a precomposition
Select all layers of the lower third and create a new precomposition with Ctrl, Shift and C. Name it Bauchbinde. Then activate the Continuously Rasterize switch so that all 3D settings are preserved within the precomposition. The advantage of this precomposition: you can rotate or align the entire group without touching each layer individually. The position remains in the center of the composition, so you can work accurately.

Step 7: Set the rotation of the precomposition
Open the lower third by double-clicking and set the rotation so that the group is tilted. This looks more dynamic than a horizontal alignment. Since the precomposition encloses all layers, the individual elements keep their positions relative to one another. Afterwards, you go back into the lower third and can edit the individual layers in a targeted way.

Step 8: Create a position animation with keyframes
Press the P key to activate the Position property. Click the stopwatch to set keyframes, and move the layer, for example, starting at second 2. Then use Shift and Page Down to move in steps of ten until just before second 5 and set another keyframe there by moving the layer to the end position. With the zero key on the numeric keypad, you can play the animation in the preview. While holding the Shift key you move the layer in larger steps, with Ctrl in very small ones.

Step 9: Smooth keyframes and shape the dynamics
Select the keyframes and press F9 to activate Easy Ease interpolation. The movement then starts and ends smoothly instead of abruptly. To add variety to the animation, shift individual keyframes forward or backward in time and adjust the final sequence. In this way, dynamics are created without you needing complicated techniques. If you like the result, return to the composition and observe how it interacts with the cityscape.
Step 10: Add and animate a text layer
Close all open layers and create a new text layer via right-click. Write a word like "Hello" there and choose a color that fits the cityscape, for example orange. Place the text on the lower third. For the animation, you can use the animation presets, such as the typewriter preset. So that the text only appears once the lower third has slid in, you shift the text layer back in time. Alternatively, you adjust the settings in the Animator.

Step 11: Limit the timing and activate motion blur
Check the final position of the lower third and, if necessary, extend the composition by one second, for example to six seconds. With N you trim the composition duration so that it extends exactly to the end of the animation. Then activate motion blur for all layers and for the composition. This makes the movement look smoother. Don't forget that you have to set the switches for this per layer and additionally in the composition overview.

Step 12: Render as an animation with alpha channel
Open the output module via the render queue and choose QuickTime as the format. Set the channels to RGB and Alpha so that the transparent background is preserved. Under video codec, Animation is suitable, as it reliably stores transparency. You can set the quality to 100 percent because the file is only intended for your collection. Confirm with OK, specify a save location, and name the file Bauchbinde. Then start the rendering process.

Step 13: Use the preset in a new project
Now close the lower third composition and delete the layers of your test project. Drag the rendered file into a new project and place it over your cityscape. The lower third appears after the set time without you having to activate transparency or 3D settings again. This is the real benefit of a preset: it works independently of the background image. In this way, you can put together your own preset packs, sort them, and share them if needed.

Step 14: Check the result
Open the file in the window and enlarge the view to 100 percent. Check the sharpness, transparency, and the flow of the animation. Only when the result is convincing is your preset considered finished. With this method you create any elements you like, which you can immediately reuse in later projects.

Summary ??? Creating and reusing a lower third in After Effects as an animation preset
In this tutorial, you built a futuristic lower third consisting of several rectangles, a 3D camera, and a precomposition. You animated the movement with keyframes and Easy Ease, added a text, and refined the composition with motion blur. Afterwards, you rendered the file as QuickTime with an alpha channel and used it in a new project. This gives you a preset that you can reuse at any time.
FAQ
What is an animation preset in After Effects?An animation preset is a rendered composition, usually with an alpha channel, that you can use directly in new projects without rebuilding it.
Why should I use a precomposition?A precomposition combines several layers so that you can rotate or align the group together without changing the position of individual layers.
What setting do I need for the transparent background?When rendering, you select RGB and Alpha as the channels in the output module, as well as a codec that supports transparency, such as Animation.
What is the F9 key for?With F9, you apply Easy Ease to selected keyframes so that movements start and end smoothly.
Why should I adjust the resolution in the preview window?A lower resolution such as Draft speeds up the preview and your work, while the final rendering remains unaffected.## ##


