The Puppet Tool in Adobe After Effects allows you to easily and professionally animate cartoon characters or other graphics. You can control the movement of your figures as if they were on strings with skilled hand movements. This software offers you numerous ways to create creative and lively animation projects. Let's dive in and explore how the Puppet Tool works together.
Main insights
- The Puppet Tool is ideal for animating figures with an alpha channel.
- Place pins at strategic points to control the movement accurately.
- Use the various options in the Puppet Tool to make detailed adjustments.
- The automation features greatly simplify the animation process.
Step-by-Step Guide
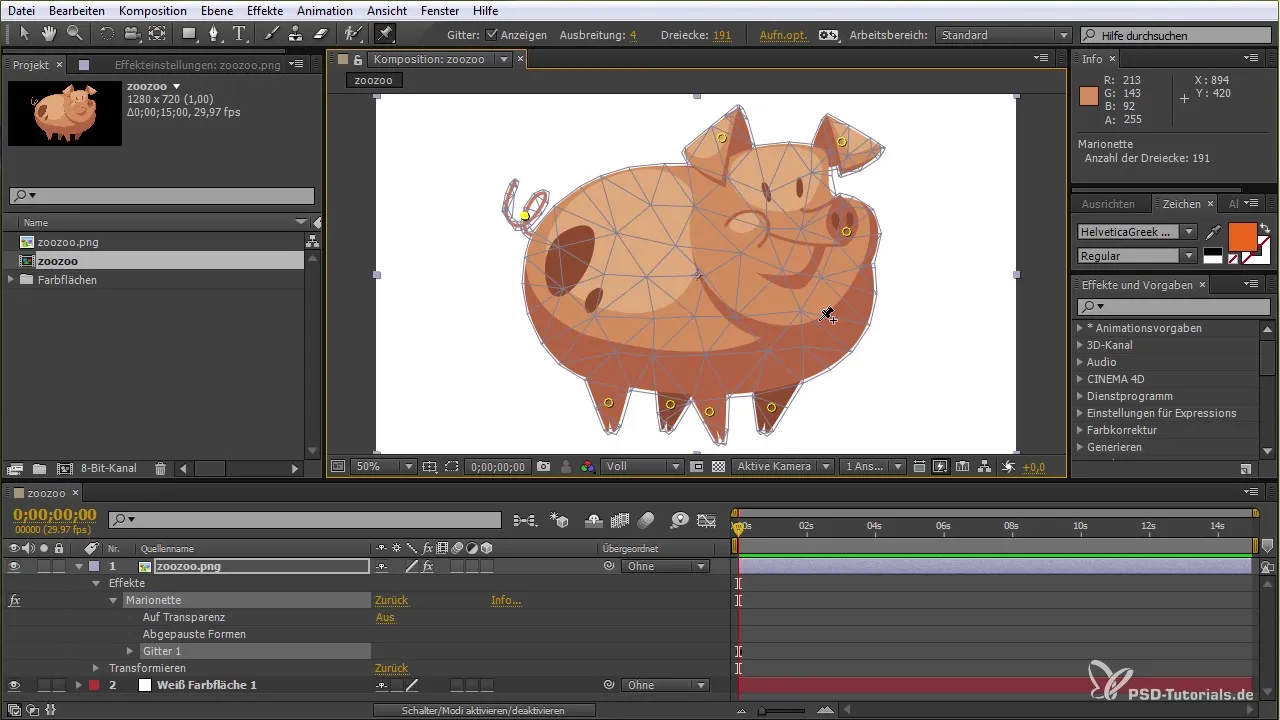
First, we load the graphic that you want to animate. In my example, I have prepared a piglet. Drag the file into your project and make sure it is on the alpha channel.

To use the Puppet Tool, you must first ensure that the selected layer is the piglet. At the top of the toolbar, you will find the pin icon. Click on it to select the Pin Tool. This will be the first step to bringing the piglet to life.

Now it's time to determine which areas of the piglet you want to move. In this case, you can animate the legs, ears, and tail. These movements need to be chosen strategically to ensure a natural animation. You will see a grid that helps you place the points.

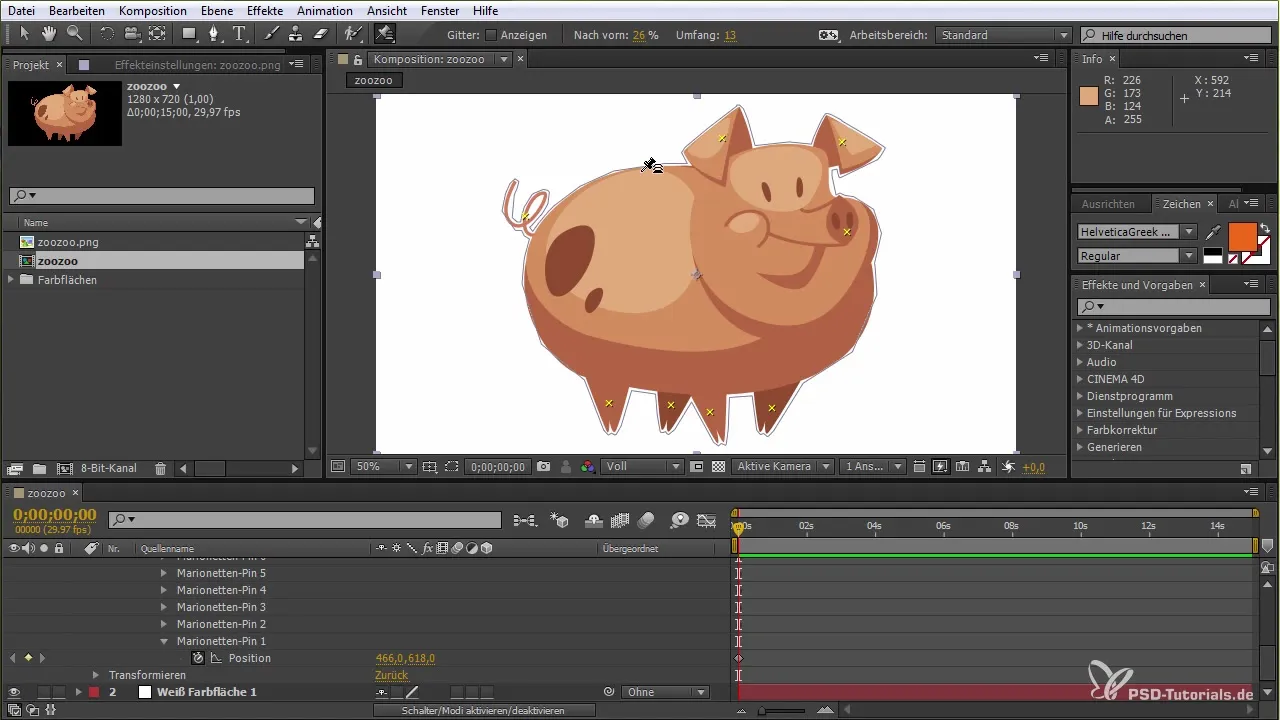
Select the important points by clicking on the corresponding spots in the grid. Be careful not to select any inner areas, as this could affect the animation. Then drag the points you've placed to test the basic movements.
You have the option to enable or disable the grid and adjust the extent of the grid lines. This is important to ensure that the animation is detailed and precise.
Another important aspect of the Puppet Tool is the available additional tools, such as the Puppet Overlap Tool. It allows you to control which areas may overlap and which areas may not. Set the grid line as it best suits your animation.

Additionally, there is the Puppet Stiffness Tool that helps you make certain areas less mobile. To achieve a more realistic animation, you can increase the stiffness of these areas so that they are not so flexible.
Now comes the exciting part of the animation. You can use the Puppet Pin Tool to animate all the points you set beforehand. Hold down the Ctrl or Command key to activate the time function. This allows you to create an animation in real-time as you move the points.
Make sure your movements in the timeline coincide with the changes in the animation. This allows you to create dynamic movement without having to set it in advance.
If you notice that the animation is not quite smooth, you can adjust the recording speed and smooth out the movements. This helps achieve a professional look.

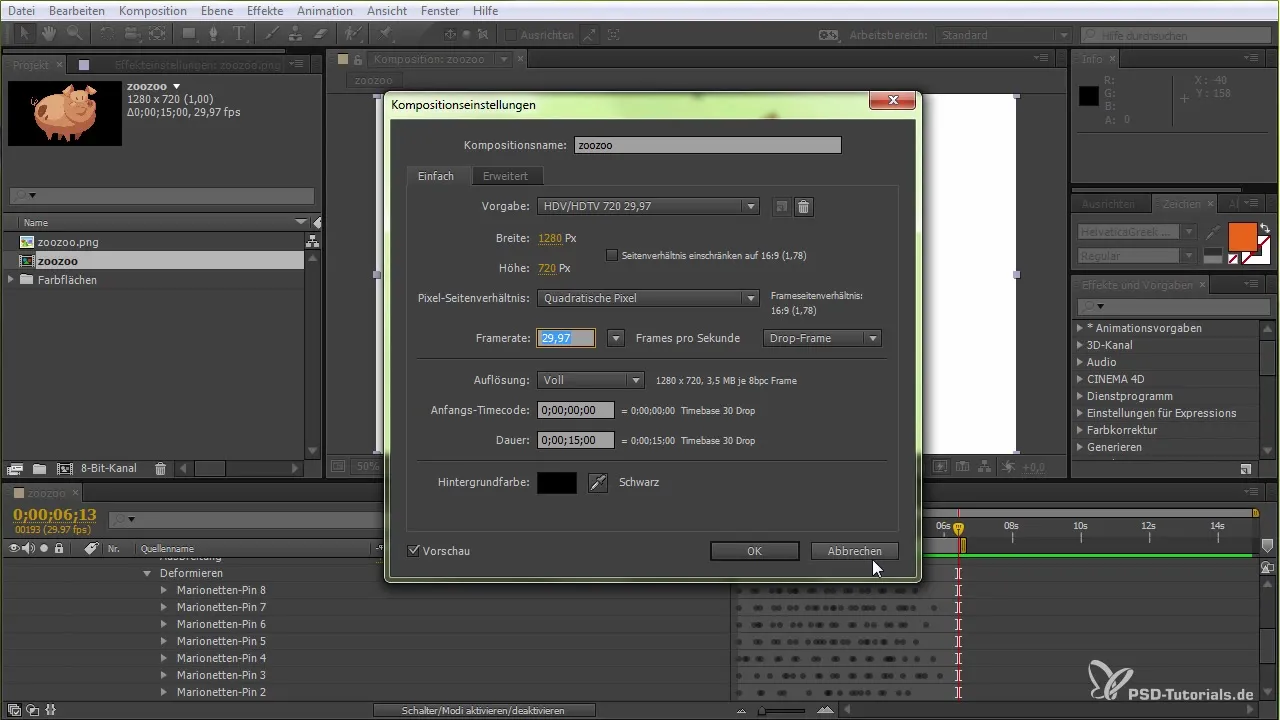
Finally, you can increase the frame rate in your composition settings to make the animations smoother and more detailed. This allows you to create both slow and fast movements and refine them further depending on the desired effect.

Summary – Puppet Tool in After Effects: A Beginner's Guide
The Puppet Tool in After Effects is a powerful tool for animating graphics. With simple tricks and the right handling, you can create lively animation projects. Experiment with different points, speeds, and settings to perfect your animations.
Frequently Asked Questions
What is the Puppet Tool in After Effects?The Puppet Tool allows for the animation of figures and graphics by placing pins at specific locations.
How do I place pins for animation?Select the layer, activate the Puppet Pin Tool, and click on the areas you want to move.
Can I adjust the speed of the animation?Yes, you can adjust the recording speed and the frame rate in the composition settings.
How can I smooth the movements?Use the smoothing function in the Puppet Tool settings to make the animation look more natural.
Can I also animate complex figures?Yes, the Puppet Tool is suitable for complex figures as long as they are in an alpha channel.


