
When you first launch After Effects, the interface quickly feels cluttered: windows, bars, and icons compete for your attention. However, the program is built flexibly, and you can move, dock, or hide every window according to your needs. This guide shows you how to customize the workspace and which basic tools you need for your first projects.
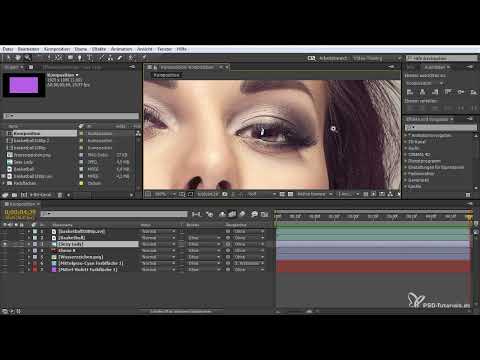
The video is only loaded from YouTube when you play it – data (including your IP address) is then transmitted to YouTube/Google. More in the privacy policy
Key Takeaways
- Every window in After Effects can be moved, docked, collapsed, or dragged onto a second monitor as a free-floating window.
- With workspaces (presets), you can return to a familiar arrangement with a single click.
- The appearance settings in the preferences change the brightness and colors of the interface.
- The toolbar at the top left contains selection, hand, zoom, and shape tools, which you can extend with additional options via a small triangle.
- Masks, text, brush, and clone stamp form the basis for design and retouching.
Step-by-Step Guide
The Basic Interface and the Composition Window
The starting point is the composition window, in which you see and edit your image. You can recognize its handle at the top left by a ribbed bar. Using this bar, you can undock, redock, collapse, or move the window.

The dividing lines between the areas can also be dragged. If you push them together, the composition window gains space while other panels shrink. This way, you put your focus on what you are currently working with.
Docking Windows and Creating Tabs
When you move a window, After Effects displays an indicator. Depending on where this indicator is located, the window is docked above, below, or to the side, nested as a tab in an existing panel, or placed over the entire interface. If you release the window in the center of the indicator, it replaces the existing arrangement. If you drag it to the edge, a new area is created. If you don't like an arrangement, simply drag the panel again until it fits.

Note that panels adapt to the available space with a slider. If you don't have enough space, you can click on areas and move them to enlarge or reduce them.

Using Workspaces and Presets
If you have lost track, you don't have to start over. Via the workspaces menu, you select predefined layouts such as "Animation". After selecting, After Effects restores the original windows to their default arrangement. You can also save your own arrangements so that you can recall them at any time later.

At the same time, you can add new panels. One example is the Tracker, which is displayed via the Window menu and can then be fitted into the existing interface. A panel such as the Brush can be detached completely and placed freely on the screen. If you drag a window onto a second monitor, your main screen remains free for the composition.

Customizing Appearance and Colors
You control the design of the interface via the preferences. In the "Edit" menu, open the preferences and select the item "Appearance" there. Here you can change label colors for layers, paths, or gradients. The changes become visible immediately, so you can see right away whether you like the new color scheme.

With the brightness slider, you determine whether the interface should appear lighter or darker. For getting started, the default setting is generally recommended, as it distorts the image perception the least.

The Selection Tool and the Hand Tool
The topmost tool on the left is the Selection tool. With it, you select and move layers and objects in the Composition panel. As soon as an object is selected, handles appear that you can use to enlarge, shrink, or rotate it. The changes also affect the parameters in the timeline. If you press the P key with a layer selected, all position parameters are displayed.

The Hand tool is used exclusively to move the visible portion of the image. If your composition is very large, you use the Hand tool to move to the corners or to specific frames without changing any settings.
Working with the Zoom tool
The magnifying glass enlarges and reduces the view. A left click zooms in, while holding down the Alt key and clicking again zooms back out. For targeted sections, you drag a frame with the left mouse button held down, for example to take a closer look at an eye or an eyelash.

The Camera and the Rotation tool
The Rotation tool rotates layers, and the parameters for this are available to you in the timeline. The Camera tool only works if you have created a camera beforehand. To do this, right-click in the layer overview, go to "New," and select "Camera." Then you activate the 3D switch for the layer you want to move. With the Camera tool, you can then move closer to the subject, move away from it, or shift the view sideways. With the C key, you switch between the camera tools. The layer itself remains unchanged in the process; only the camera is affected.

Moving anchor points with the Pan Behind tool
The Pan Behind tool changes the anchor point of a layer, that is, the reference point around which it rotates. By default, it is located in the center. If you drag the point to a different position, the next rotation takes place around this new point. This also works with 3D layers.
Creating shape layers with the Rectangle and Ellipse tools
Hold down the left mouse button on the tool in the toolbar to display more options. With the Rectangle tool, you drag out a rectangle and thereby create a shape layer. You change the fill color at the top of the panel, and you set the color and thickness via the stroke. If you would rather use the shape as a mask, you switch to mask mode. With the Shift key held down, you draw a perfect circle with the Ellipse tool.
The Polygon tool creates multi-sided shapes. With the mouse wheel, while holding down the mouse button, you change the number of corners. The Star tool works similarly and additionally allows you to adjust the length of the points.

Creating masks with the Pen tool
With the Pen tool, you place points to draw your own paths. In the example, you draw a shape around the eye by placing the points one after another. With the Alt key held down, you bend the cursor at a point and can thus form curves. The finished shape is applied to the layer as a mask. With the M key, you display the mask properties.

Masks can be added, subtracted, or intersected. You select the mode in the mask menu. You add additional anchor points with the V key by clicking on the mask edge. With the "Mask Feather" tool, you create a soft transition. This is suitable, for example, for crossfades, which you can additionally animate.

Writing text
You place the Horizontal Type tool at any position in the Composition panel. If you simply click into it, point text is created, which can be freely adjusted in size. If you instead drag out a selection frame while holding down the Ctrl key (referred to as Strg in the instructions), the text wraps automatically. For vertical writing, you select the corresponding tool in the toolbar.

Brush, Clone Stamp, and Eraser
With the Brush tool, you paint areas directly in the image. If you double-click on a layer, the layer view opens in full screen, so that areas outside the composition also become visible. Here you set the color, opacity, and size of the brush. The strokes are then transferred to the composition. The Eraser tool removes painted areas again.

The Clone Stamp is well suited for retouching, for example to remove a mole. You press the Alt key to set a source point, and then click on the spot you want to cover. These changes can also be carried over to moving images using keyframes.

Isolating with the Rotoscope Brush
The Rotoscope Brush isolates objects automatically. You roughly paint a line over the subject, such as a person, and After Effects analyzes the marked area. With videos, you don't have to repeat this for every single frame, as the program tracks the selection across the frames. For fine contours such as hair, the Refine Edge tool is available to you, which analyzes the edge and removes or adds small areas.


Coordinate Axes, Snapping, and the Puppet Tool
With the 3D function activated, you can adjust the coordinate axis. It then rotates with the layer or remains aligned to the world coordinates. With snapping, you align layers precisely, for example to edges or center lines.

The Puppet tool places a mesh over a layer. You set handle points, for example on the head, chin, and arms, and then move them. This allows characters to be animated without cutting them out individually.

Summary ??? Customizing the After Effects Interface: Getting Started for Beginners
You have seen that the After Effects interface can be largely designed to your liking. Windows can be docked, nested as tabs, or placed freely. Workspaces take you back to a familiar arrangement with one click. The toolbar with its submenus forms the foundation for selection, zoom, shapes, masks, text, and retouching. Once you master these basics, getting started with more complex projects becomes much easier.
FAQ
How do I reset the interface if everything is a mess?In the workspace menu, select a default preset such as "Animation" or "Standard", and After Effects will restore the arrangement.
Can I drag a window to a second monitor?Yes, you simply drag the panel past the edge of your main screen onto the other monitor.
How do I change the brightness of the interface?Open the Preferences under "Edit", select "Appearance", and adjust the brightness using the slider.
What is the Hand tool used for?The Hand tool only moves the visible section in the Composition window and does not change any objects.
How do I create a camera?Right-click in the layer overview, select "New" and then "Camera". After that, you must activate the 3D switch for the affected layer.
How do I add a point to a mask?Click on the mask edge with the Pen tool or press the V key while pointing at the desired spot.
How do I select a sample for the Clone Stamp?Hold down the Alt key and click on the spot that should serve as the source, and then paint over the area you want to retouch.


