
You built an animation that works, but doesn't quite convince you? That's exactly what After Effects offers a range of tools for, which go far beyond simply setting keyframes. This part of the series shows you how to find your way around nested compositions, gain new motion ideas with brainstorming, use the Graph Editor for fine adjustments, and control your preview so that you don't have to wait forever for the calculation.
The video is only loaded from YouTube when you play it – data (including your IP address) is then transmitted to YouTube/Google. More in the privacy policy
The guide follows the flow of the tutorial. So you can follow the steps one after another in your own project.
Key Takeaways
- Via the composition icon you get directly into nested sub-compositions, and with the arrow at the top left you return.
- Brainstorming automatically generates variants based on selected keyframes, from which you can choose the right one and develop it further.
- The Graph Editor allows you to make precise adjustments to curve shapes, interpolations, and Easy Ease settings.
- Markers, comments, and locks help you keep an overview, even in larger projects.
- Preview settings such as resolution, region of interest, and render preview save you a lot of waiting time.
- Proxies enable you to work smoothly with large footage such as 4K videos.
Step-by-Step Guide
Step 1: Navigating into Sub-Compositions
A composition can contain other compositions. To switch into such a sub-composition, you click on the composition icon of the relevant layer. The sub-composition then opens, and you can work directly on its settings. Every time you go deeper, another window opens. You can move or close these windows as soon as you no longer need them. To return to the original composition, you use the corresponding tab or arrow.

Step 2: Activating the 3D Draft
Next to the layers you will find an icon with which 3D layers can be edited. If you have already created a 3D animation from several layers, you can switch on the 3D draft via this icon. The display is simplified in the process. This is hardly visible in the preview but has a significant effect on performance, which is why you should gladly use this option for extensive 3D scenes.
Step 3: Setting Keyframes for Brainstorming
Before you use brainstorming, you need an animation from which variants can be derived. To do this, first create a new layer, for example via Ctrl or Command and Y. Select the layer, scale it with the S key, and activate Position with the P key. If you add the 3D function and set keyframes for position and depth at different points in time, a simple but usable movement results. With the N key you set the work area, and with the zero on the numeric keypad you play the preview.

Step 4: Generating and Selecting Brainstorming Variants
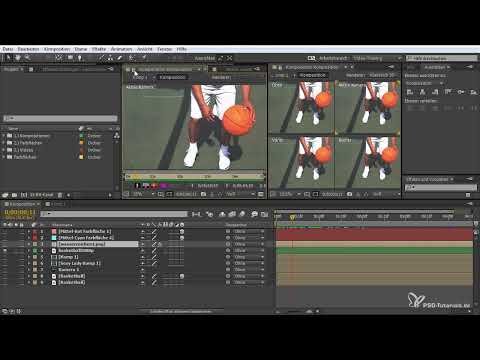
If you don't like the animation, you select all the keyframes you want to change and click the Brainstorming button. After Effects then shows you several variants, usually nine windows. Each variant has its own movement pattern. You can play, pause, or take a closer look at each preview using the zoom. By clicking on the alpha display, you can also see how the layer looks without a background.

Step 5: Refining Random Values and Continuing with Results
If a variant appeals to you, you can enlarge it using the zoom and adjust the randomness. Then you play it again. If you are satisfied with the result but still want to try out further ideas, you keep the top three tiles and start a new brainstorming. This way you work your way step by step to a solution. In the end, you can save the result as a new composition or apply it directly to the current composition.

Step 6: Opening and Maximizing the Graph Editor
The Graph Editor is suited for detailed adjustments of keyframe curves. To do this, select the desired keyframes, for example the two keyframes of your 3D movement, and click on the editor. A curve view with additional values then appears. So that you can see everything well, you maximize the window via the button at the top. The display becomes significantly larger and clearer as a result.

Step 7: Using Snapping and Zoom in the Editor
With the eye icon, you show or hide individual values. You can also activate snapping so that your changes automatically align to certain points. The magnifying glass controls whether the zoom range is automatically adjusted to the selected keyframes. If it is deactivated, you can zoom in and out freely with the mouse wheel. With the view buttons, you can display either the entire curve or just the section around the selected keyframes.
Step 8: Separating Axes and Setting Easy Ease
If a movement should only play out on the X or Y axis, you can split the position values into individual axes. To do this, select the keyframes and choose the desired separation. Afterwards, you can change the interpolation of a keyframe. Clicking the Easy Ease option makes the movement start more slowly at the beginning and end more smoothly towards the end. You can further adjust the curve using its handles, for example with a curved line or a stop.

Step 9: Setting Markers and Adding Comments
For better orientation in the timeline, you can set markers. To do this, press the asterisk key on the numeric keypad, which makes a marker appear at the current position. While holding the Shift key, the timeline snaps to this marker. Double-clicking the marker opens a window where you can enter a comment. It is displayed from this point onward, which is well suited for notes or short instructions for your project.

Step 10: Locking Layers and Managing Composition Windows
To protect a layer from accidental changes, activate the padlock in the layer list. The layer then remains unchanged, even when you switch to other scenes. You can also open multiple composition windows side by side so that you keep an eye on different scenes at the same time. This makes it easier for you to check changes in a sub-composition directly in the main composition.

Step 11: Showing the Grid, Title Safe Area and Guides
Via the View menu, you activate the grid, the title safe area and the ruler. The title safe area shows you where important content should be placed so that it is visible on every screen display. With the ruler, you drag guides to the desired positions and thus work precisely. When you no longer need the aids, you hide them again with the key combination Ctrl or Command and R.

Step 12: Hiding and Showing Masks Again
If you draw a mask with the tool, its anchor points can get in the way while you work. Select the layer or the mask and press the M key to hide the mask. With the same key, you show it again. Especially with many layers in the background, this helps you keep an overview. If you no longer need the mask, you can simply delete it.

Step 13: Using the Screenshot Function
After Effects gives you the option to save snapshots of your current state. Once you have set the scene the way you want to capture it, click the screenshot button. A sound confirms the capture. Afterwards, you can display the snapshot again at any time and compare it with the current state. This is particularly helpful when you are trying out effects and want to know what the image looked like before.

Step 14: Setting the Preview Resolution and Region of Interest
When a scene contains many effects, the preview often takes a long time. You can help yourself here with the resolution in the preview window. At half, third or quarter resolution, After Effects renders the individual frames much faster. On screen, you can hardly see a difference when zoomed out. If you only want to check a specific section, you set the region of interest and thus limit the calculation to the desired area. You can deactivate the selection again at any time.

Step 15: Controlling the Render Preview
You open the render preview via the window at the top or with Ctrl or Command and 3. There you specify whether the preview plays once, repeatedly, or in ping-pong mode. In ping-pong mode, the animation runs forwards and backwards. You can also disable the sound, jump to the beginning or end, and skip individual frames. With the Shift key held down and the zero on the numeric keypad, After Effects applies the preview settings and quickly shows you the scene.

Step 16: Using Proxies for Large Footage
If you work with 4K footage, the preview quickly becomes sluggish. Here you can help yourself with a proxy, that is, a smaller version of the same file. You create it beforehand at a lower resolution, but keep the same proportions. Then, in the project, you right-click to select the stand-in and replace the original file with the smaller one. This lets you work more smoothly before you go back to the original for the final rendering.

Summary ??? After Effects: Brainstorming and Graph Editor Simply Explained
You have seen how to navigate nested compositions, develop new motion variations with Brainstorming, and precisely adjust curves and Easy Ease settings with the Graph Editor. Markers, comments, and locks keep things organized, while resolution, region of interest, and render preview save you waiting time. With proxies, you stay flexible even with large footage. If you try out these tools one after another in your own project, you will quickly gain confidence in working with After Effects.
FAQ
How do I get back from a sub-composition to the main composition?You click on the original composition in the tab or arrow above the timeline panel, and the panel shows your main scene again.
What happens if I use Brainstorming several times in a row?The top three variations are kept, and with each new run you can approach your desired result step by step.
Why should I enable the 3D draft?The 3D draft simplifies the display of complex 3D layers and thus relieves your computer, especially in extensive scenes.
What is the title-safe area for?It shows you the area in which important content should be placed so that it remains visible on all screens and in television productions.
How do I briefly hide a mask without deleting it?You select the mask and press the M key. Pressing it again makes it visible again.
Can I limit the preview area to a specific section?Yes, with the region of interest you specify which section should be rendered, thereby saving time and processing power.
What does a lower preview resolution do?At half, third, or quarter resolution, the frames are calculated faster. The final output remains unaffected.
Why do I use a proxy?A proxy is a smaller version of your footage and allows you to work smoothly with large files such as 4K videos.


