
Imagine a glowing streak moving through your 3D space, moving on its own and looking as if someone had drawn it in the air with a sparkler. You will build exactly this effect in this tutorial, and you don't need any additional extensions for it. Everything you need is already in After Effects: a particle system, a null object, and a few expressions.
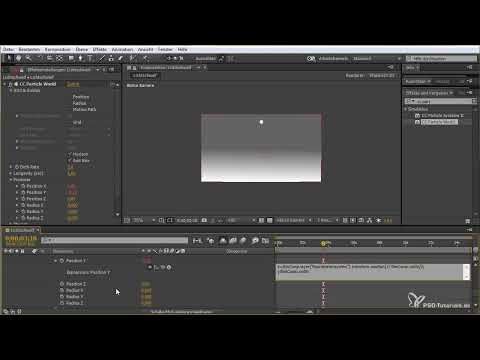
The video is only loaded from YouTube when you play it – data (including your IP address) is then transmitted to YouTube/Google. More in the privacy policy
Introduction
The light trail is a popular design element for logos, intros, and motion graphics. You can find it in many commercials and title sequences. Many beginners believe expensive plug-ins are necessary for it. That's not true. With the built-in particle effect CC Particle World and a few simple expressions, you can achieve a convincing result.
The guide takes you from an empty composition to a fully animated trail. You create a background, set up a 3D scene, link the particle to a null object, and fine-tune the look at the end. The steps build on each other, so you should work through them in the given order.
Key Takeaways
- The light trail is created with the built-in effect CC Particle World and requires no third-party plug-ins.
- A null object serves as an invisible anchor that you can move freely in 3D space.
- Particles cannot be animated directly via their position. With expressions, you link the coordinates of the particle system to the null object.
- Using the parameters Birth Rate, Death Size, and Particle Type, you control the density, length, and shape of the trail.
- With the
wiggle()expression and glow effects, the movement looks lively and luminous.
Step-by-Step Guide
Step 1: Create the Project and Composition
Start After Effects and create an empty project via File > New > New Project. Then create a new composition with New Composition and name it Lichtschweif. The default values work well for this tutorial. If you need a different resolution or duration, you can adjust them here at any time. The advantage of this approach is that you determine all the settings yourself before you start designing.

Step 2: Create a Background with a Gradient
So that the trail stands out better, you need a background. To do this, create a new solid via Layer > New > Solid and name it BG. Then apply a gradient to it, which you can find in the Effects browser. Choose a color that roughly corresponds to a dark gray. This creates a soft horizon against which the light will glow nicely later. With the gradient switch, you can hide the layer if needed and compare the effect.

Step 3: Add a White Solid and a Null Object
Now you need two more layers. First, create a white solid via Layer > New > Solid. This will be used as the particle later. Then add a null object via Layer > New > Null Object. A null object is invisible and only has coordinates. Such objects are often used to control movements that are to be linked to other layers. That is exactly what makes it so useful for your light trail.

Step 4: Enable 3D Layers and Set Up the Camera
Enable the 3D switch for all three layers. Then go to Layer > New > Camera and confirm the default settings. The camera is necessary so that you can later rotate the trail in space and view it from different angles. Without enabled 3D layers, this perspective does not work.

Step 5: Rename the Null Object
Rename the null object to Koordinatensystem. The name is important because you will refer to it later in the expressions. A unique name also prevents confusion as the composition grows with more layers.
Step 6: Apply the CC Particle World Particle System
Drag the effect CC Particle World from the Effects browser onto the white solid. You can already see particles spraying through the scene. In the Effect Controls panel, under Grid & Guides, disable the grid so that only the particle system remains visible. Then open the groups Producer and Physics. Set the radii to zero there, and set all other values that cause the dispersion to zero as well. If you now zoom into the composition, you will see only a single small particle. This is exactly the starting point you need for further work.

Step 7: Set Up Particle Type and Producer
In the effect, switch to the Particle Type parameter and change it from Line to Lens Convex. This setting gives the particles a glowing, round shape that will later result in a soft trail. Then open the Producer again, because this is where you set the position of the particle system. The position is the key to the link with the null object, which follows in the next step.

Step 8: Set Expressions for X, Y, and Z
Now you link the position of the particle system to the null object. To do this, activate the stopwatch on the Position parameter under Producer with Alt-click so that the input field for expressions appears. Then drag the pickwhip, i.e. the spiral icon, onto the position of the null object. This automatically creates a link.
In the expression field, you now write one line for each axis. The number in the square brackets indicates the axis: 0 stands for X, 1 for Y, and 2 for Z. For X, for example, use an expression that takes the position of the layer Koordinatensystem and relates it to the center of the composition, something like thisComp.layer("Koordinatensystem").transform.position[0] - thisComp.width/2. For Y and Z, you copy this line and change only the axis number and the matching composition value. Pay attention to upper and lower case in the spelling, because After Effects distinguishes between them. As soon as you release the expression, the particle moves along with the null object.


To test it, you can move the null object in the layer window using the anchor. The particle follows this movement, and you can freely design the animation in 3D space.

Step 9: Bring Movement to Life with wiggle
So that the trail doesn't look rigid, you add a random oscillation to the position. To do this, open the position in the Producer and append the wiggle command to the existing expression. An example is wiggle(2,100). The first number determines the frequency, the second the strength of the oscillation. If you want the trail to swing out more strongly, you can increase the second number to 200 or 400.

Step 10: Optimize Particle Shape and Density
In the Particle section, you lower the Death Size parameter somewhat. This makes the last particles smaller, and the line looks cleaner. Then increase the Birth Rate, i.e. the rate at which particles are born. A value of around 90 already produces a dense streak of light. You can adjust the value: Lower values go easier on your computer but make the trail somewhat grainier. The higher you go, the more even the line becomes.

Step 11: Add Glow, Color, and Camera Movement
In the last step, you refine the look. Add the Glow effect (Glühen) via the Effects browser and drag it onto the trail's layer. With a warm color, for example an orange tone, the light looks more alive. Adjust the threshold, the radius, and the intensity until the glow looks pleasing.
In the particle system, under Transfer Mode or the settings for overlay, change the mode to Add (Addieren). As soon as the trail crosses itself, the brightness values are added together, which produces a particularly strong effect. After that, you can rotate the camera and change the viewing angle with the camera rotation tool. With the F9 key, you set keyframes with smooth easing so that the camera movement looks elegant.


Summary – Creating a Light Trail in After Effects Without Plug-ins
You have created a full-fledged 3D light trail that works exclusively with After Effects' built-in tools. You set up a composition and a background, used a null object as a control point, and configured the CC Particle World particle system. Through expressions, you linked the position to the null object, created movement with wiggle(), and refined the look with Glow and Add. The trail can now be built into your scene anywhere, orbited with the camera, or guided past any points you like. Try out the parameters, because every setting noticeably changes the character of the effect.
FAQ
Why can't the particles be animated directly via the position?The particle system has no handle for X, Y and Z in 3D space, so you link the coordinates to a null object using expressions.
What is a null object and why do I need it?A null object is an invisible layer that only has coordinates. It is ideal for controlling movements that are meant to be transferred to other layers.
Can I also use the light trail without the wiggle expression?Yes, you can also animate the null object by hand with keyframes. The wiggle command merely provides a randomly appearing, lively movement.
Which setting changes the length of the trail?The parameters Death Size and Birth Rate influence length and density. A higher Birth Rate produces a more even, denser trail.
Why does the computer slow down with a high Birth Rate?More particles require more processing power. Lower the Birth Rate if the preview stutters, and increase it again as soon as you want to render the final result.


