
A trailer feels fluid when many small decisions fit together: the timing, the curves, and the layering of individual movements. This guide walks you through the steps for reviewing a fully animated project in After Effects, bringing it to the right length, and going over the most important techniques once more. The timestamps refer to the video tutorial, whose values are counted in seconds and which is 423 seconds long in total.
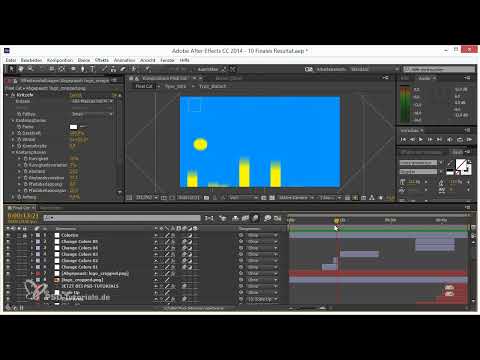
The video is only loaded from YouTube when you play it – data (including your IP address) is then transmitted to YouTube/Google. More in the privacy policy
Key Takeaways
- A properly set work area and trimming the composition ensure that your video has exactly the desired length.
- Easy Ease alone is not enough. Anticipation, Overshoot, and Follow Through bring movements to life.
- The Bouncing Ball shows how shape, Squash & Stretch, and movement convey weight and material, even without textures.
- Overlapping animations with null objects create complex movements from simple building blocks.
- Text animators with twinning, offset, and momentum look more exciting and natural.
Step-by-Step Guide
Step 1: Check the Result as a Preview
Before you fine-tune details, play your animation through completely once. Pay attention to the green render bar above the timeline. It shows you that all frames have already been calculated, so the preview plays back smoothly. This way you can quickly tell whether the overall impression is right before you get lost in individual keyframes.

Step 2: Set the Work Area and Trim the Composition
To make sure your video has exactly the right length, set the work area at the point where the animation ends. To do this, drag the ends of the work area bar to the last frame. Then right-click on the marked area and choose the option "Trim Comp to Work Area". The composition is now cut to your length, and unnecessary frames at the beginning or end disappear from the project.

Step 3: Apply Curves, Easing, and the Disney Rules
Especially for movements that you set as Easy Ease with F9, it is worth taking a look at the Graph Editor. In every future project, think of Ease In and Ease Out and go into the curves deliberately instead of just accepting default values. Also build in an Anticipation, that is, a small counter-movement before the actual action, and set an Overshoot, where an element briefly shoots past its target. The text popping up in the trailer impressively shows how much more fluid a movement looks when you stick to these time-tested rules from classic animated film.
Step 4: Design Stroke Animation and Revealed Areas
The project begins with a stroke animation in which elements gradually become visible. You can reveal areas in two ways: via a thread in combination with the Stroke effect, or via a brush with animated painting. With a script, the timing of the individual strokes can be precisely coordinated. This technique is an interesting exercise because you work with rhythm, order, and spacing at the same time.
Step 5: Rebuild the Bouncing Ball as a Basic Exercise
The Bouncing Ball is one of the best-known animation exercises of all, and you should definitely try it if you haven't built it yet. Create at least two or three variations with different balls, such as a table tennis ball, a basketball, a medicine ball, or a balloon. Each ball has its own weight and its own elasticity, and these are exactly the differences you should make visible in the movement. On YouTube you will find numerous reference videos that show you what such movements look like.
Step 6: Use Shape, Squash & Stretch, and Form of Movement
For your exercises, it is best to do without textures and work with simple color fields, for example yellow on blue or black on white. A silhouette is enough, because then you don't have to worry about rotation or details. The statement of your ball arises solely through its shape and its movement. Squash & Stretch shows the viewer how heavy, elastic, or sluggish the ball is. A solid ball is hardly deformed on impact, while a soft ball compresses noticeably. This very challenge makes the exercise so valuable.
Step 7: Build Overlapping Animations with Null Objects
An overlapping animation arises when you combine two movements, for example a ball that moves and a null object that additionally rotates. The result is a movement that looks much more complex than it actually is. This technique is very practical when you want to vary movements quickly without setting every keyframe anew. Proceed step by step and check after each layer how the interplay changes.

Step 8: Using Text Animators with Twinning
Text animators work excellently together with the Disney rules if you know how to use them. An important term is twinning. This means that not all elements move at exactly the same time. For example, when balls enter the frame, start the second ball one frame later. This small offset looks much more interesting than a simultaneous movement. Individual words can also be made to appear at different times using text animators. Many such small details ultimately make the difference between a stiff and a lively animation.
Step 9: Designing Momentum and Follow Through
Momentum describes the impulse of a movement that continues to act for a short distance after stopping. This principle is part of follow through. If you are animating text, for example, let it swing slightly after reaching its position. The viewer then feels that the movement continues and waits eagerly to see what happens next. This anticipation is a typical characteristic of good trailers.
Step 10: Using Icon Fonts and Custom SVG Files
An experimental approach is to combine text animators with icon fonts. Equally exciting is the option of using your own SVG files. Vector files can be addressed in After Effects via the text engine and animated just like text. This is especially practical if you want to incorporate your own symbols or logos, because they stay sharp even at high magnification.
Step 11: Completing the Project and Reviewing the Result
Finally, you play through the complete video once more. You will notice that the techniques from the previous steps are familiar, but in combination they create a coherent overall picture. Keep in mind that this project is an example and not a template for serial production. The purpose is to develop a feeling for timing, spacing, and animation principles.
Summary – After Effects Animation Step by Step: Completing the Trailer Project
You have seen how a trailer project comes together, from the preview through trimming to fine-tuning curves and timing. The bouncing ball forms the ideal foundation here, because it shows you how much expression is already contained in shape and movement. With anticipation, overshoot, twinning, momentum, and overlapping animations, you achieve movements that look fluid and lively. Feel free to recreate the project or develop your own video in the same reduced style. This gives you experience that will help you with every further project.
FAQ
Do I have to recreate the video exactly?No, a similar implementation in the same reduced style is perfectly sufficient, and you often even learn more that way.
Why should I leave out textures on the bouncing ball?Without textures, you focus entirely on shape, movement, and timing, and that is exactly where the most important learning effects arise.
What is the difference between twinning and offset?With twinning, similar elements start slightly offset in time, so that the movement does not look mechanical.
How does a null object help me with overlapping animations?A null object can perform its own movement that is transferred to other layers, so that you can assemble complex sequences from simple parts.
Why are the Disney rules still important today?They describe fundamental principles of movement that work independently of technology and software and make animations believable.


