
Imagine you have a scene with several elements, and they all move in exactly the same way. At first glance this looks tidy, but over time it feels stiff and artificial. This exact problem is called twinning, and it is one of the typical mistakes in animation. In this tutorial, I'll show you how to recognize twinning and how to avoid it with simple means.
The video is only loaded from YouTube when you play it – data (including your IP address) is then transmitted to YouTube/Google. More in the privacy policy
What exactly is twinning?
Twinning refers to the twin-like behavior of several objects that move identically, frame for frame. This happens easily, for example when you parent elements to the same control object or let several objects start at the same time when fading in. The movement then looks mechanical, and the viewer's eye has no anchor point to follow.
The remedy is simple: let elements start, stop, or move with a slight time offset. Even an offset of two to four frames is often enough to make the animation look more lively and thought-out.
Key Takeaways
Key Takeaways
- Twinning occurs when several objects are animated in exactly the same way.
- An offset of two to four frames is usually enough to noticeably improve the effect.
- With text animators using range selectors, you can move individual parts of a text independently of one another.
- Speed curves in the Graph Editor determine whether movements flow smoothly into one another.
- A small counter-movement effect, such as a slightly delayed opposite motion, creates depth and parallax.
Step-by-step guide
Step 1: Recognizing the problem in the example
In this example, I'm working with a trailer in which a slider, a book, and a bouncing ball are parented to a common null object. As a result, all elements follow the same movement. This is especially noticeable with the ball and the slider because they move in sync. Take a close look at your scene: if several elements move identically, you have already found the starting point for twinning.

Step 2: Copying keyframes and moving the slider
To move the slider to the next slide, you copy the keyframes you already have. Select them, copy them with Ctrl+C, and paste them at the new position with Ctrl+V. Then move the keyframes to the desired point in time. Make sure the book stays connected to the slider, since it is parented as well.

Step 3: Adjusting the values with the Align field
Deactivate the Transform field and activate the Align field instead. Then drag the upper keyframe to the height of the first keyframe. This way you change the slider's values without destroying the structure of the animation. This is a clean method for aligning keyframes in a targeted way.
Step 4: Deliberately fading in the ball with an offset
The same principle applies to the ball. Don't fade it in on the same frame as the slider, but slightly later. It's important that the ball is not yet visible while the slider is already moving. This creates a sequence instead of everything appearing at once. Even if the effect seems subtle at first, this very offset determines whether the scene looks mechanical or natural.
Step 5: Creating a new text animator for partial movements
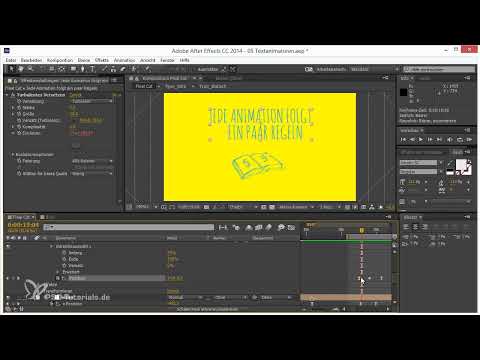
With the existing text animators, you can move parts of a text without changing the rest. It's important that you don't select an existing animator, but instead create a new one via Animate and choose the Position property. This gives you a separate animator that is responsible only for the lower text area.

Step 6: Setting the range selector to words
In the range selector, open the Advanced section and change the unit to Words. Now only individual words are taken into account. Set the start of the range so that it begins exactly where the text should be faded out. With the slider, you can also set the offset. If it's at 50 percent, you only animate the lower part of the text, which is very helpful in practice.

Step 7: Designing the Movement of the Text
At the point where the text moves out, set the keyframes for the position. Start with a small value and increase it gradually. In my example, the end value is about 144 pixels. Make sure not to make the animation too timid, because otherwise the viewer will hardly notice the movement. A preview with the RAM Preview helps you quickly assess the effect. It is better to animate a bit more extremely and then dial it back than to stay too cautious.
Step 8: Adjusting Speed Curves in the Graph Editor
The real fine-tuning happens in the Graph Editor. Here you can edit the speed curves of individual keyframes. Double-clicking a keyframe opens the settings. Set the outgoing speed to zero if an element is supposed to come to a calm stop. You can determine the tangents yourself. Make sure the curves flow into each other, then a smooth movement results. If curves collide harshly, the animation looks jerky. With Easy Ease via F9 you get a good starting point, which you then fine-tune.

Step 9: Letting the Ball Stop Later
The ball also gets a time offset by coming to a stop later than the slider. To do this, set the first keyframe slightly offset and let the ball roll out with a gentle easing. You can even animate it slightly in the opposite direction to the slider. A small exaggeration in the movement makes the effect clear without seeming intrusive.

Step 10: Reinserting the Ball and Designing the Disappearance
If the ball is supposed to reappear later, move its keyframe to the appropriate spot and place it a few frames later. You can make the ball disappear with a plop effect. Make sure that the timing of the disappearance is precisely coordinated, so that the plop only appears once the ball has completed its movement.

Step 11: Moving the Slider Back in the Opposite Direction
To make the scene feel complete, you move the slider back at the end. To do this, copy the keyframes again, switch in the Graph Editor between value graph and transformation, and set the values with the align field. You bring the upper keyframe to the height of the previous one. Afterwards, you check the result in the preview and adjust the timing if needed.

Step 12: Following the Rule "Never Two Things at the Same Time"
The most important rule of thumb is: when several objects appear on the screen, never animate two of them at the same time. Instead, offset them by two to four frames. This applies to fade-ins just as much as to movements. With this habit, you reliably avoid twinning without having to completely rebuild every scene.

Summary – Avoiding Twinning: Bringing Animations to Life with Offsets
Twinning occurs when objects are animated in exactly the same way. You avoid it by fading in, moving, and stopping elements with a time offset. Text animators with range selectors help you control parts of a text independently. With clean speed curves in the Graph Editor, a smooth movement results that looks more complex and thoughtful. Therefore, plan offsets deliberately and check your scenes regularly in the preview.
FAQ
What is twinning in animation?Twinning refers to the phenomenon of several objects moving in exactly the same way, down to the exact frame.
How many frames of offset should I plan for?An offset of two to four frames is enough in most cases to avoid the effect.
Why does an animation without offset look artificial?Simultaneous movements look mechanical because the eye has no starting point to follow.
Can I move parts of a text independently of each other?Yes, with a new text animator and a range selector by words, you can animate only certain parts of the text.
What do speed curves do?They determine how a movement is accelerated and slowed down. Suitable curves ensure a smooth transition.
Which keyboard shortcut helps with quickly copying keyframes?With Ctrl+C you copy keyframes and with Ctrl+V you paste them again at a new position.
When should I set the offset especially deliberately?Whenever several objects appear at the same time or move together, for example with fade-ins or a shared control object.


