
Your animation has its basic structure, and all the ideas are in. What it still lacks is the finishing touch: the little details that turn a solid animation into a polished result. That is exactly what this final part of the tutorial is about. You bring the transition back to the original blue, animate a circle via scale, activate motion blur in the right places, fine-tune the rhythm of the texts, and finally showcase a hand-drawn logo with a scribble effect. At the end, we trim the sound and render the project.
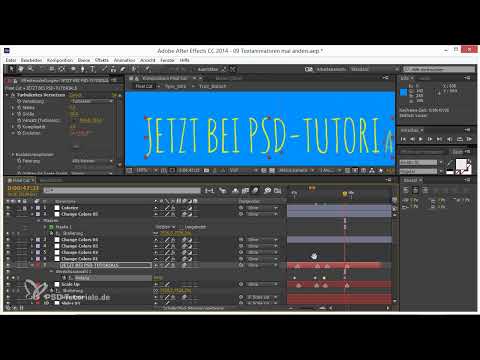
The video is only loaded from YouTube when you play it – data (including your IP address) is then transmitted to YouTube/Google. More in the privacy policy
The workflow is built in Adobe After Effects. The keyboard shortcuts are given for macOS (Command key) and Windows (Ctrl key). If you work through the individual steps one after another, you keep an overview at all times.
Key Takeaways
Finishing touches save time later if you do them step by step. Set keyframes cleanly before you add new effects, and check your results regularly with the preview.
Motion blur is most effective with fast movements. Activate it for icons, texts, bouncing balls, and color-change layers, but not across the board for everything.
The global motion blur switch can stay turned off while you work. It is still taken into account when rendering, as long as the layers have their own switch activated.
Interpolation and easing determine how natural a movement looks. A Ctrl-click on the keyframes quickly leads to smoother transitions.
Step-by-Step Guide
Step 1: Duplicate the last color layer and remove masks
Start with the transition back to the original blue. To do this, duplicate the last "Change Colors" layer so that you keep the existing coloring as a template. Select the copy and open its masks. Then select all masks and remove them. Make sure you delete the keyframes first and then the masks themselves. Only when both are gone is the layer properly prepared.

Step 2: Reset the scale and fit to the composition
The scale of the layer has shifted through experimenting, and the values are hardly traceable anymore. Reset it by selecting the layer and pressing the key combination Command+Alt+F (macOS) or Ctrl+Alt+F (Windows). Alternatively, right-click the layer and choose Transform and then Fit to Comp. Afterwards, the element sits exactly in the composition again, and you have your original state back.

Step 3: Draw a perfect circle in the center
Select the Ellipse tool and drag out the circle from the center of the composition. Hold down the Ctrl key (Windows) or the Command key (macOS) so that drawing starts from the center, and additionally the Shift key to get an exact circle. The shape should be generous and lie directly in the center so that it later works like a transition.

Step 4: Animate the scale instead of the mask
A mask can be animated, but scale is much more flexible. You can adjust the size at any time later without having to edit the shape itself again. To do this, open the Scale property of the color layer with the keyframes already set. Select the two keyframes and copy them with Command+C or Ctrl+C. Then select the Scale property of the new layer and paste the keyframes with Command+V or Ctrl+V. This way you take over the timing without extra effort.

Step 5: Adjust the curve and set the end value to zero
The copied curve doesn't quite fit your idea yet. You want it to run slightly shifted and to return to a value close to zero at the end. To do this, drag the two scale values down in the Graph Editor until they approach the zero point. Watch the result in the preview as you do so. If the circle is supposed to disappear completely at the end, check the last keyframe and set it exactly to zero. It is enough to let the animation end a bit earlier, since the effect works that way too.

Step 6: Enable motion blur and sharpness for the right layers
Now motion blur comes into play. It gives fast movements more body and makes them look more organic. Enable the motion blur switch for all layers that move quickly. In this project, these mainly include the icons, the text layers such as "Tipps und Tricks", the Bouncing Balls, and the color change layers. Set the checkmark deliberately. Calm layers hardly benefit from it, and unnecessary blur can even make the image look more restless.
Step 7: Check each layer individually
Afterwards, go through all the layers once more. Play the animation slowly and watch for movements you may have overlooked. With the Bouncing Balls, it is especially important to check every single ball, because it is easy to forget one of them. The text layers should also be checked individually. It is a small bit of fine-tuning, but that is exactly what lifts the animation to a professional level. At the end, check the color change layers once more, because that is where the bars often sweep quickly across the screen.

Step 8: Use the global switch and prepare the render queue
At the top of the timeline, you will find a global switch for motion blur. It can be turned off while you work so that the preview stays smooth. When rendering, however, it is activated automatically, provided the individual layers have their own switch set. Layers without the switch remain without blur. To add the project to the render queue, press Command+Alt+M or Ctrl+Alt+M. In the Media Encoder, you check in the settings whether motion blur is enabled. In the optimal settings, it is switched on by default.

Step 9: Adjust the rhythm of the text
The "PSD Tutorials" lettering should appear in the same rhythm as the previous text. To do this, copy the animation of the previous text and transfer it to the new layer. Then shift the keyframes so that the entrance matches exactly in time. Make sure the movement does not look stiff. A quick look at the Graph Editor shows you whether the curve is smooth or whether you still need to readjust.

Step 10: Set interpolation and check keyframes
After the transfer, the keyframes still run too linearly. Therefore, set the interpolation again. A Control-click (Ctrl-click or right-click on the keyframe) opens the context menu, through which you set the interpolation to a smoother variant. Then play the animation again. The text should now accelerate and decelerate evenly. It is worth checking each keyframe individually, because small irregularities quickly arise with multiple letters.

Step 11: Fine-tune the letter animation for "PSD Tutorials"
The text is faded in letter by letter. For this, you need to set the values for the range precisely. Start with the P: it should be the only character visible at first. The S and the D follow, until finally the entire lettering appears at 100 percent. Check every intermediate step in the preview so that the letters appear one after another and do not come too quickly or too slowly. The end value of 100 percent ensures that the complete name remains at the end.

Step 12: Define the work area and check the animation
Define the work area by pressing the keys B and N at the beginning and the end of the section. This lets you play exactly the part you are currently working on. Then look at the start values. The value at the beginning should be at zero so that the text starts cleanly. A quick look at the values in the Graph Editor helps you spot unwanted deviations.

Step 13: Insert the logo and trace it with the Trace effect
The PSD Tutorials logo should also appear above the text. You will find the file in the project folder under Illustrationen; it is called "Logo cropt". Drag it into the composition, make it a bit smaller, and place it under the lettering. Instead of creating the drawing by hand, you use the Trace effect. Apply it to a new layer and select the current frame. This time, however, you set the alpha channel instead of luminance so that you get a clean outline of the butterfly. The traced layer thus takes on the outlines, which are then animated.

Step 14: Apply the Scribble Effect and Animate the Masks
Now apply the Scribble effect to the traced layer. You can find it under Effect, then Generate, and Scribble. The effect makes the lines look hand-drawn. To make the drawing appear gradually, you animate the end of the mask. To do this, set a keyframe at the beginning and one at the end of the text fade-in. Check the result before you continue. The lines should visibly build up piece by piece.

Step 15: Fine-Tune the Parameters of the Scribble Effect
The first impression is often still too fine and too orderly. Therefore, adjust the parameters. Increase the Spacing Variation so that more gaps appear and the lines look looser. The Stroke Width may increase a little so that the strokes become bolder. You can also raise the Curviness and the Wiggle Variation (Belappungsvariation) somewhat so that the result looks rougher and more handmade. Finally, reduce the Stroke Overlap (Fahrtüberlappung) a little so that the lines do not run into each other too chaotically. Test each change with a short preview, because even small shifts noticeably change the look.
Step 16: Correct the Timing and Adjust the Ramp
The result should be finished a bit earlier. To do this, move the mask keyframes forward and adjust the ramp so that the transition to the next section stays smooth. Afterwards, extend the section at "PSD Tutorials" so that the logo remains visible for a few more seconds after the animation. A quick look at the timeline shows you whether all layers fit together cleanly.

Step 17: Cut the Sound and Use the Waveform
For the sound, a simple cut at the end is enough. In the timeline area, press the L key to display the waveform of the audio layer. With Shift+L you can additionally display the audio level. Then drag the layer back to the point where the animation ends. Make sure the sound does not end abruptly. A gentle fade-out feels much more pleasant. Reverb or further audio editing do not belong in After Effects; a dedicated audio program is better suited for that.

Step 18: The Final Preview, Saving and Rendering
Finally, do one last RAM preview. Play the complete animation and watch for stuttering, incorrect timing, and missing blur. Then save the project via File and then Save. Afterwards, add the composition via the render queue and start the export. With that, your first animation project is completely finished.

Summary – Animation Final Touches: Fine-Tuning with Scaling, Blur and Render Tips
In this tutorial, you carried out the final fine-tuning of your animation project. You reset the color layer, animated the circle via scaling, and applied motion blur selectively to fast layers. You also adjusted the rhythm of the text, showcased the logo with the Trace effect and the Scribble effect, and cut the sound. Finally, you exported the animation via the render queue. If you internalize these steps, fine-tuning will be much easier for you in future projects.
FAQ
How do I reset a layer to its original size?Select the layer and press Command+Alt+F or Ctrl+Alt+F; alternatively, right-click and choose Transform and then Fit to Comp.
Why doesn't my motion blur show in the preview?The global switch is often turned off for the preview to keep playback smooth. When rendering, it is taken into account if the individual layers have their own switch enabled.
Which layers should I apply motion blur to?Above all, fast-moving layers such as icons, text layers, bouncing balls, and color-change layers benefit from it, while calm layers should usually remain without blur.
How do I achieve a smoother motion path with keyframes?A Control-click (Ctrl-click or right-click) on the keyframes opens the context menu, where you switch the interpolation to a smoother variant.
How can I make the Scribble effect looser and more irregular?Increase the Spacing Variation, the Curviness, and the Wiggle Variation (Belappungsvariation), and reduce the Stroke Overlap (Fahrtüberlappung) a little so that the lines do not look too chaotic.
How do I display the waveform of an audio layer?Select the audio layer and press the L key. With Shift+L you additionally display the audio level.
How do I set a work area?Place the time marker at the desired start and press B, then move it to the end and press N.


