
Imagine you have a logo trailer in which text elements are arranged in a circle, but so far they stand still. This is exactly where this tutorial comes in. You will learn how to use text animators, simple expressions, and a few basic rules from animation to bring a circle to life that lets elements pop up one after another and, in the end, wobbles with a bit of randomness. The way there involves only a few parameters, and you don't need any curves or keyframes for each individual object.
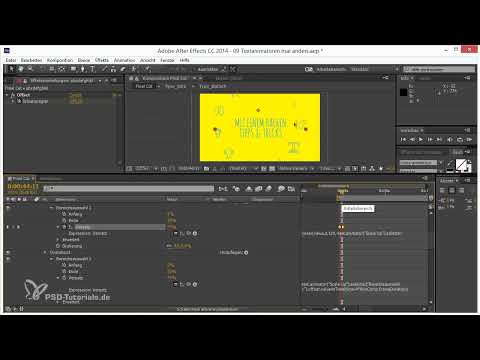
The video is only loaded from YouTube when you play it – data (including your IP address) is then transmitted to YouTube/Google. More in the privacy policy
Key Takeaways
- Text animators control many layers or characters at the same time. So you animate once and distribute the effect across the entire text range.
- With a slider and a short expression, you can control a circular motion without writing sine or cosine formulas.
- An overshoot when scaling up, meaning briefly shooting past the target, makes elements pop up in a lively way.
- Easy Ease High and Low accelerate and slow down the motion so that it looks more natural.
- With the "Wiggle" selector, you create a wiggle effect that randomly varies position and rotation.
Step 1: Starting point with icon font and circular arrangement
Before you animate anything, you should know where you are starting from. In this example, there is already an icon font that you have arranged in a circle using text animators. So the result is static, and that is exactly what you will continue working on now. Make sure that all elements are correctly distributed on the circle before you begin the animation.

Step 2: Rotating the circle via the margins
The simplest way to rotate the elements in a circle is via the margins of the text animator's range selector. You have already used the first and the last margin to create a bit more space at the top. If you shift both values at the same time, the circle moves. To keep the spacing between the elements intact, you have to shift both margins in the right proportion to each other. This step is well suited for understanding the basic principle before you move on to expressions.

Step 3: Creating an offset slider
For precise control that you can change at any time, you create a slider. To do this, open the effect settings of your text layer and add a slider via "Expression Controls". Give it a clear name, for example "Offset". This slider will later determine the rotation of the circle, without you having to work on the margins themselves.

Step 4: Adding the expression to the first and last margin
Now you connect the slider to the margins. Hold down the Alt key (the Option key on macOS) and click the stopwatch of the first margin so that the expression editor appears. The expression here is value + effect("Offset")("Schieberegler"). It takes the current value and adds the offset to it. Then copy this text into the last margin. Since both margins receive the same shift, the distance between them stays the same. If you now move the slider, the circle rotates cleanly around its center, and the elements always face outward.

Step 5: Animating the offset
With the slider, the rotation already works manually. To animate it, you set a keyframe at the beginning and another one later in the clip, deliberately keeping the time span short. Look at the preview and adjust the speed so that it feels pleasant and does not seem hectic. Make sure that the start of the rotation coincides with the moment the text is supposed to appear.

Step 6: Setting the scale to zero
So that the elements can pop up later, they first have to be invisible. To do this, set the scale in the text animator to 0%. Then you define the range in which the animation should take place. You can adjust the range selector so that not all characters react at the same time. A start and end point of about 20% of the width ensures that the animation does not run too fast and the characters appear one after another.

Step 7: Insert the linear expression for the offset
Now it gets a bit more technical, but the expression remains easy to follow. In the offset area, the linear() function helps you convert the current value, which runs from 0 to 100, into a range that starts with a negative end and ends at 100. This makes it easy to control the start and end of the effect. Set the offset to 0 at the beginning of the animation and to 100 a few frames later. Then check whether you like the speed curve, and adjust the keyframes if necessary.

Step 8: Create the overshoot with a second animator
When popping up, a small overshoot looks especially lively. The element briefly shoots past its target and then settles. To do this, duplicate the existing text animator with Ctrl+D or Cmd+D and rename the first animator "Scale Up". You use the second animator as the overshoot. Set its scale to about 120% and remove the keyframes so that only the value applies. The overshoot therefore sits between scaling up and springing back to the normal size.

Step 9: Shift the overshoot's offset using a time expression
So that the overshoot does not start at the same time as the pop-up, you shift its offset in time. To do this, copy the expression of the first offset and extend it with value.add(time ...). Inside the parentheses, you subtract four frames, multiplied by thisComp.frameDuration. The formula then reads roughly time - 4 * thisComp.frameDuration. Pay attention to the minus sign, because a plus sign would shift the delay in the wrong direction. Then check in the preview whether the elements really pop up first and overshoot afterwards.

Step 10: Fine-tune the easing
The movement only looks natural once you adjust the speed of the keyframes. Select the offset keyframes and use "Easy Ease Low" for the beginning so that the movement starts smoothly. For the transition to the overshoot, you fall back on "Easy Ease High" so that the element slows down at the end of its path. This fine-tuning is a matter of feel. Feel free to try several variants until the pop-up looks right to you. If you want it even more extreme, you can increase the overshoot's scale slightly.

Step 11: Randomness with a position and rotation animator
So that the elements do not appear rigidly lined up, you add some randomness. To do this, create another text animator and enable the properties "Position" and "Rotation". Set the rotation to a small value, about 2 to 3 degrees. Then remove the range selector, because the wiggle should affect all characters. The actual effect only comes about through the "Wiggly" selector.

Step 12: Control the wiggle via "Wiggly"
In the text animator, under "Add Selector" you will find three options: the classic range selector, the "Wiggly" selector, and a custom expression selector. Choose "Wiggly" here. The values for position are about −100 to 100, and the rotation is −20 to 20 degrees. You also determine how many times per second it wiggles and whether the effect works per character or per line. For character basis, the rule is: each character gets its own random value.

Step 13: Fine-tune the wiggle values
Test the effect in the preview and reduce the values if it looks too strong. A value of about 50 for the position and one wiggle per second, possibly between one and a half and two, creates a calm, pleasant restlessness. Make sure the wiggle does not interfere with readability. If the movement is too hectic, reduce the number of wiggles further.

Step 14: The finale with the logo screen
Once all the animations are set, your trailer is almost finished. The last step is to add the final logo screen, which rounds off the trailer. Make sure this ending matches the motion language of the text animators so that the trailer feels coherent as a whole.

Summary – Text Animators in After Effects: Animating Circular Motion, Overshoot, and Wiggle Properly
Text animators are a powerful tool because you can control many characters at once with just a few parameters. You have learned how a slider and simple expressions rotate a circle, how scale and offset enable the pop-up effect, and how an overshoot with a time shift adds liveliness. With easing and a carefully used wiggle, the animation looks natural and varied. Try out the steps in your own project and adjust the values so that they match your style.
FAQ
Do I need knowledge of expressions to implement this animation?Answer: Basic knowledge helps, but the expressions used are short and can be followed step by step.
Why shouldn't I control the overshoot with the same animator as the pop-up?Answer: A separate animator allows you to adjust scale and time shift independently, and that makes the movement much more controllable.
How can I tell if the wiggle is too strong?Answer: If the text looks restless during playback or becomes hard to read, reduce the values for position and rotation as well as the number of wiggles per second.
Can I also implement the circular motion without an icon font?Answer: Yes, the technique works with any text or layer that you arrange with text animators, for example with symbols or small shapes.


