
A dot that jumps only looks alive once it leaves a trail behind. In this tutorial, you build the tail and the hit particles for the jumping dot from the first part. The basis is the Particle World effect in After Effects, whose emitter is already linked to the jump via a Jumping expression.
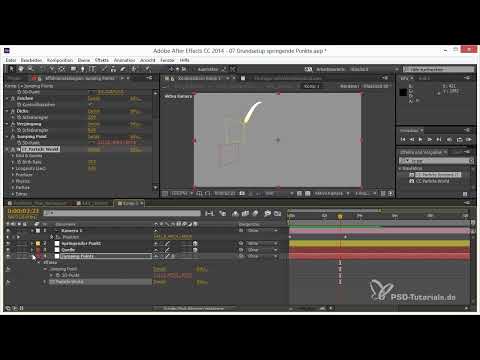
The video is only loaded from YouTube when you play it – data (including your IP address) is then transmitted to YouTube/Google. More in the privacy policy
The video picks up directly from the first part. The timestamps in the screenshot variables refer to the seconds of the video (total length 946 seconds). If you recreate the process in After Effects alongside it, you will find the individual steps at these points.
Key Takeaways
The tail is created through a combination of emitter settings, physics, and particle type. If you set the radius, velocity, and gravity to zero, you get a clean path of particles that follows the jump exactly. The hit particles are only generated when the dot touches the ground, and they need their own expression on the birth rate for this. Additive blending, color gradient, and glow provide the luminous look.
Step 1: Clean up the emitter and set the radius to zero
Begin in the Particle World effect of the jumping particle in the Producer section. There, the radius is initially set to a larger value. Set it to zero so that all particles are created exclusively at the position of the Fade and are not distributed in a volume. Only then do you get the desired tail shape, in which the particles follow the path of the dot one after another and disappear after a short time.

Step 2: Disable velocity and gravity
In the Physics section, velocity causes particles to be shot out at a certain speed. Disable it completely. Gravity must also be set to zero, otherwise the particles fall out of the emitter like sand. As soon as both are switched off, you can see the first beginnings of a path that follows the jump.

Step 3: Check the scene up close
Move the camera closer to the effect and check the display from different angles. You will notice that the particles are correctly positioned in three-dimensional space. An animated camera should not cause any problems either. You can then collapse the Physics settings, since you will not need them for the time being.
Step 4: Switch the particle type to Faded Sphere
The test particles you see at the beginning are quick to calculate, but they look harsh and unattractive. Therefore, switch the Particle Type to Faded Sphere. This is a colored sphere or circle with soft edges, which provides much more pleasant shading.

Step 5: Control Birth Size via a controller
So that you can conveniently adjust the size of the particles via a controller, you link the Birth Size to a slider using an expression. The slider's value is 0.25 in its initial state. For larger particles, you divide the slider value by 10 and use it with a multiplication. This way you work with more convenient numbers, such as 2.5 instead of 0.25.

Step 6: Link Death Size to Birth Size
The Death Size, that is, the size at the end of a particle's life, does not need to be set separately. Instead, link it to the Birth Size and multiply the value by a factor that determines the tapering. If the factor is set to zero, the particles disappear completely at the end. With a value of 0.3, about a third of the original size remains at the end.

Step 7: Set density, size variation, and opacity
For a dense tail, you increase the number of particles. You set the Size Variation to zero so that all particles are the same size and the line looks even. The result is a smooth, round spline. You set the Max Opacity to 100 before fine-tuning it later.

Step 8: Build a Color Gradient from Head to Tail
You can control the color via Birth Color and Death Color. At the front tip, an orange-yellow works well, which fades into white toward the end. Alternatively, you can set up the gradient the other way around, so that the tail looks yellow-orange at the back and the tip glows white. With a Custom Color Map, additional color stages can be added if needed.

Step 9: Activate Additive Mode for Overlays
So that the particles brighten each other where they overlap, set the Transfer Mode to Add. In the middle of the jump, where most particles overlap, this creates a white highlight. Toward the sides, the tail becomes yellow and slightly reddish again. This gives a hot, glowing look.
Step 10: Adjust the Length and Thickness of the Tail
The tail is too long at first. You set the lifespan of the particles, i.e. the Longevity, at the top in the particle group area. This value cannot be integrated via expression, which is why you adjust it manually. At the same time, you can make the particles thinner or thicker. With a value of about two for the size and a much shorter Longevity, you get a shape that matches the overall look.

Step 11: Understanding the Jump Vector and Frequency
The jump vector determines how high and in which direction the point jumps. A flat value results in low jumps, a higher value in significantly higher arcs. To start with, the Y-axis is enough so that the point jumps upward. You can use the X and Z values later if the point is supposed to jump around a sphere.

Step 12: Control the Birthrate with a Checkbox
The checkbox in the setup currently has no function. Connect it to the Birthrate via the expression value. The checkbox returns the value 1 when it is enabled and 0 when it is disabled. If you use this value as a multiplier, the tail only starts when the checkbox is enabled. This is particularly handy if the point is later supposed to form a logo, because it lets you easily switch the animation on and off.

Step 13: Create Hit Particles as a Second Particle Effect
For the dust cloud on impact, you create a second Particle World effect. It gets its own Physics with a Motion and a Velocity. As soon as both effects run together, however, the tail disappears. The reason is the Composite with Original checkbox in the effect area. If it is disabled, the original image is no longer combined with the particles. Turn it back on, and the tail reappears.

Step 14: Generate Hit Particles Only on Ground Contact
The Hit Particles should only appear when the point touches the ground. For this, you use an expression on the Birthrate that briefly raises the value, holds it for two frames, and then resets it to zero. The trigger for ground contact is determined via the jump progression. At first, the expression may kick in two frames too early. Therefore, adjust it until the timing matches the impact exactly.

Step 15: Fine-Tune the Number and Size of the Hit Particles
The number of particles is far too high at first. Reduce the Birthrate to a low value, such as two. You detach the Birth Size from the expression by clicking on the stopwatch. Afterwards, you can control the size independently. With the Death Size, you need to make sure that it is not still linked to the Jumping Particles. If you swap the reference in the particle group, the Death Size reacts correctly to the Birth Size of the Hit Particles.

Step 16: Improve the Particle Shape with Texture and Lens Effects
If you use the Lens Convex effect, unsightly full circles appear when overlaying with the white color layer. The solution is to move the Hit Particles in front of the Jumping Particles. Alternatively, you can use a texture. For this, you apply the texture to the Jumping Point, which however appears too large and behaves with the Death Size as you have already learned. Adjust the size until the particles look coherent.

Step 17: Adjust Opacity and Fade Behavior
The Hit Particles should have more opacity, so you increase the Max Opacity. The fade type determines how soft the transition of the particles looks. In this case, the Faded Disc is better suited than the Faded Sphere because it is softer and is barely noticeable at the speed of the movement.

Step 18: Add Glow
A slight glow stylizes the particles and makes them shine. Raise the threshold so that only the brightest, white areas glow. The slight black edge that appears will disappear later when you add the whole thing over the footage. Then you add a second glow that works only horizontally and has a higher radius. This creates a streak effect that gives the whole thing speed.

Step 19: Fine-Tune the Colors of the Hit Particles
Finally, you adjust the colors of the Hit Particles. The Birth Color becomes lighter and whiter, the Death Color darker. With the Screen mode you achieve a nicer blend. Then reduce the opacity slightly so that the cloud does not look too dominant. At the end of the trail, a clear color change should also be visible, which is why you increase the number of particles once more.

Outlook
The finished Jumping Point is the foundation for everything that follows. In the next part, you will place it into the table ride, let it jump across the table, and create several variations of it. The basics from this tutorial form the foundation for each of these extensions.

Summary ??? After Effects Tutorial: Jumping Points with Trail and Hit Particles
The trail is created when you set Radius, Velocity, and Gravity to zero and work with a Faded Sphere, a size coupling via expressions, and an additive mode. The Hit Particles receive a second Particle World effect whose birthrate is activated via an expression only on ground contact. With a color gradient, glow, and fine adjustment of the opacity, you get the final look that breathes life into the jumping points.
FAQ
Why does the trail disappear as soon as I add the Hit Particles?The "Composite with Original" checkbox in the effect area is deactivated. Activate it, and the trail will become visible again.
Why should the radius of the producer be set to zero?With a radius greater than zero, the particles are distributed in a volume. For a trail along the fade, however, you need all particles exactly at the position of the point.
What is the checkbox with the expression value for?The checkbox returns the value 1 when it is activated and 0 when it is deactivated. Linked to the birthrate, the trail can thus be switched on and off in a targeted way, for example for later logo animations.
How do I make sure the Hit Particles are only created on ground contact?You link the birthrate to an expression that briefly raises the value, holds it for two frames, and then resets it to zero. You adjust the timing until it matches the moment of impact.
Why do full circles appear with Lens Convex?The white color area of the particle region is also captured by the Lens effect. If you move the Hit Particles in front of the Jumping Particles, clean circles appear again.
Can the Longevity be controlled via expression?No, the Longevity cannot be integrated via expression in this setup and must be set manually.


