
A point of light that bounces realistically on a sphere can hardly be controlled in After Effects alone. This is exactly where Cinema 4D Lite comes into play. In this tutorial, I'll show you how to export a scene, rebuild a globe in Cinema 4D, create the glow of light, and then bring it back into After Effects. You'll also learn how to control the light with an Expresso setup so that it doesn't disappear inside the sphere.
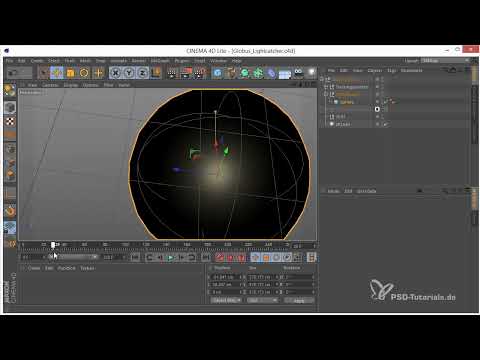
The video is only loaded from YouTube when you play it – data (including your IP address) is then transmitted to YouTube/Google. More in the privacy policy
Key Takeaways
Key Takeaways
- After Effects offers no direct way to make a point of light drop onto a sphere in a controlled manner. Cinema 4D Lite takes over this task.
- A point light that is bound to a Jumping Point can be controlled consistently in both programs.
- A null object as the center point and a sphere as its child make rebuilding the globe much easier.
- The Multiplayer in the Expresso setup moves the light away from the center point and prevents the point of light from disappearing inside the sphere.
- The light reflection remains non-destructive because you can adjust settings in Cinema 4D at any time and export again.
Step-by-Step Guide
Step 1: Create a point light and bind it to the Jumping Point
Begin in After Effects with a new point light. It serves as the light source that will later create the glow on the sphere in Cinema 4D. To make the light follow the Jumping Point, first reveal the position of the Jumping Point with the P key. Then you link the light to the Jumping Point by holding down the Alt key and clicking the pick whip. After a few projects, you should be able to do this in your sleep.


Step 2: Export the composition to Cinema 4D
To get the scene into Cinema 4D, choose the Cinema 4D Exporter entry in the File menu. Assign a clear file name, for example Globus Export 01, and save the Cinema file. This file is the basis for everything that follows, so you should name it carefully.

Step 3: Launch Cinema 4D Lite from After Effects and import the export
Cinema 4D Lite can't be launched from the outside, only from within After Effects. So open it via the corresponding menu item in After Effects. Then drag the exported file from the file browser into your project and import it into your composition. Make sure the view is set up correctly so that you can see the globe in the image. If the resolution wasn't saved along with it, adjust it manually.


Step 4: Rebuild the globe with null objects and a sphere
After the import, you'll see the globe with the tracking points as null objects. Select all null objects by clicking the first and last point while holding the Shift key, and group them together. Then create a new null object, which you call Mittelpunkt. Move it to the center of the globe. Beneath it, create a sphere, which you make a child of the Mittelpunkt. Set the coordinates of this Mittelpunkt to zero so that the sphere sits exactly in the center.


Step 5: Adjust the sphere's radius to the globe
Adjust the radius of the sphere so that it encloses the tracking points. You can change the radius directly in the object properties, but it's more convenient to use the small square in the view, with which you adjust the size interactively. Turn the light off in between and check the sphere in the different views. Better a little too small than too large, because oversize is much more noticeable later.


Step 6: Check the render quality and the light on the sphere
Activate the Render Perfect mode so that the polygon edges of the sphere are smoothed cleanly. Then switch the light back on. You can now see how the light point jumps across the sphere and creates a nice glow. This step immediately shows you whether the geometry is correct.

Step 7: Set the light falloff and color
For the light to decrease naturally, select the Fall-off Inverse Square option in the light's details. With the scale tool, reduce the light radius until you get a pleasant gradient. Then reduce the intensity slightly and add a slight yellow to red tint. This fine-tuning gives the globe light its warmth.


Step 8: Save the scene as a Light Catcher and integrate it into After Effects
Do not save the Cinema file under the old name, but use Save as to give it a new name, such as Globus Light Catcher. This way the original file remains untouched. Then switch back to After Effects and import the Light Catcher. The old export can be deleted, as it is no longer needed. Place the Light Catcher in the composition for the Lights group and set the blending mode so that it adds on top of your footage.


Step 9: Adjust size and position in the compositing
Now it becomes clear whether the size is right. Often the sphere does not quite match the globe in the image. You can simply scale and move the Light Catcher in After Effects until it sits exactly on the globe. Pay particular attention to the lower area, which may be slightly cut off. Save in between and check the result until it looks right.


Step 10: Move the light point from the inside to the outside
During the test, the light jumps into the sphere in some places, and that does not look good. So you need to move the light point slightly away from the center without changing its movement. In After Effects, you would use an expression for this. Cinema 4D Lite has no expressions, but it does have the Expresso tool, which works very similarly.
To do this, create an Expresso tag on the Jumping Light in Cinema 4D and drag the center point, the sphere, and the moving light into the settings. The Multiplayer is the crucial building block here, as it shifts the light point back and forth, or away from the center point. A value of around 1.03 may already be enough.


Step 11: Check and fine-tune the Multiplayer
After each adjustment, check whether the light point really disappears nowhere inside the sphere. Sometimes this affects only a single frame. If the light stays outside the sphere everywhere, you have set the movement correctly.

Step 12: Work non-destructively and soften the hotspot
A major advantage of this setup is its flexibility. If requirements change, you adjust the light in Cinema 4D, export the Light Catcher again, and replace it in After Effects. The Expresso tag continues to refer to the new object, so the link is retained. After importing, hide all other layers with Shift-H in order to view the light reflection in isolation.
If the hotspot looks too harsh, reduce the intensity in Cinema 4D, save, and check the result again. With the Enhanced Color Table you also get a more pleasant color selection, which lets you set the light a bit warmer.


Step 13: Setting the Multiplayer Value Creatively
The Multiplayer slider has not only a technical but also a creative function. With values around 1.25, the light looks more global and less hot. A value around 1.1 creates a somewhat more intense effect without glowing too strongly. With 1.15, you reduce the hotspot a little more. So decide for yourself how hot the light reflection on the globe should look.


Outlook
The light reflection is now in place, and you have mastered the most important steps. Next comes the globe's time travel, in which its color changes from black and white through a sepia tone to full color.
Summary ??? Globe Light in After Effects with Cinema 4D Lite
In this tutorial, you learned how to bind a point of light in After Effects to a Jumping Point, export the scene to Cinema 4D Lite, and rebuild a globe there with null objects and a sphere. You adjusted the light with falloff and color, integrated the Light Catcher into After Effects, and used an Expresso setup to prevent the light from disappearing inside the sphere. The Multiplayer gives you both technical control and creative freedom.
FAQ
Why can't you let the light fall onto the sphere directly in After Effects?After Effects offers no way to direct a point of light onto a sphere in a controlled manner. Cinema 4D Lite is required for that.
How do you start Cinema 4D Lite?Cinema 4D Lite can only be launched from within After Effects, not directly from the desktop.
What is the Expresso tag?Expresso is the Cinema 4D tool that works similarly to expressions in After Effects. You use it to control the movement of the light.
What is the Multiplayer for?The Multiplayer moves the light away from the center so that it doesn't disappear inside the sphere. At the same time, it influences the creative effect of the light reflection.
What does non-destructive mean in this context?You can adjust the scene in Cinema 4D at any time, re-export it, and replace it without having to rebuild the entire setup.
Can you still change the Light Catcher after importing it?Yes, you can adjust its size and position in After Effects and readjust the hotspot in Cinema 4D at any time.


