
Do you know this? You have placed a spotlight and have to rotate it by hand until it points exactly at your object. As soon as you move the object, the readjusting starts all over again. From Cinema 4D you may know the Align To or Target tag for this. After Effects has no such tool as a ready-made switch, but with a short expression this behavior can be recreated. In this tutorial, I show you how to permanently orient lights, cameras, and flat layers toward a target object, so that they follow this object no matter where you move it.
The video is only loaded from YouTube when you play it – data (including your IP address) is then transmitted to YouTube/Google. More in the privacy policy
Key Takeaways
- An expression automatically calculates the orientation from the position of a target object.
- The
lookAt()function converts the position data into angles that After Effects needs for the orientation. - You work with world coordinates and convert them into the local space of the light or camera. This prevents many typical errors.
- The anchor point of the target object should be in the center of the layer content, otherwise the light will not point at the visible center.
- Complex scenes with shadows can slow down the preview. In that case, temporarily turn off the shadows.
- Depending on the layer, you have to adjust the rotation by 90 degrees so that the correct axis points toward the target.
Step-by-Step Guide
Step 1: Prepare the Starting Scene
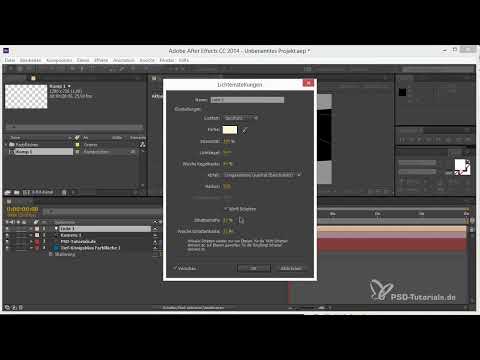
Start with a simple scene. Create a text or a layer that will serve as the target later, and make it a 3D layer. Then add a spotlight via "Layer > New > Light". Make sure you enable the "Casts Shadows" option in the light settings. So that the light also casts shadows on your target layer, additionally enable the shadow option in the layer properties of the target layer.


Step 2: Apply the Expression to the Orientation
Select the light and open the "Orientation" property. Hold down the Alt key and click the stopwatch next to the property. This adds an expression that you can then edit. The input field appears directly below the property.

Step 3: Define the Target Object
The expression needs a reference to the layer the light should look at. For this, write target = thisComp.layer("PSD Tutorials"); as the first line. You can also take over the name of the layer with the pickwhip or by dragging the layer into the field. Adjust the name to your own layer. From now on, the variable target stands for this target object and can be reused in the following lines.

Step 4: Determine the World Position of the Target
Local position values always refer to the parent layer. If your layer is nested or has a null layer as a parent object, these values are no longer correct. That is why you use the world position. In the next line, write targetWorld = target.toWorld(target.anchorPoint);. The toWorld function calculates the position of the anchor point in the entire 3D space of the composition.
Step 5: Convert the World Position into the Light's Space
Now you have to convert the world position into the coordinates the light needs. For this, you use the inverse function of toWorld, namely fromWorld. Write targetLocal = thisLayer.fromWorld(targetWorld);. This way, targetLocal describes the position of the target from the light's point of view. You can think of it as a conversion from the shared space into the light's working space.
Step 6: Define the Point of View with lookAt()
Now comes the actual orientation. The lookAt() function requires two points: the starting point from which to look, and the target point. You set the starting point to the zero point [0, 0, 0], because the light's anchor point plays no role here and you do not want to change it. As the target point, you pass targetLocal. The complete expression then looks like this:
Confirm the input by clicking outside the input field. The light now automatically aligns itself with the target.

Step 7: Test the result and correct the anchor point
Move the light in the composition window and watch how it always aligns itself to the target layer. If the light is still slightly offset, this is usually due to the anchor point of the target layer. By default, it sits at a corner or at the origin. Right-click the layer, choose "Transform" and set the anchor point to the center of the layer content. After that, the light hits exactly the visible center of your object.


Step 8: Keep the preview smooth
With multiple shadows and expressions, the calculation in the preview quickly becomes sluggish. If you notice that playback stutters, temporarily turn off the shadow option of the light or the layer. Once you have animated the movement, turn the shadows back on. This way you keep an overview of your scene without sacrificing quality in the final result.

Step 9: Animate the light
Now you can move the light freely or animate its position using keyframes. The orientation always automatically follows the target. So you only have to set the position of the light, no longer the direction. The radius of the light can also be changed afterwards without losing the alignment.

Step 10: Transfer the expression to a camera
The method works the same way with cameras, and is particularly handy if you control the camera via a null layer. Copy the expression from the light's orientation, select the camera and paste the expression into the orientation using the Alt key and the stopwatch. Paste the text and adjust the name of the target layer if necessary. After that, no matter how you move it, the camera stays pointed at the object.

Step 11: Apply the alignment to surfaces and arrows
The expression can also be used for layers that are meant to indicate a direction. As an example, you draw an arrow on a shape or text layer, turn it into a 3D layer and scale it down. Apply the expression to the orientation or the rotation properties. There, the arrow now points at the target. Sometimes, however, it doesn't point in the desired direction. In this case, try out rotation values, such as 90 or -90 degrees, until the correct axis points to the target.


Summary ??? LookAt Expression in After Effects: Automatically aligning lights and cameras
With a short expression, you replace the manual readjustment of lights, cameras and layers in After Effects. You define the target object, calculate its world position, convert it into local space and pass the values to lookAt(). Pay attention to the anchor point of the target and to the rotation axis for layers. If the preview stutters, temporarily turning off the shadows helps. With this method, your 3D scene stays flexible, and you can concentrate fully on animation and lighting mood.
FAQ
Why doesn't my light point exactly at the center of my layer?Most likely the anchor point of the target layer is not in the center. Move it via right-click, "Transform" and set it to the center of the layer content.
My preview is stuttering badly. What can I do?Temporarily turn off the shadows while you animate. Only turn them back on once the scene is finalized.
My arrow points in the wrong direction. What's the reason?The orientation is not always on the right axis. Rotate the layer as a test by 90 or -90 degrees until the direction is correct.
Can I also use the expression for cameras?Yes. Copy the expression to the camera's orientation. After that, the camera always looks at the target, even if you move it.
Do I have to animate the orientation myself?No. You only animate the position of the light or the camera. The orientation automatically follows the target object.


