
When tracking points are lying on the table in a 3D project, they often look static. In this tutorial, I'll show you how to connect them with a null object setup, keyframes, and an expression so that they travel across the set as jumping points. You'll also learn how to organize your project so that you can still find it quickly even after months.
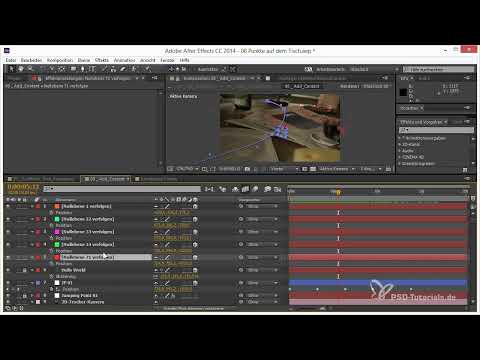
The video is only loaded from YouTube when you play it – data (including your IP address) is then transmitted to YouTube/Google. More in the privacy policy
Key Takeaways
- A clean project structure with clearly named compositions will save you a lot of searching time later.
- With Ctrl+X and Ctrl+V, you can bring null objects from the clip directly into the Jumping Point composition.
- The jump path is created from position keyframes, which you then set spatially to "Auto Bézier".
- An expression links the particles to the Jumping Point, so you can adjust jump height and speed at any time.
- After moving compositions, you need to reassign the particles' Texture layer.
Step 1: Organize the Project and Compositions
Before you start working with the points, bring some order to your project. Create a folder for the table-ride section and sort all compositions there. Name them according to the order in which they are used, for example 00 for Additional Content, 01 for the Comp Unstabilized, 02 for the Comp CAM Stabilized, and 03 for Stabilized and Cropped. A folder for test compositions holds the basic setup of the points. That way you'll find your way around immediately even after two or three months.

Step 2: Create the Jumping Point Composition and Null Object
Copy the layer with the Jumping Points into a new composition and name it something like "Jumping Point 01". Then create a new null object. This null object will be your first Jumping Point, that is, the source from which the point starts. It's best to give it a striking color, for example blue, so you can recognize it immediately in the clip.


Step 3: Select the Right Null Objects
Now you need the points over which your Jumping Point will later jump. Lock all layers except the null objects. Then drag a rectangular selection so that only the null objects are selected. Next, choose the points that should serve as stations, for example one at the start, a few on the table, and one at the front near the logo. This creates the path your point will follow later.
Note that the Ctrl+Z shortcut doesn't always work reliably with layer selections. Therefore, check your selection before the next step.

Step 4: Cut the Null Objects and Paste Them at the Top
With Ctrl+X you cut the selected null objects, and with Ctrl+V you paste them back into your Jumping Point composition. The layers then land right at the top of the composition, and you don't have to search for them laboriously. Beforehand, deactivate the Shy switch so that the layers stay visible. The order of the selection is preserved. This is important because it later determines the order of the jumps.

Step 5: Set Keyframes for the Jump Positions
Select the Jumping Point and press the P key so that its position is displayed. Activate the keyframe stopwatch and set the first keyframe at the start position. Go forward a few frames and copy the next position of the null objects with Ctrl+C and Ctrl+V. In this way, you set all the stations one after another until you have, for example, five keyframes. The motion path is then already visible.

Step 6: Adjust the Timing and Length of the Movement
The keyframes now need to be timed so that the point is clearly visible. Hold down the Alt key to stretch or move the keyframes. If necessary, you can also extend the movement beyond the end of the composition until the timing is right.

Step 7: Set Spatial Interpolation to Auto Bézier
By default, spatial interpolation is set to "Linear," which results in a jagged zigzag. Right-click the keyframes and choose "Keyframe Interpolation." Set the spatial interpolation to "Auto Bézier." The point now flies across the table in a smooth curve instead of sharp kinks.

Step 8: Connect the Jumping Point to the Particles
Turn the Shy Guy switch back on and unlock the Jumping Point, which you will need in a moment. Then link it to the particle setup via an expression. The expression ensures that the particles are created exactly where your Jumping Point is currently located. Writing the code is more laborious at first, but later it gives you the great advantage that you can flexibly adjust speed, jump height, and behavior at any time without having to set all the keyframes again.

Step 9: Reassign the Texture Layer After Moving
When you move layers or compositions between compositions, effects often lose their layer assignment. You notice this when the particles suddenly no longer appear. In this case, specify the Texture Layer again, for example the Jumping Point itself. After that, the particles become visible again. Make sure to repeat this step after every copy.

Step 10: Remove Dark Areas with the "Add" Mode
The glow often creates distracting dark areas around the point. Set the layer's mode to "Add." The dark areas disappear, the point glows more beautifully and blends better into the image.

Step 11: Fine-Tune Speed and Jump Height
Now open the Time Remap to see how the jump looks at the final speed. In the example, the movement was too fast, so you reduce the value to about 0.6. Likewise, the jumps were too high, so you reduce the height to about 100. As a result, the point stays closer to the table surface. Since clients often only want such corrections late in the process, the expression setup is a real advantage here because you can adjust the values centrally.


Step 12: Add More Points and Create Complexity
A single jump is rarely enough. Repeat the technique with more Jumping Points. Pay attention to variety: don't let all the points jump the same way, and set some stations so that a point leaves the camera's framing. When the camera can barely follow a point, it seems agile and fast, while the camera appears sluggish. Exactly this contrast brings the scene to life. Then place the points deliberately on the table.

FAQ
Do I have to write expressions for this setup?Yes, the connection between the Jumping Point and the particles runs via an expression. This is more laborious at first, but allows later adjustments without new keyframes.
Why do my particles disappear after moving a layer?When moving between compositions, effects often lose their layer assignment. Simply specify the Texture Layer again.
Why does my movement look jagged?Spatial interpolation is probably set to "Linear." Set it to "Auto Bézier," and a smooth curve will result.
How do I remove the dark areas around the glow?Set the layer's mode to "Add." This hides the dark areas.
Can I use Ctrl+Z for the layer selection of the null objects?This keyboard shortcut does not work reliably for layer selections. Check your selection carefully before cutting.


