Do you want to create impressive 3D animations in After Effects and learn how to make points jump? In this tutorial, you will learn how to create an engaging animation with interactivity and dynamics using sinus mathematical functions and expressions in After Effects. With the didactic explanation of the jumping motion and the recurring hit particles, your animation will become more attractive and lively.
Key Insights
- Use sinus functions to create jump arcs.
- Write expressions to control the animation and integrate particle effects.
- Implement error handling in your expressions to ensure stability.
Step-by-Step Guide
Applying Sinus Functions
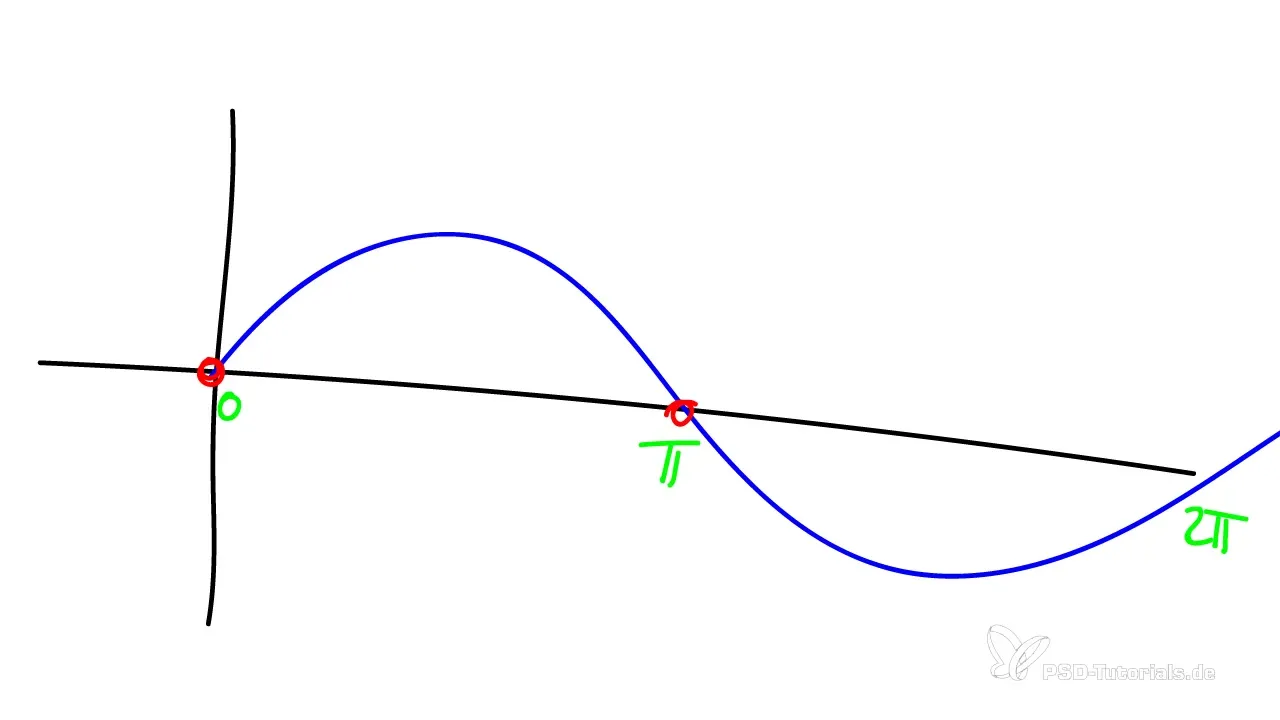
In the first step, you need to define the sinus value for the animation. A sinus creates the desired waveform for the points' jumps. You surely remember from your school days how the sinus looks. It forms a recurring wave that alternates between peaks and valleys.
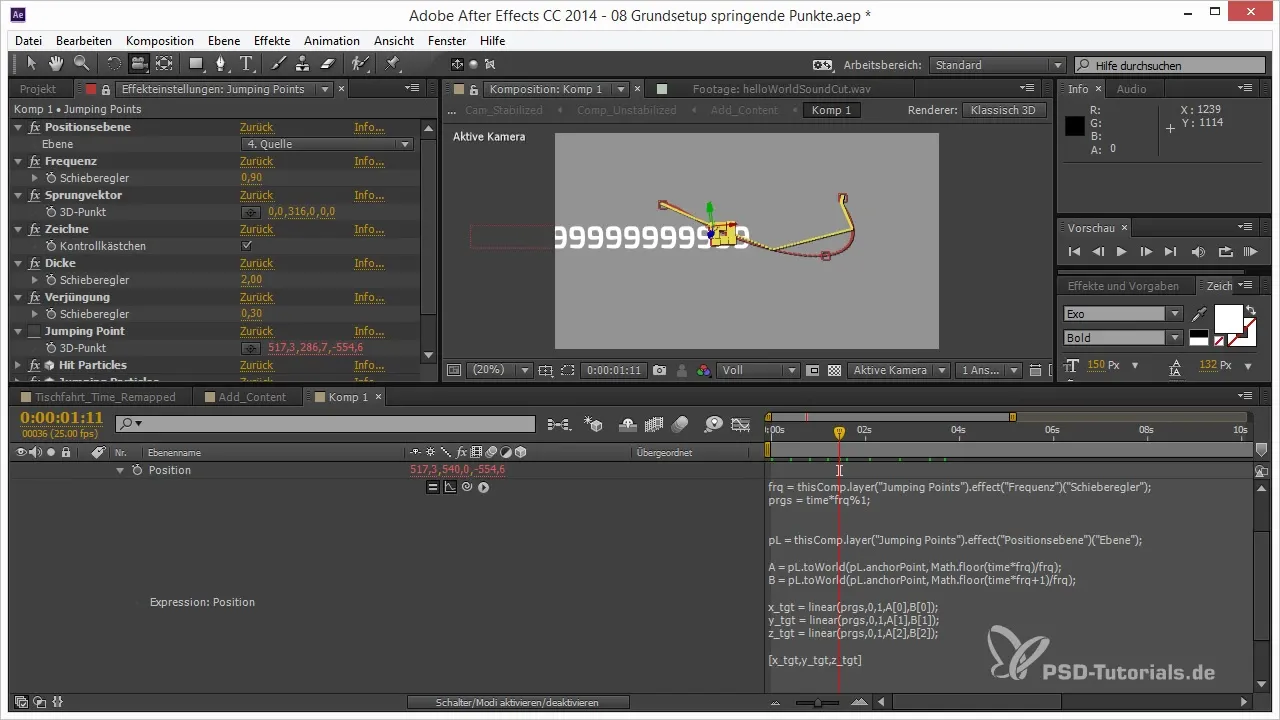
To calculate the jump values, you focus on the range from 0 to PI. Your progressive value goes from 0 to 1, so simply multiply it by PI to extend the movement from 0 to PI. This simple calculation gives you the sinus value for the animation, which is then applied to the 3D point.
Integrating the Jump Parameters
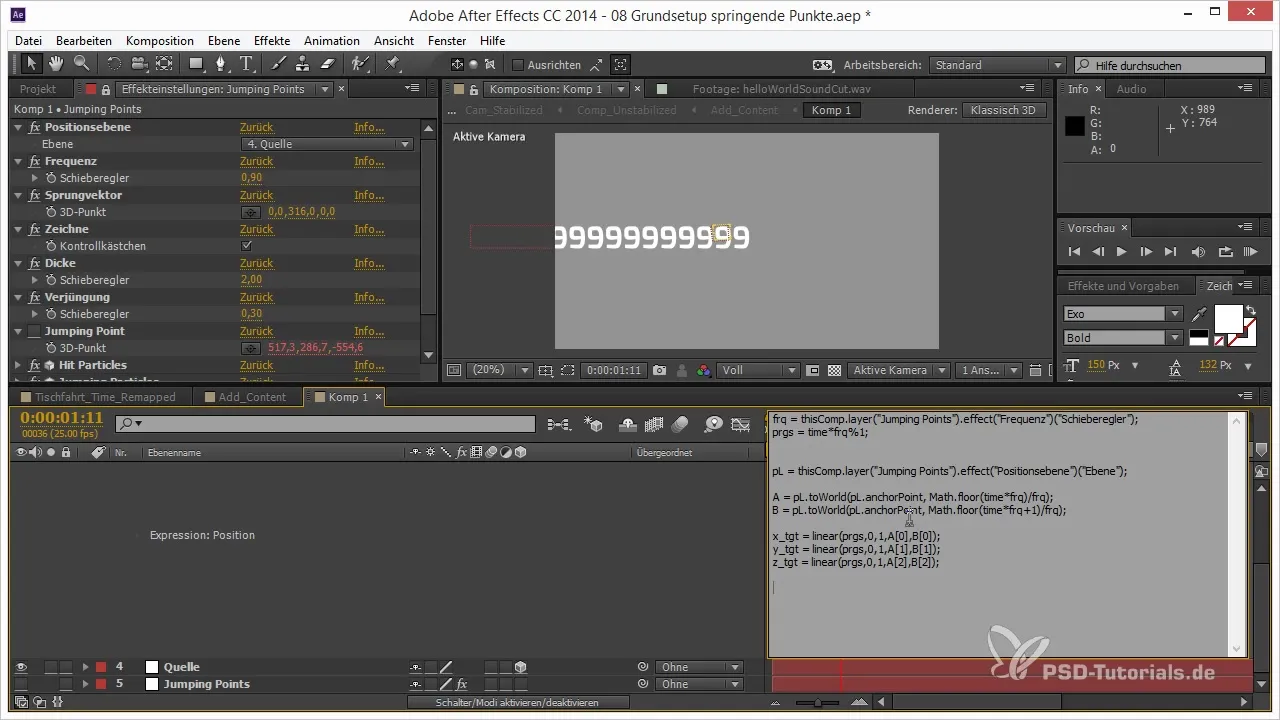
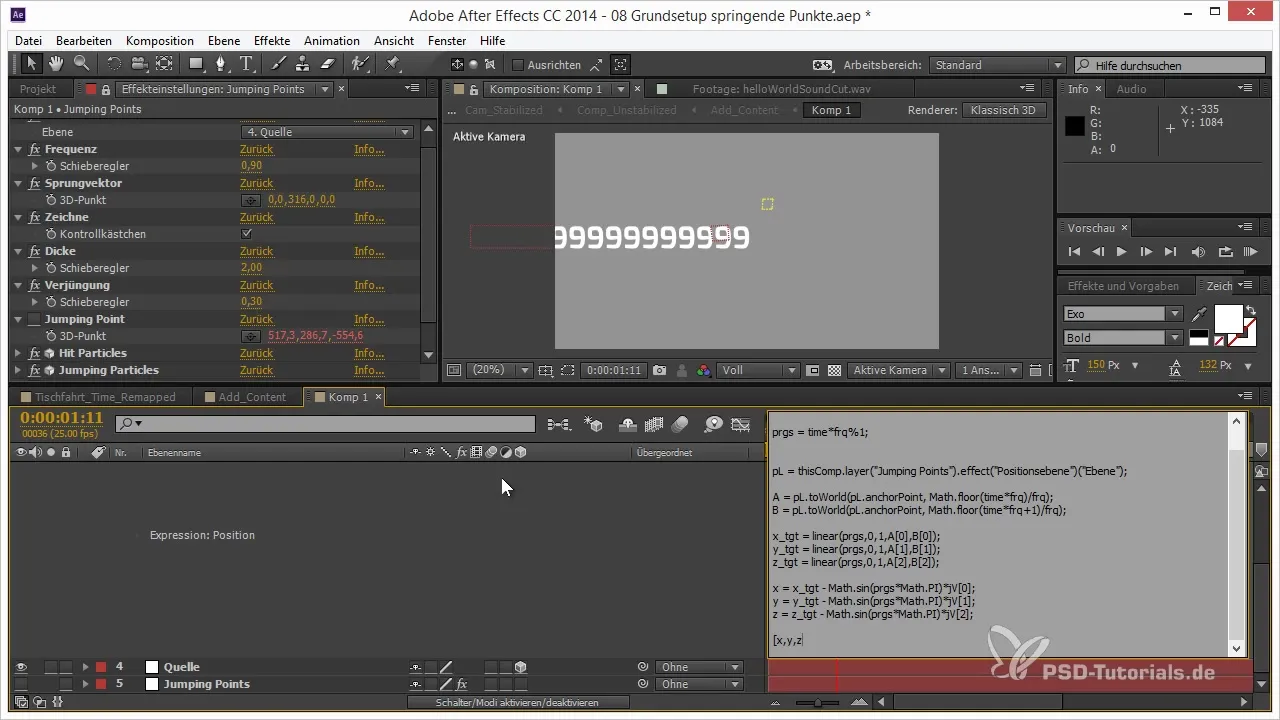
Now that you have the sinus value, you can insert it into the expressions. Use the components X target, Y target, and Z target. However, you do not use these terms directly; instead, you incorporate the final variables X, Y, and Z.
It is important to use the math.sin function to obtain the sinus value. This means calculating your progressive value times PI and inserting the result into the corresponding expression.
Multiplying with the Jump Vector
The next step is to incorporate the jump vector. This is done by multiplying the object-specific value from the jump vector with the just generated sinus values. This raises the point according to the axis on which you want to animate it.
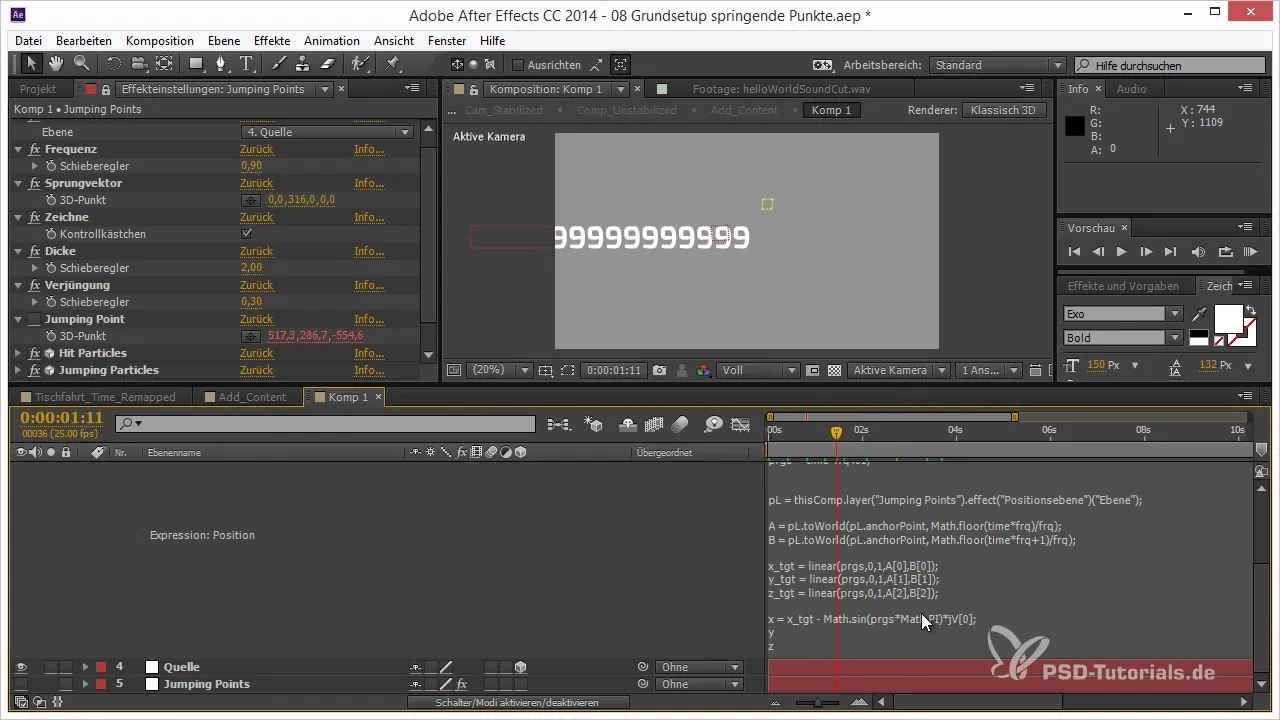
You perform the same steps now for the Y and Z axes, simply adjusting the letters. Once you combine these variables, you achieve the effect of the jumping point. The idea behind this approach is to make the jumps realistic and harmonious.
Error Handling in Expressions
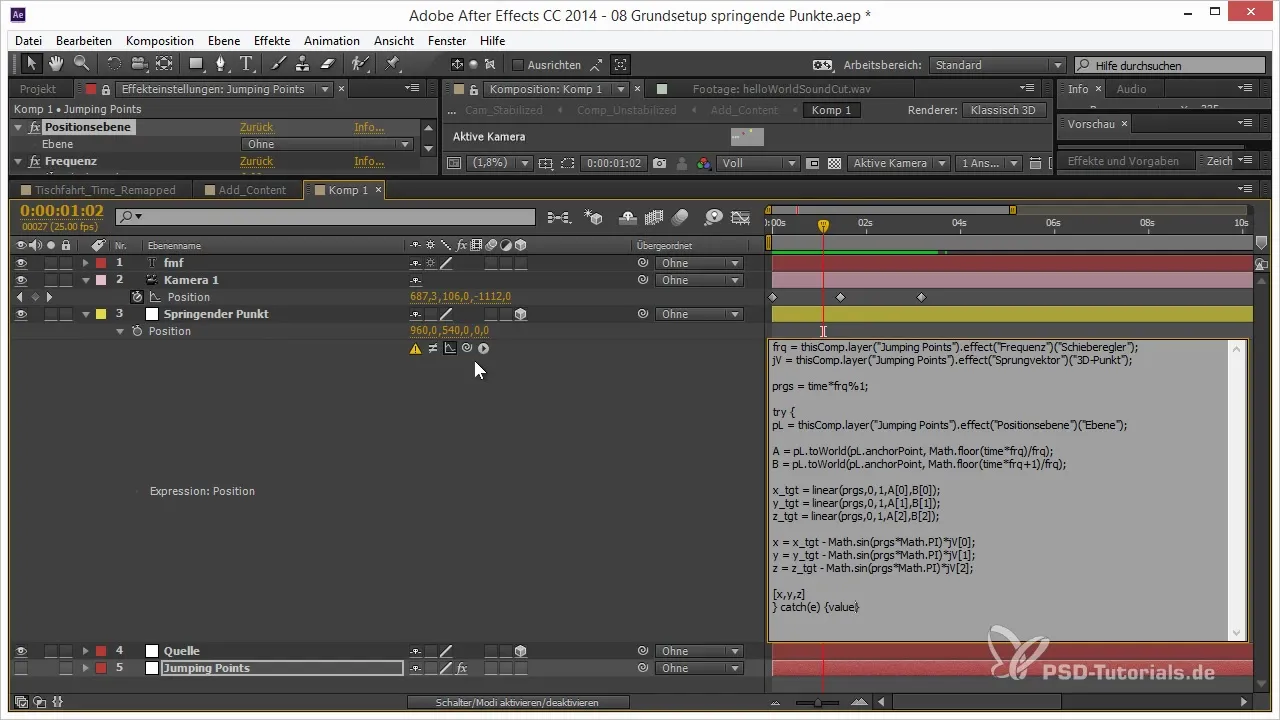
The next challenge is to deal with possible errors in your expressions. For example, if you are working on a point with no values, the expression will be faulty. Here, the try-catch method comes in handy. This allows you to ensure that in case of an error, your original value is retained.
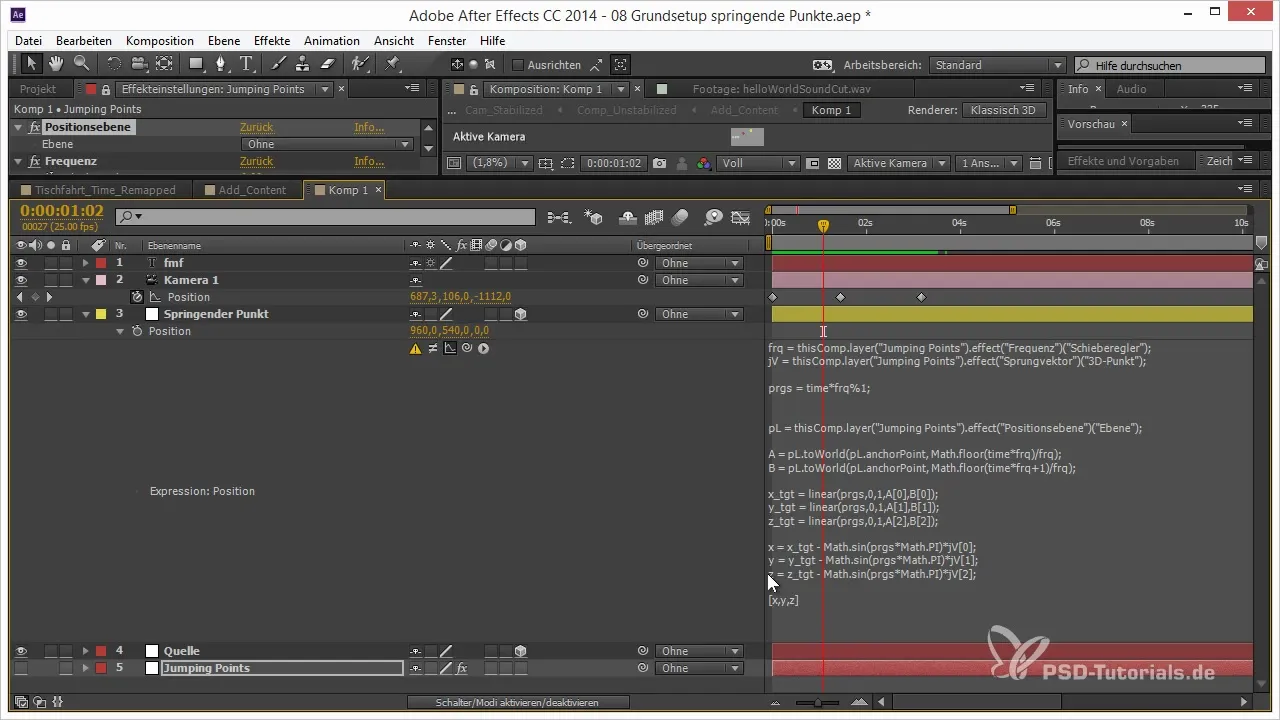
This means rewriting the expression so that the value of the animation is maintained even with faulty input. You simply add the code for try and catch to handle and hide possible errors.
Generating Hit Particles
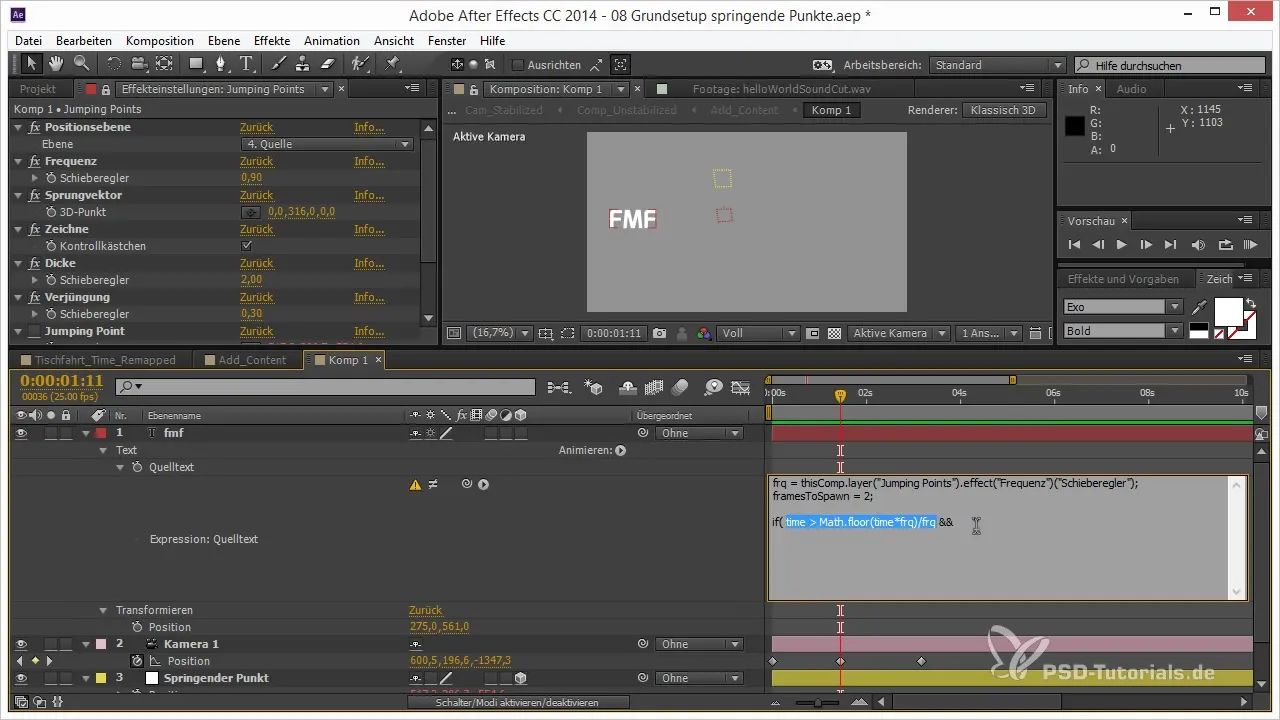
The next step focuses on the hit particles that should be generated as soon as the point touches the ground. Here too, you will use a frequency and ensure that the time is converted into frames for proper application.
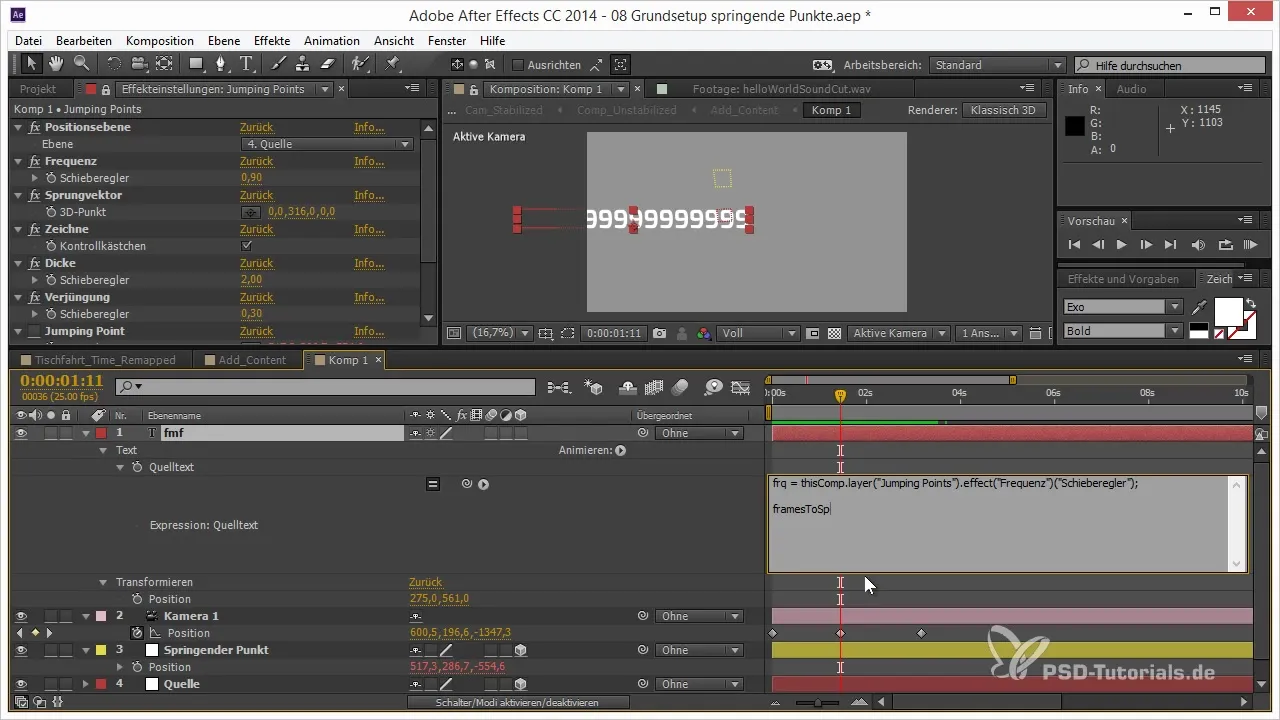
You need to determine the exact moment when the particles should be generated using an if statement. Once the time indicator reaches the specified range, you activate the spawning of the particles.
The calculation is done by taking the time in frames and dividing it by the corresponding frequency. This way, you can accurately generate the particles at the right moments.
Making Adjustments
If you want to make adjustments to the frames to optimize the animation, you can replace the time variable with a simpler variable like t. This tactic allows you to easily make time shifts.
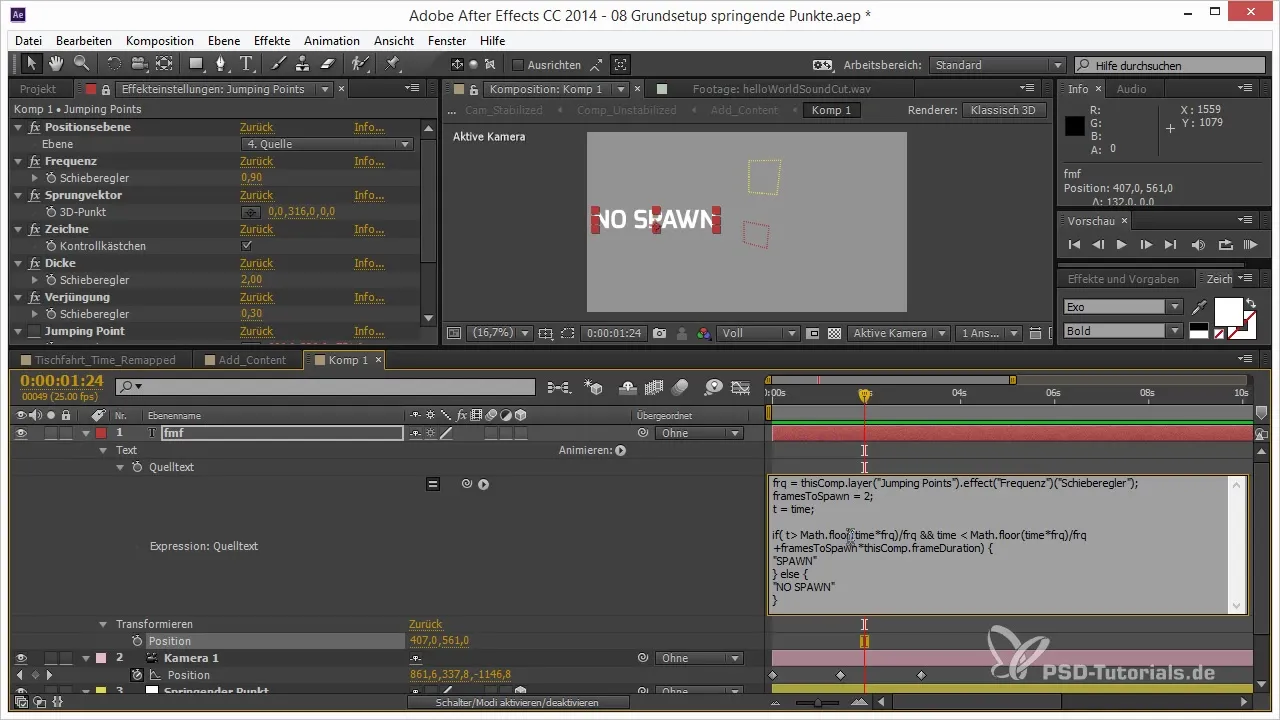
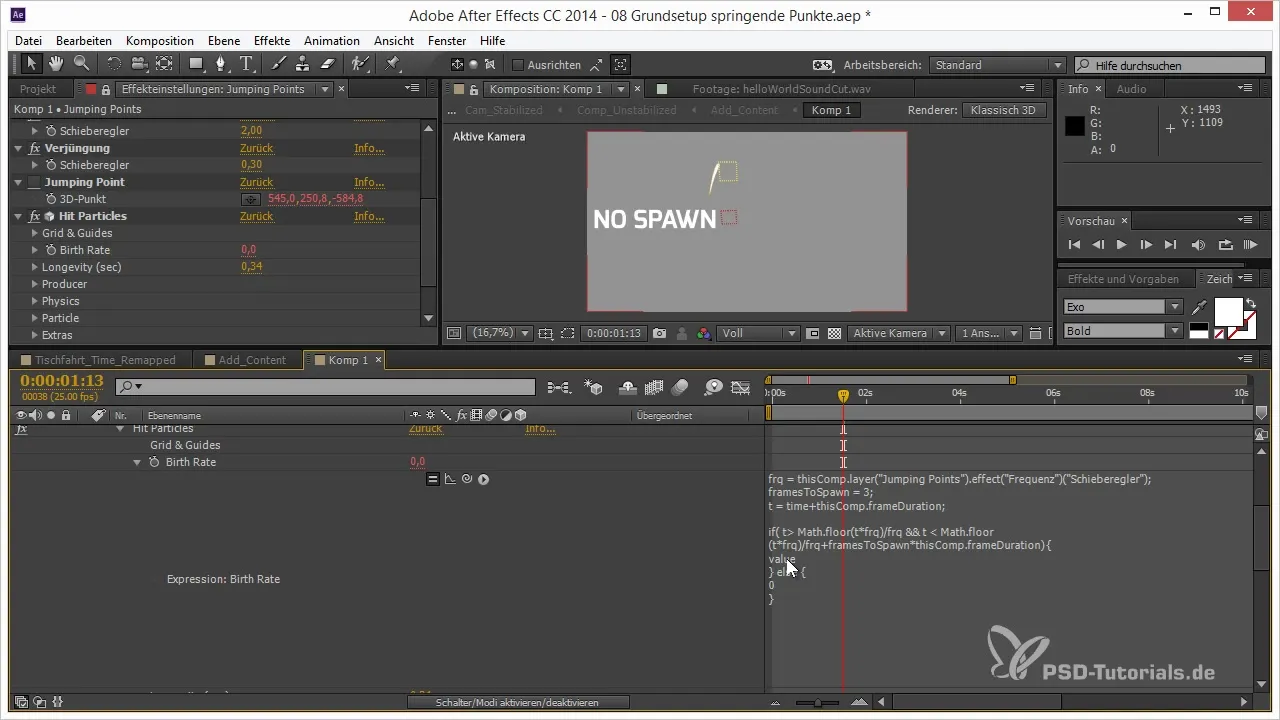
This ensures that you spawn at the right time and can control the animation precisely. Finally, you put all the parts together: replace the spawn parameters and use the expression to perfectly showcase your hit particles.
Summary – 3D Projects in After Effects: Jumping Points with Sinus and Hit Particles
In this guide, you learned how to create realistic jumping motions in After Effects using sinus functions and how to insert hit particles. The application of expressions and error handling ensures stability in your projects and brings your animations to life.
Frequently Asked Questions
How can I ensure that my expressions have no errors?Use the try-catch syntax to catch errors in your code and ensure that the value is not lost when an error occurs.
How does the calculation of the jump parameters work?Calculate the values using the formula progress * PI to shape the jumping motion over the range of 0 to PI.
How do I generate hit particles?Set a condition so that the particles are generated only when the point touches the ground, and implement the query using a frequency.
How do I adjust the timing of my animation?Use a variable like t for new time calculations that allow you to flexibly shift the animation.
How can I ensure that my particles appear at the right time?Calculate the exact moment for spawning the particles by converting the frame time into seconds.


