
The 3D tracker has already calculated the camera movement of your footage. However, the camera alone is of little use. Only when you bring the individual tracking points into your scene as null objects do you get spatial reference points to which you can align text, graphics, or other elements. That is exactly what this tutorial is about. You export the data, correct the position of the scene, and test the result with a placeholder text.
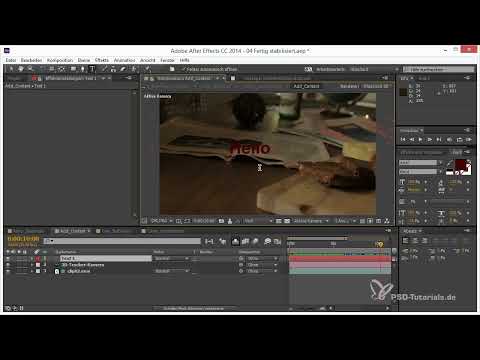
The video is only loaded from YouTube when you play it – data (including your IP address) is then transmitted to YouTube/Google. More in the privacy policy
Key Takeaways
- Tracking points can be exported as null objects via the Camera Tracker. To do this, you select the points and create the null objects with a right-click.
- The export should be done with the original camera. The smoothed camera visibly shifts the points.
- You should align the camera and null objects together under a helper null object so that the relationship of all layers to each other is preserved.
- A test text anchored to a null object quickly shows whether the track works cleanly.
- The Subspace Warp of the stabilization can distort foreground elements. After changes to the scene, you have to re-analyze it.
Step 1: Preparing the Composition for Export
Open the composition with the original shot to which the Camera Tracker is applied. The tracker must work with the default transform values here so that it performs the calculation correctly. Therefore, duplicate the composition and remove everything in the copy that you don't need for the export, such as the 3D layer that is just getting in your way.
Then activate the Solo button of the tracker layer. This way you see only the tracking points and can edit them without distraction.

Step 2: Creating the Tracking Points as Null Objects
With the Selection tool, drag a frame around all the points you want to export. Right-click the selection to open the context menu and choose the option for creating null objects. This creates null layers in the timeline, one for each selected point. In this tutorial, over 130 layers are created already, and that is perfectly normal, because each tracking point thus becomes its own anchor in the scene.

Step 3: Adding Missing Points
In the next pass, you add points that you overlooked during the first export. To do this, select the front points as well as the new points in the background in the Camera Tracker. Create null objects again via right-click. Feel free to proceed area by area, because especially in the background, points often appear that provide you with additional information about the depth of the scene.
At the end of the work, you arrive at a total of 230 null objects in this example. You won't necessarily need all of them later, but for a later reconstruction in Cineware, as much data as possible is helpful.

Step 4: Checking the Position of the Points
If you look at the null objects now, some points will no longer sit exactly at their places in the image. This is usually due to the wrong camera. You are currently viewing the track with the smoothed camera, not the original camera. Therefore, hide the smoothed layer and check again. Now the points should sit firmly on the image.
In this step, make sure that you perform the export with the correct camera version. Otherwise, you copy shifted data into your scene.

Step 5: Transferring the Null Objects into the Original Composition
Select all null objects and cut them from the composition with Ctrl + X. Then switch to the composition in which you want to continue working, for example the Additional Content, and paste them there with Ctrl + V. The null objects are thereby located behind the clip so that they don't cover the image.
To keep the timeline clear, you activate the Shy switch for all null objects. They are then hidden as soon as you turn on Shy mode. However, the null objects remain available for work.

Afterwards, you can reset the Solo button of the tracker layer. To do this, drag down the Solo button on all edited layers at the same time so that all layers receive the change. With multiple layers, this is the fastest method.

Step 6: Aligning the Scene with a Helper Null Object
After the export, the scene is often tilted or the origin is poorly placed. Therefore, create a new null object and enable the 3D property for it. Then select the tracker camera and all null objects, for example by holding down the Shift key. Next, parent the layers to the new null object using the Parent menu.
The camera absolutely must be selected as well. This is the only way to preserve the relationship between the camera and the null objects, and you can rotate the scene without destroying the track.

Now switch to the Right view and rotate the helper null object around the X axis using the Unified Camera tool and the W key until the table edge runs straight. For fine-tuning, you can also enter the values directly.
Check the result in the Top view and rotate the scene around the Z axis if necessary. Make sure the points lie on a common plane. Not every surface has to be perfectly level. A slightly tilted newspaper is perfectly fine in this case.

Step 7: Placing a Test Text in the Scene
Now create a text layer with the content "Hello World". In this example, the free font Exo is used, which is available on fontsquirrel.com. If you use a font from a free source, feel free to give credit to yourself and the creator. The font offers numerous styles, which is very handy for titles.
Set the text in uppercase, choose the color white, center it, and enable the 3D property. At the moment, the text is still somewhere in space and not at the spot where it should appear later.

Step 8: Anchoring the Text to a Null Object
So that the text appears at the right spot, you connect it to a null object. It helps to know the layer number. To do so, press the P key to display a layer's position. The layer number helps you quickly find the right null object in the Parent menu.
In the Parent menu, select the desired null object, in this example number 14. The layer then jumps directly to the position of the null object. After that, you can still slightly move, rotate, and scale the text so that it looks roughly the way it should appear in the final result.

Regarding the size, note that the stabilization will later crop part of the image. It's better to make it a bit smaller than to see the text cut off in the end.

Step 9: Testing the Track in the Stabilized Version
Switch to the stabilized composition in which the stabilization and the additional content are active. Here you can see whether the text stays cleanly in place. The scene should look stable even during camera movements. Watch whether the text drifts or jitters too much.

Step 10: Correcting the Subspace Warp Afterwards
During the check, you notice that the text is stretched vertically. This is due to the Subspace Warp, which was actually calculated for the background. Since it doesn't know that you have changed elements in the foreground, it applies its correction to your text as well.
The solution is to re-analyze the Subspace Warp after the changes. Pay attention to the result and repeat the process if necessary. A later tutorial will show you how to get the jumping points under control step by step.

FAQ
Why aren't my null objects sitting correctly in the image after the export?You are probably exporting with the smoothed camera instead of the original camera. Hide the stabilization, check the position again, and only export when the points sit firmly on the image.
Do I have to keep all the null objects?No, not necessarily. However, for a later reconstruction in Cineware, as much data as possible is helpful. The null objects also help you orient yourself in the scene.
Why should I select the camera as well when aligning?Only when the camera and null objects are parented together under the helper null object is the relationship between them preserved. Otherwise, the track shifts when you rotate the scene.
Why is my text stretched in the video?The stabilization's Subspace Warp corrects the distortion for the background. Since it doesn't know about your foreground changes, it distorts the text as well. Re-analyze the Subspace Warp after every change.


