
Imagine a light reflection gliding not only across the floor, but also across the espresso cup and the wooden board. It is precisely such details that make a scene believable. The simple Light Catcher in After Effects eventually reaches its limits here. This guide shows you how to export your scene to Cinema 4D Lite, tidy it up there, and integrate the original clip as a reference so that you can later recreate the lights precisely in 3D.
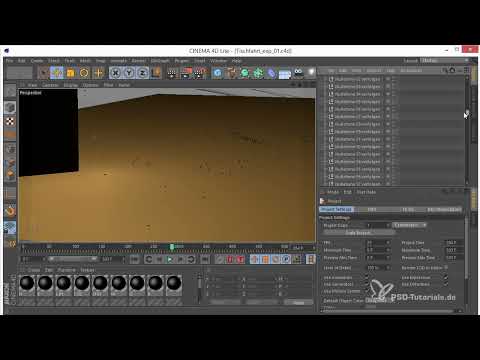
The video is only loaded from YouTube when you play it – data (including your IP address) is then transmitted to YouTube/Google. More in the privacy policy
Key Takeaways
- Cinema 4D Lite cannot be started by double-clicking. You open it from within After Effects.
- The Cinema 4D exporter transfers lights, null objects, and tracking points into a .c4d file.
- Unneeded elements such as the logo animation, tracking points, and tracker camera are removed before the rebuild.
- The world grid stays unchanged so that the lights retain the After Effects coordinates.
- With Make Preview, the clip is cached, which significantly speeds up navigation in Cinema 4D Lite.
Step-by-Step Guide
Step 1: Save the scene via the Cinema 4D exporter
First, open your scene in After Effects and get an overview of the available scene data with Control + Shift + H. There you will find the lights that will jump later, as well as the null objects that describe your scene spatially. The Light Catcher should come along too. Then go to File and Export to reach the Cinema 4D exporter.

Note: In older versions prior to the Creative Cloud, you have to install the exporter separately. It also requires that Cinema 4D is present in some version. In the Creative Cloud, Cinema is already included.
Step 2: Name the export file sensibly
Save the file in your project folder and assign a name that fits the project, such as Tischfahrt. For the export itself, a fixed convention has proven effective: exports from After Effects are named Exportprojekt 01. If you later make changes to the lights, this simply becomes Exportprojekt 02. This way you keep track of the versions.

Step 3: Open Cinema 4D Lite via After Effects
Double-clicking the exported file won't get you anywhere, because Cinema 4D Lite cannot be started on its own. Instead, you import the file into After Effects and drag it into your composition. There it appears as a Cineware layer. Via the entry Show Cineware Help, the Cinema 4D Lite window then opens. From this moment on, you can work with it normally, just like with the full version.

Step 4: Import objects into Cinema 4D Lite
Drag your Cinema 4D file from the Project window directly into the Object Manager. This brings all objects from After Effects into Cinema 4D Lite, even the textures for the logo. The null objects represent the tracking points, and the tracker camera is included as well. However, you don't need all of it. The lights with their Bounce Fades are kept, while the Jumping Points can be deleted. The logo animation is also not necessary for the rebuild.

Step 5: Remove materials and group null objects
Remove all materials except the Light Catcher's material, because you don't need the other surfaces for the reflections. Afterwards, you can sort the objects in the Object Manager. With Alt + G, you create a null object that acts as a group. Place the tracking points in it and rename the null object as well as the groups by double-clicking the name. Clear naming saves you a lot of searching time later, especially when many lights are involved.

Step 6: Unlock locked layers in the Layers Manager
The tracker camera initially cannot be removed because it is locked. You will find the reason in the Layers Manager at the bottom of the window. There is a Log Layer there, which is created whenever something was locked in After Effects. You can remove this layer with Delete. Using the small lock icon, you then unlock the layers so that you can also remove the tracker camera and the tracking points. After that, your project is tidied up.
Step 7: Save the Project as a New File
Save the cleaned-up project under a new name, for example Tischfahrt Light Catcher, using Control + Shift + S. The original Tischfahrt file remains untouched. If you export the scene from After Effects again later, you can simply copy the changed lights from the new export project and paste them into this render project. This way, you update the scene without having to recreate the entire setup.

Step 8: Create a Background Object for the Original Clip
Next, you bring the original clip into Cinema 4D Lite, because without it the scene can hardly be recreated. To do this, create a Background object via the object icon. This object is initially invisible as long as you don't assign a material. So double-click in the Material Manager to create a new material and name it, for example, Background. In the material properties you will find the Color channel. Drag your clip in there as a texture by dragging it from the footage folder directly into the field. Cinema then asks whether the file should be copied to the project folder. This is not necessary, because you are only using the file as a reference.

Step 9: Drag the Clip onto the Background Object
Then drag the finished material onto the Background object in the Object Manager. Now your original video appears as the background in the viewport. Note that this background is not rendered along with the scene. It serves exclusively as a visual template that you can use for orientation while modeling. Without this background, it would be quite difficult to recreate the scene based on the tracking points alone.

Step 10: Use Make Preview for Smoother Navigation
With large or heavily compressed video files, Cinema 4D Lite often stutters during playback. Make Preview helps here. You start the function with Alt + B or via the small menu in the middle of the window. Choose a hardware preview with a low resolution. The video is not actually rendered in the process, but stored in the cache. While Cinema creates this preview, it loads all frames into memory. Afterwards, you can navigate the scene much more smoothly. So wait briefly until the process is complete. The result in the Picture Viewer is irrelevant here.
Note: This procedure was tested with Cinema 4D Lite R14. You should check for yourself whether the behavior changes in newer versions.

Step 11: Remodel the Scene Without Changing the World Grid
Normally, you would now adjust the zero point and the world grid to the table in order to work more easily. However, don't do that. Your lights are in After Effects coordinates, and as soon as you move the origin, they get mixed up. As a result, you would no longer be able to swap them out cleanly later. Instead, model the scene so that it roughly fits. The exact position is then left to the original setup, and the reflections can be planned precisely afterwards.

Summary – After Effects Export to Cinema 4D Lite for Light Reflections in 3D
With the Cinema 4D Exporter, you transfer your lights and null objects from After Effects into a Cinema file. You open Cinema 4D Lite via the Cineware layer in After Effects. Then you clean up the project, remove locked layers in the Layers Manager, and save the result as a separate file. The original clip serves as a background reference, the Make Preview function speeds up navigation, and the world grid remains unchanged so that the lights stay interchangeable later.
FAQ
Why can't Cinema 4D Lite be started by double-clicking?Cinema 4D Lite must be launched from within After Effects, for example via Show Cineware Help in a composition with the exported file.
Do I have to buy Cinema 4D separately to use the exporter?Cinema 4D is already included in the Creative Cloud. Older versions from before the Creative Cloud require an installed version of Cinema 4D and the additionally installed exporter.
Why isn't the clip in the background rendered?The clip serves only as a visual reference when recreating the scene and is not part of the final render result.
Why shouldn't I move the world grid?The lights are in After Effects coordinates. If you move the origin, they can only be swapped out later with difficulty or not at all.
What does Make Preview do?Make Preview stores the frames in the cache, so that Cinema 4D Lite loads the images faster and navigation in the scene becomes smoother.


