
Jumping points are among the elements that show up again and again in motion design projects, and that is exactly why a clean basic setup is worthwhile. If you animate every jump movement individually with keyframes, you have to start over with every change. This tutorial shows you a different way: you build a system that calculates the jumps via expressions, and you then control them with just a few sliders. You also get a trail that traces the jump path through space.
The video is only loaded from YouTube when you play it – data (including your IP address) is then transmitted to YouTube/Google. More in the privacy policy
The approach is deliberately non-destructive. You change frequency, direction or path without setting keyframes again. As the tutorial progresses, you will also see why simple solutions like Animate Paint in 3D fail, and how you can instead create a true spatial solution with the CC Particle World plugin.
Key Takeaways
- The jumping points are controlled via an expression. With it, you change frequency, jump direction and stroke display via Expression Controls instead of animating every movement anew.
- A source layer defines the base path. The jumping point follows it, and you can control it via position keyframes or curves.
- Animate Paint looks convincing in 2D, but loses perspective when the camera moves. For true 3D trails you need particles.
- CC Particle World is suitable for the trail if you couple the particles to the jumping point via the Emitter Position field.
- The coordinates of After Effects and the particle world are scaled and centered differently. You have to convert the values using the composition width so that both systems fit together.
Step-by-Step Guide
Step 1: Understanding the Structure of the Jumping Point Layer
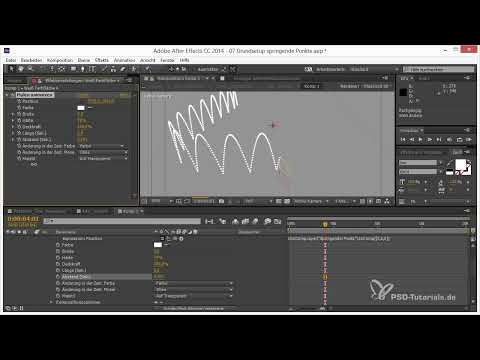
First, open the layer "Jumping points". It is the template that you will later import into your composition for each jumping point. It already contains several Expression Controls: a position layer as the source, a frequency that determines how often the point jumps per second, a jump vector for the jump direction, a checkbox for enabling drawing, a stroke thickness and a taper toward the end of the stroke. The result of the expression is the actual Jumping Point.
In this layer, take a look at how the controls work together. You don't need to fully understand the expression itself in this step. All that matters is which control is responsible for what.

Step 2: Using the Source as the Base Path
The source layer is the key to flexibility. It determines along which path the jumping point moves. Drag the position of this source from left to right with keyframes, and the jumping point follows exactly this route. The jump arcs are created automatically by the expression.
Activate the small curve icon on the source's position property. That way, you can see in the Graph Editor how the position changes over time. This curve is also the path on which your jumping point jumps. So you can shape it deliberately, for example with a small arc in the Z direction.

Step 3: Testing the Frequency and the Jump Path in 3D
Now adjust the frequency. A value of three jumps per second produces noticeably smaller jumps, while the point still follows exactly the same path. This is exactly where the advantage of the system shows: the path stays unchanged, and only the behavior changes.
Next, add a camera and look at the movement in perspective. The jumping point has to work in 3D space, even when you shift the position in between. The jumps follow the route you set, and they remain correct from other angles as well.

Step 4: Why Animate Paint Reaches Its Limits
An obvious idea for the trail is the "Animate Paint" effect. It draws a stroke along the movement of a point. If you link it to the jumping point, you have to convert the 3D position into a 2D coordinate using "to Comp". With a length that you limit to a few tenths of a second, the result already looks quite convincing.
However, as soon as you move the camera, the problem becomes apparent. The stroke remains a 2D drawing and ignores perspective. The real jumping point moves in space, the trail does not. This solution is therefore only suitable for static viewing angles. For your requirements, you need something that actually exists in space.

Step 5: Building the Particle Trail with CC Particle World
The solution lies in particles. With CC Particle World, After Effects comes with a built-in effect that moves entirely in 3D space. You can find it under Effects & Presets. The first time you call it up, loading takes a little longer. Make sure not to use the "Particle Systems" variant, as it only works in 2D.
Alternatively, you can use Trapcode Particular. It offers more design options, but for this basic setup, CC Particle World is perfectly sufficient.

Step 6: Cleaning Up the View
So that you are not distracted by additional helper information while working, deactivate all checkboxes for grid, guides, and rulers in the view options. After that, you only see your particles. This makes controlling the trail considerably easier.

Step 7: Linking the Emitter to the Jump Point
The trail should always originate at the current position of the jump point. For this, the particles need to have the emitter at this location. The simplest way is via a layer with the jump point, which you place in the composition as a 3D layer. You can additionally add a null object to see the point better. Then compare the position of the null object with the position of the jump point. You will notice that the values do not match.

Step 8: Converting Coordinates Between After Effects and CC Particle World
The reason for the discrepancy lies in the coordinate system. In a composition of 1920 by 1080 pixels, the center is at 960 and 540. The particle world, by contrast, works with a center at 0,0 and sets the width of the composition as a unit of 1. This is easy to check: set the position of the emitter in the particle world to 1 and compare the result in the viewer with the composition width. You will see that exactly one width has been covered.
The conversion method is therefore as follows: you subtract half of the composition width or height from each coordinate and divide the result by the composition width. For the X position, the expression looks roughly like this:
Note that the Z position is at zero in the center. Here you do not need to subtract anything, but you still divide by the composition width. Link the three axes to the corresponding values of the jump point so that the emitter sits exactly on the point at all times.

Step 9: Checking the Result with the Camera
Finally, you move the camera around the scene and animate it. The emitter stays attached to the jump point, and the trail follows the actual 3D path. Since both points exist in the same space, the perspective is correct from every angle. With that, you have completed the basic setup, and the next step is designing the trail itself.

Summary ??? Jumping Points in After Effects: Building a Flexible 3D Setup with Expressions
You have built a basic setup for jumping points that can be adjusted at any time. The jumps are created via an expression that controls frequency, direction, and stroke display through sliders. You define the path via a source layer, so you can make changes to the movement without rebuilding the animation. For the trail, you saw why Paint animation fails with a moving camera, and instead implemented a true 3D solution with CC Particle World. The decisive part is the conversion of coordinates via the composition width, because it connects the jump point and the particle emitter. In the next step, you will design the trail and thereby make it a permanent part of your projects.


