
A portrait behind a pane of glass whose pores and streaks remain visible: this look seems elaborate, but it can be created in After Effects entirely without additional plug-ins. All you need are the built-in effects, an adjustment layer, and a camera. With the glass layer from the project, you build a glass wall that distorts everything behind it, and with a few finishing touches you get an image that looks significantly more refined than the original.
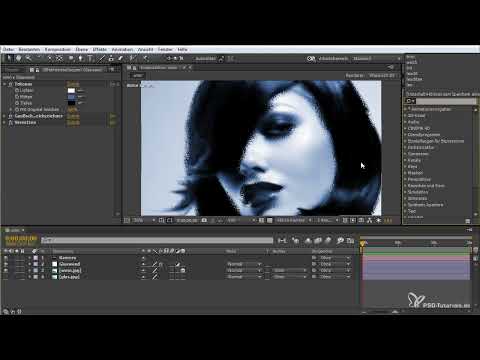
The video is only loaded from YouTube when you play it – data (including your IP address) is then transmitted to YouTube/Google. More in the privacy policy
The tutorial guides you from preparing the composition through the distortion to the vignette, light accents, and motion. You can replace the sample image with your own at any time.
Key Takeaways
- The glass layer serves as a distortion template for the Displace effect (Displacement Map) on an adjustment layer.
- A 3D camera lets you view the glass effect from different angles and use the glass wall as a real layer in space.
- The Gaussian Blur must be placed above the Displace effect, otherwise the distortion is cancelled out again.
- Vignette, text layer, shadow, and light accents can be added with simple means and give the look depth.
Step-by-Step Guide
Preparing the Composition and Inserting the Glass Layer
First create a new composition and drag the sample image of the woman into it. Then add the glass layer, which is included in the project and was created in Photoshop. It is the heart of the effect, because its brightness structure later determines how strongly and in which places the image is distorted. Drag the glass layer into the composition above the portrait so that you can see and edit it at any time.

Creating the "Glas Wand" Adjustment Layer
Right-click in the layer panel and choose "New" and then "Adjustment Layer". Name it "Glas Wand" right away so you can quickly find it later. The adjustment layer acts like a filter on everything beneath it, and you use exactly this property for the glass wall.

Applying the Displace Effect to the Glass Wall
Search the Effects panel for the "Displace" effect and drag it onto the "Glas Wand" adjustment layer. You immediately see at the image edges that something is changing. Since the effect shifts pixels beyond the image edge, gaps appear in the corners. You can close them with the option for filling the edge pixels. With other images, however, this method leads to visible stripes or color segments, so you should always check the result critically.

Checking the Gaps at the Edges
If filling the edges creates unattractive patterns, it is worth taking a look at the image framing. In the sample image, the gap at the top in the area of the head stands out, and the color segments disturb the look. In this case, the fill is therefore not helpful. Make sure that this area will later lie outside the effect's reach anyway thanks to the camera movement.

Disabling the Glass Wall and Adding a Camera
Disable the layer with the glass template by turning off the eye icon. It is only needed as a distortion source for the effect and should not appear visibly in the image. Then add a camera via right-click and "New" and give it a sensible name. Activate the 3D switch for the portrait layer so that the woman can be placed in space.

Positioning the Woman in 3D Space and Zooming
Now place the woman in 3D space and adjust her so that she stands behind the glass wall. Zoom in a little with the camera so that the effect does not later extend beyond the wall edges. The distortion is retained, but no longer causes problems in the corners.

Checking the Glass Effect and Refining the Distortion
Switch back to the adjustment layer "Glas Wand" and open the settings of the Displace effect. There, select the glass layer that you deactivated earlier as the displacement layer. Now the image becomes visibly textured, and this distortion effect is exactly the goal. Experiment with the values for the horizontal and vertical displacement until the strength of the glass suits your subject.

Test camera movement and depth
Rotate the camera and look at how the effect behaves in space. The advantage of this technique is particularly evident when zooming in, because the pores and hatchings stay in place and look like real irregularities of a glass pane. The illusion also remains stable when rotating, which makes the look very convincing.

Use Gaussian Blur correctly
Search the effects palette for "Gaussian Blur" and drag it onto the portrait layer or into the layer chain, but in such a way that it sits above the Displace effect. If it sits below it, the glass effect is neutralized, and the image just looks blurry and dull. With a slight blur, on the other hand, you get the desired frosting of the glass, which makes the distortion appear softer and higher quality.

Adjust the color tone with the Tritone effect
For a coherent color look, you can use the "Tritone" effect. Drag it onto the glass wall and set the highlights or shadows to a cool blue tone. Make sure the effect is placed at the very top of the chain so that it affects the entire result. Afterwards, compare the image with the original, and you will see how much the impact has changed.

Add a glow effect for highlights
To make the glass surface look like a mirror, you can add a glow effect. This increases the white values and makes bright areas light up. Use the effect sparingly, because too much shine quickly looks artificial. A camera movement shows you how the light reflections travel across the image.

Create a vignette with a mask
For a darker edge area, create a new solid in a dark gray tone. With the Ellipse tool, draw a shape in the center of the image, set the mask to "Subtract", and slightly increase the mask expansion until the shape fits properly. Move the mask so that it is centered, and increase the mask feather until the vignette fades out softly. A deep black would darken the look too much, which is why a dark gray is the better choice.

Insert text and match the color
A text layer rounds off the design. With the Text tool, create, for example, the lettering "Dark Woman" and place it so that it complements the subject without covering it. Adjust the hue and brightness of the text to the overall image so that it blends in harmoniously.

Use shadows and 3D layers
If you turn the text or another element into a 3D layer and push it behind the glass wall, it partially disappears behind the glass. This looks very appealing. Then duplicate the effect, place the copy a bit higher, and give it more brightness so that an interplay of shadows is created. Move the camera over the point of interest to show the movement of the shadow behind the wall.

Design a camera move and flash effect
For dynamics, you can animate the camera via the point of interest and the position. Then you add a white solid that starts with a keyframe on the opacity. Set the value at the beginning to zero and let it flash briefly. This creates a flash of light that introduces the transition into the scene.

Design a transition via the anchor point
If you have already animated the position, you can use the anchor point to fine-tune the image framing. Press the A key to activate the anchor point. End the transition with a zoom into the eye and use the Easy Ease function with F9 so that the movement ends smoothly.

Finishing up and replacing the image
Finally, move the composition into position so that the zoom into the eye ends cleanly, and end the work area with the N key. Afterwards, you can replace the sample image with your own at any time. The settings remain in place, so you can repeat the glass effect with any subject.

Summary ??? Creating a glass wall effect in After Effects without plug-ins
With a glass layer, an adjustment layer, the Displacement Map effect, and a camera, you create a convincing glass look without any additional software. Pay attention to the order of the effects, especially with the Gaussian Blur, and use vignette, tint, and light accents for the final impact. With this method, you can place any subject behind a glass wall and give it its own style.
FAQ
Do I need additional plug-ins for this effect?No, all steps can be done with the standard features of After Effects.
Why does the glass effect disappear when I apply the blur?The blur is probably below the Displacement Map effect; move it up so that it is applied last.
Can I use my own image?Yes, you can replace the sample image with your own at any time and then adjust the settings.
What is the glass layer from the project used for?It provides the brightness structure the Displacement Map effect uses to distort the image.
Why shouldn't I make the vignette black?A dark gray looks more natural, since pure black darkens the image too much.


