
Imagine a drop falling out of the darkness onto a smooth surface, bursting open and leaving a smeared trail behind, while the camera flies through a tunnel of color streaks. In this guide, you will recreate exactly this look step by step in After Effects. You don't need any elaborate 3D software for it, but above all a good feel for layers, masks, and camera movements.
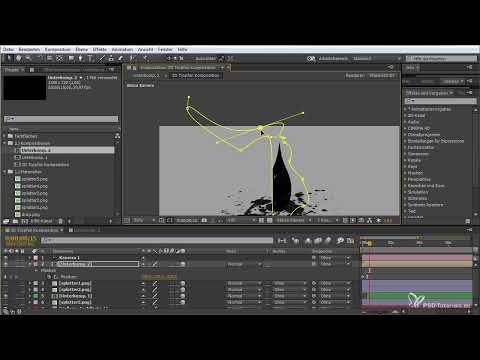
The video is only loaded from YouTube when you play it – data (including your IP address) is then transmitted to YouTube/Google. More in the privacy policy
The guide is based on a tutorial for beginners. You will work with prepared splatter effects that were created in advance in Photoshop. Along the way, you will learn how to place layers in 3D space, use masks for appearing and disappearing, animate a camera move, and refine the scene with depth of field and motion blur.
Key Takeaways
- A clean folder structure with separate folders for materials and compositions saves you a lot of searching later.
- All layers that are supposed to sit in space need to be 3D layers. Only then do the camera and depth effect take hold.
- Nested precompositions allow you to move, rotate, and duplicate several splatter effects as one unit.
- Masks with animated expansion let the drop appear first and later disappear in the splatter.
- The camera move feels most lively when the motion already begins in the first frame.
- Depth of field and motion blur turn a simple scene into a cinematic animation.
Step-by-Step Guide
Prepare the Project and Folder Structure
First, create a new composition with 1280 x 720 pixels and a length of 15 seconds and name it, for example, "3D Drop". Then create two folders in the Project panel: one for your materials and one for compositions. Put the splatter files from the project package into the materials folder and the main composition into the compositions folder. This structure seems unnecessary at first, but it pays off as soon as the project grows with numerous layers.

Create the Background with a Solid
Create a new solid via the menu and color it a slightly darker gray. This surface serves as the base on which the liquid will land later. A neutral tone makes the colors of the splatter effects stand out much more strongly than a loud background.

Import the Drop and Splatter Effects
Drag the drop clip into the timeline via double-click or drag and drop so that it becomes visible. Then import all the splatter effects. Activate the 3D switch for each layer. After that, create a new camera via the context menu. The default camera settings are completely sufficient to start with; you can adjust them at any time later.

Select and Combine Splatter Effects
Now activate the individual splatter layers one after another and pick out the variants you like. You can also combine two effects by overlapping them. Then scale the layer up a bit and stretch it slightly in width until the motif looks harmonious. Next, select both layers and create a precomposition, for example with the keyboard shortcut Ctrl or Command plus Shift plus C. Also activate the 3D switch for this new composition so that you can rotate it freely in space. With the Rotation tool (R), you tilt the motif slightly in the desired direction.

Place the Drop and Create Depth
The drop is the actual main character of the scene. Duplicate it once or twice so that it looks stronger, and move the copies via Position so that they lie in front of the splatter. It helps to check in the camera view whether the drop is actually in the foreground. If necessary, slightly reduce the brightness of the drop layers so that they don't stand out too strongly from the background. A value of around 87 percent works well in this example. Finally, make the drop a little smaller so that it falls more realistically from above.

Paint a Mask for the Drop's Appearance
Open the splatter's subcomposition and select the Pen tool. Use it to draw a freehand mask that roughly matches the shape of the impact point. Then switch to the mask settings and initially shrink the mask. To do this, set a keyframe at the beginning and move the time marker forward a bit. Holding down the Alt key and clicking on an anchor point selects all the points. Then hold down Ctrl or Command, Shift, and Alt and drag the points outward to expand the mask. Then go back in reverse order so that the mask shrinks again at the end and the splatter only flashes briefly.

Letting the drop fall and hit
Go back to the main composition and set the position of the drop so that it starts above the image. Set a keyframe for the starting position and another for the end position just before impact. Watch the movement in the preview and adjust the curve until the fall looks natural. Then shift the splatter's sub-composition slightly in time so that the animation only begins when the drop reaches the ground. With the key combination Shift and Page Down, you can jump through the timeline in larger steps, which speeds up fine-tuning.

Making the drop disappear
For the disappearance, you use the same technique as for the appearance. With the pen tool, draw a new mask that covers the area around the point of impact, and use it to swallow the drop, so to speak. Expand the mask using keyframes until the drop has completely disappeared. You can find the mask expansion directly in the layer's mask settings. This approach creates the impression that the drop merges into the splatter.

Animating the camera move
Now the real dynamics come into play. Set a keyframe at the beginning and another at the end in the camera position. Then move the camera through the scene and observe how the splatter layers shift in space. Make sure the movement already begins on the first frame, because a camera that starts from a standstill looks stiff. Test the flight several times and adjust the in-between frames until the impression of a fly-through emerges.

Adding more splatter effects and placing them behind the scene
Now add more splatter layers and scale, rotate, and move them. One layer is scaled somewhat larger and pulled slightly backward so that it lies behind the main scene. This creates the illusion of a background in front of which the action takes place. Don't overdo the scaling, because differences that are too large quickly look unnatural. A slight shift is usually enough.

Activating and adjusting depth of field
In your camera's settings, select the option for depth of field and activate it. After that, you need to adjust the aperture and the focus distance. Set the focus distance to 900, for example, and observe from which point the scene becomes soft. At first, the result often looks blurry, so you should change the values step by step. If needed, you can also increase the blur strength, for example to 50 percent. This makes areas that are very close or very far away noticeably blurrier. Change the aperture toward the end of the animation so that the impression of sharpness changes over time.

Creating strokes
Strokes are narrow, drawn lines that give the scene speed. To do this, create a dark solid as a new layer and draw an action on it with the pen tool by moving freely across the surface with a soft brush. From this line, a stroke is created that you can then use in 3D space. Use several strokes, color them green, for example, and move them backward so that they give structure to the background.

Arranging strokes into a tunnel
Duplicate a stroke with Ctrl or Command and D. Scale the copy with the S key and place it in the opposite direction. Position the layers so that they look like a winding tunnel through which the camera flies. A small counter-movement on individual strokes adds extra dynamics to the image. You don't have to copy the arrangement exactly; what matters is that the overall impression is coherent.

Finishing touches with rotation and motion blur
In the intro, you can add a slight rotation so that the scene glides from a wide shot into the starting position. To do this, set keyframes for the orientation and offset them slightly relative to the camera move so that a dynamic effect is created. Finally, turn on the motion blur switch for all moving layers. The background layer is excluded from this. Then render a preview in slow mode to check the result. Save your progress regularly with Ctrl or Command and S.

Summary ??? Creating an After Effects Drop Animation with a 3D Camera Move and Strokes
In this tutorial, you learned how to build a drop animation using prepared splatter effects, masks, 3D layers, and a camera. You made the drop fall and disappear, set up a camera move, and refined the scene with depth of field, strokes, and motion blur. The technique can easily be transferred to your own subjects. If you combine duplicating, scaling, and mask animations, you can create impressive effects with little effort.
FAQ
Do I need special plugins for this animation?No, the basic technique works with the standard tools of After Effects. Additional plugins such as Lens Flares or 3D text can enhance the look later, but they are not strictly necessary.
Why should I convert layers into 3D layers?Only 3D layers respond to cameras and can be moved, rotated, and arranged at different distances in space. Without them, the scene looks flat, and the camera move has no visible effect.
What is the precomposition for?A precomposition combines several layers into one unit. This allows you to move, rotate, and duplicate them together without having to edit each layer individually.
How can I tell whether the drop is in the foreground?View the scene from the camera view and move the camera slightly forward. If the drop is correctly in the foreground, it will cover the splatter layers behind it.
Why does the depth of field look so blurry at first?The focus distance has not yet been set properly. Change it step by step and check in the preview until the sharp area is on the main subject.
Can I change the colors of the strokes afterwards?Yes, you can assign a new color to each layer. Green, as shown in the tutorial, is just an example. Also try darker or higher-contrast tones.
How do I save render time during tests?Temporarily disable splatter layers you don't need and the depth of field. Only re-enable them for the final render.


