
Have you ever imported a video in which fine lines move, hair flickers, or edges look jagged? Then interlacing, also known as the Zeilensprungverfahren, is often behind it. This technique dates back to the early days of television and today you mainly encounter it with older footage, broadcast material, and certain formats. In this guide, you will learn how interlacing works, how to recognize it, and how to handle fields correctly in After Effects so that your footage can be displayed and processed cleanly.
The video is only loaded from YouTube when you play it – data (including your IP address) is then transmitted to YouTube/Google. More in the privacy policy
Key Takeaways
- Interlacing splits each frame into two fields that are built up one after the other. This saves bandwidth, but can cause flickering or jagged edges during motion.
- With a video at 30 frames per second, 60 fields per second are transmitted. The abbreviation "i" stands for interlaced, "p" for progressive, meaning full frames.
- You need to know which field comes first (upper or lower field). This information is usually found in the briefing or in the metadata of the footage.
- In After Effects, you can remove fields when rendering or read them correctly via "Interpret Footage". After that, the footage can be edited cleanly.
Step-by-Step Guide
Step 1: Understanding the Origin of Interlacing
Interlacing was developed around 1920 to reduce flickering in television broadcasts. At that time, the available bandwidth was limited and the picture tubes flickered heavily. Instead of transmitting a complete frame at once, each frame was divided into two fields that are displayed one after the other. This technique significantly reduces the amount of data required.

Step 2: Following the Structure of the Fields
The video demonstrates the structure clearly. The first field contains the odd lines, that is, the first, third, fifth, and so on. Only afterwards is the second field with the even lines built up. Only when both fields are complete does the full frame result. This very order is decisive later on when you determine which field is displayed first.

Step 3: Recognizing the Formation of the Bar Pattern
A field contains only half the number of lines. During motion, the two fields shift minimally against each other, so that a so-called bar pattern becomes visible. You can recognize it especially in fast movements and at edges that shift in the image. Keep in mind: the "i" stands for interlaced, the "p" for progressive and thus for a complete frame.
Step 4: Inserting the Test Footage into the Timeline
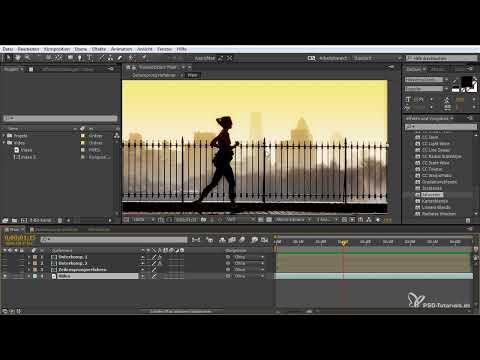
For the practical exercise, you drag the test video into your project and into the timeline. In the tutorial, a scene with strong contrasts is used because interlacing shows up particularly well here. Make sure to place the layer so that the scene is clearly visible. To do this, hold down the Shift key while moving so that snapping stays active.

Step 5: Preparing the Output as Progressive
The video shows the state in progressive mode, that is, as complete frames. To output the footage accordingly, open the render queue with the keyboard shortcut Ctrl or Command plus M. There, under the optimal settings, you choose the option with which you can control the fields when rendering.

Step 6: Setting the Field Order
In the render menu, you will find the option to use fields. Here you decide whether the upper or the lower field is displayed first. If you do not know this information, it is worth taking a look at your briefing or the technical specifications of the footage. If chosen incorrectly, motion looks jerky or unnatural.

Step 7: Setting the Pulldown and the Destination Folder
Next, you enable the pulldown, provided your footage requires this conversion, and check whether all settings are correct. Then you choose the destination folder, adjust the file name, and confirm with "Save". After Effects remembers this save location for further outputs.
Step 8: Rendering the Scene
Click on "Render". Depending on the length and your computer, this process takes a short moment. Afterwards, the scene is available as a file without the distracting interlacing.
Step 9: Check the rendered result
Drag the newly rendered file into the timeline. In the tutorial, it becomes clear that the scene now looks calmer. The flickering on the hair and legs is clearly reduced, which shows that After Effects interprets the footage correctly and has disabled interlacing.

Step 10: Adjust the footage via "Interpret Footage"
If you want to continue using the original file with correct field control, right-click the file in the Project panel and select "Interpret Footage". There you specify whether the footage contains fields and in which order they are arranged. Compare the preview with and without the setting to find the appropriate result.

Step 11: Make interlacing visible in the preview
In the interpretation options, enable interlacing for the file and play the scene. You will notice that the flickering appears again. This direct comparison in particular helps you understand the effect and recognize it in your own footage.

Step 12: Use anti-aliasing to improve quality
After Effects also offers an anti-aliasing option. Enable it to display the edges, for example on the hair or legs, more softly. In the tutorial the improvement is only subtle, but with fine lines it can help noticeably. Then confirm with "OK".
Step 13: Revert the settings if needed
If you want to undo interlacing or set it differently, open the file again via "Interpret Footage". Adjust the options to your needs. This way you can later edit the same footage with different parameters without having to re-import it.
Step 14: Duplicate and reuse a render preset
If you want to use the same render settings again, you can duplicate the preset in the render queue. To do so, hold down the Command or Ctrl key and the D key to copy the preset. You can then delete the original if you no longer need it. The setting will then be available to you again at any time.

Summary – Interlacing in After Effects: Handling interlaced footage correctly
Interlacing is a historical technique that saves bandwidth but can cause flickering and jagged edges during motion. You can recognize it by the bar pattern and by the distinction between interlaced and progressive. In After Effects, you can output the footage as full frames when rendering or specify the appropriate field order via "Interpret Footage". Pay attention to the specifications in the briefing beforehand and always compare the result in the preview so that your footage looks clean and calm.
FAQ
What does interlacing mean?Interlacing is the process in which each frame is split into two fields. One contains the odd lines, the other the even lines.
Why is interlacing still used today?The technique is mainly needed for certain older formats and broadcast material. As a rule, it has been replaced by modern progressive methods.
How can I tell whether a video is interlaced?Typical signs are a bar pattern during motion, jagged edges, and flickering on fine lines such as hair.
What do I need to consider regarding field order?You should know whether the upper or the lower field is displayed first. If set incorrectly, the motion looks jerky or unnatural.


