Would you like to learn how to upload an image in an object-oriented web application using PHP and save it in a database? In this step-by-step guide, I will walk you through the process of transferring the image from the frontend to the database. By the end, you will have a functioning upload system that allows you to securely store images.
Key Insights
Uploading and storing images in a database involves several steps, including validating the upload, processing the image information, and correctly storing the paths in the database.
Step-by-Step Guide
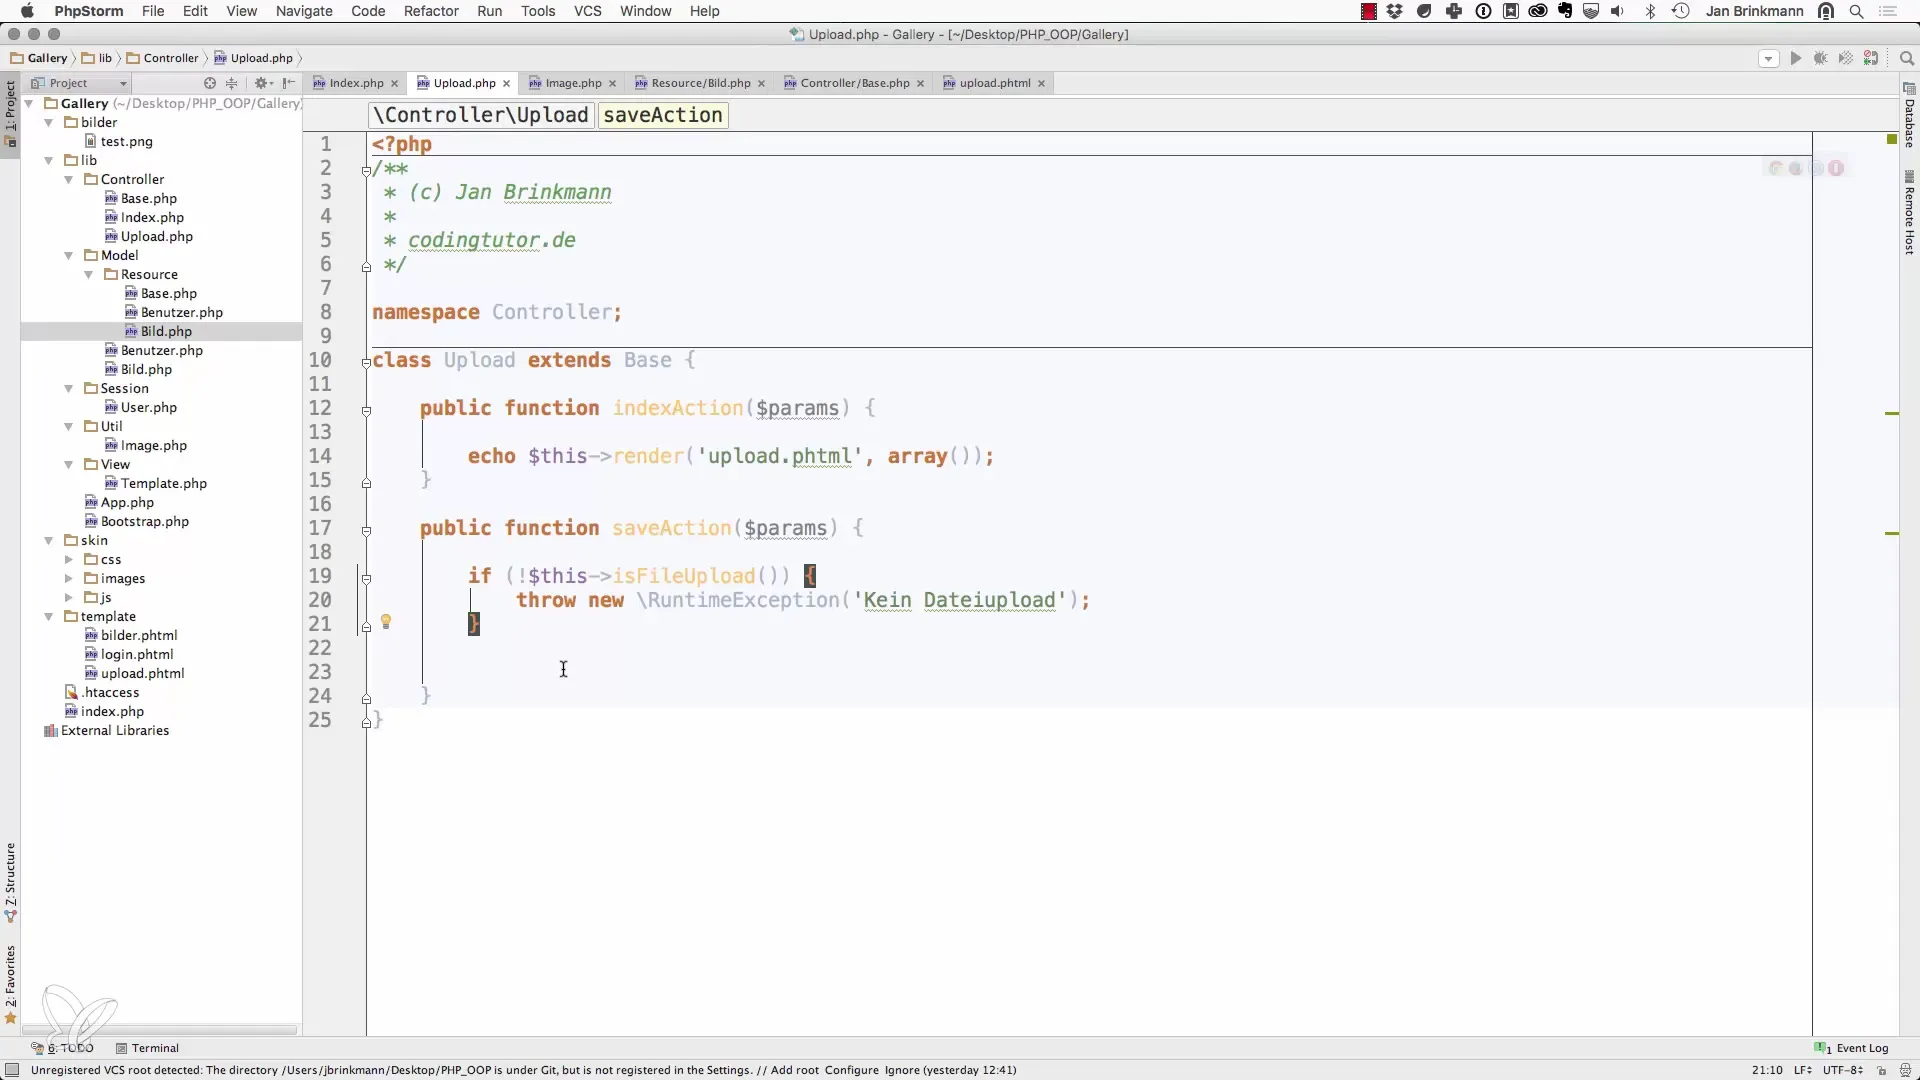
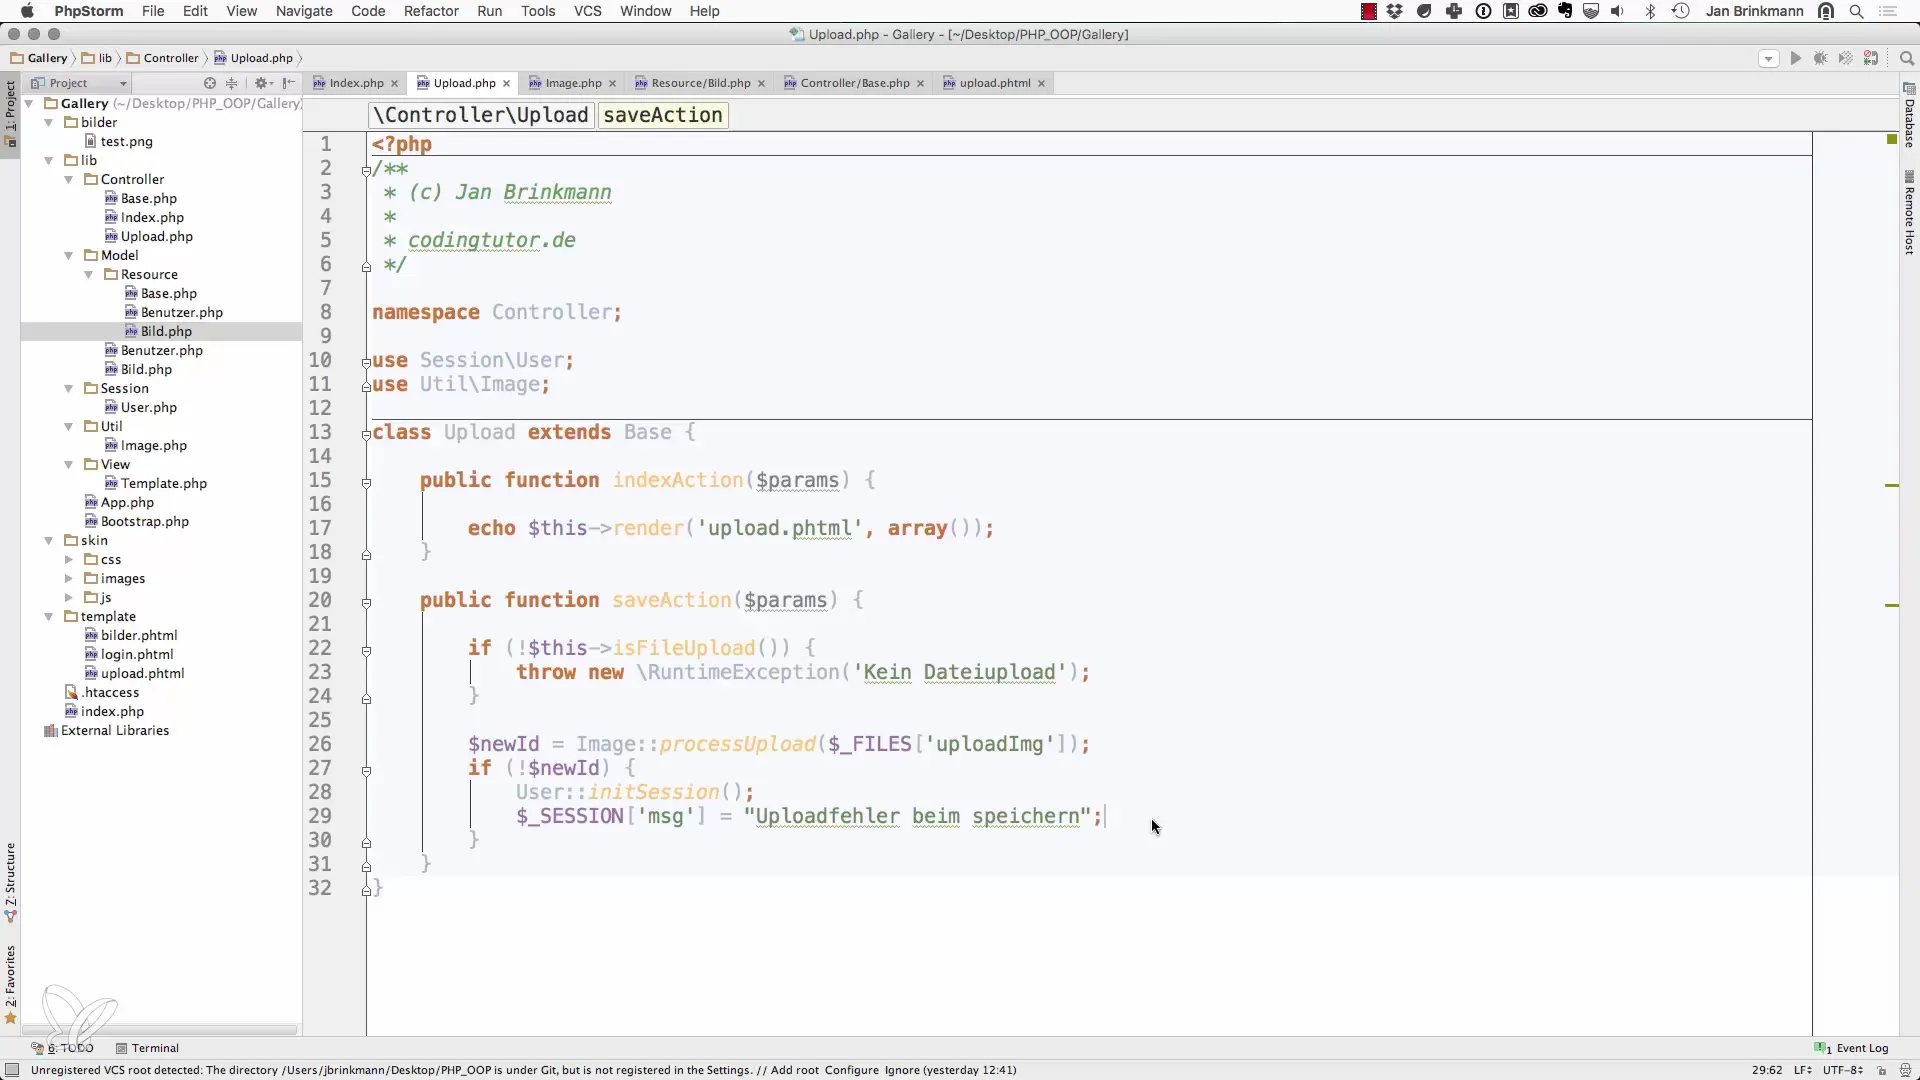
First, we take a look at the controller responsible for the image upload. Here we check if an upload is present and then pass the image for processing.
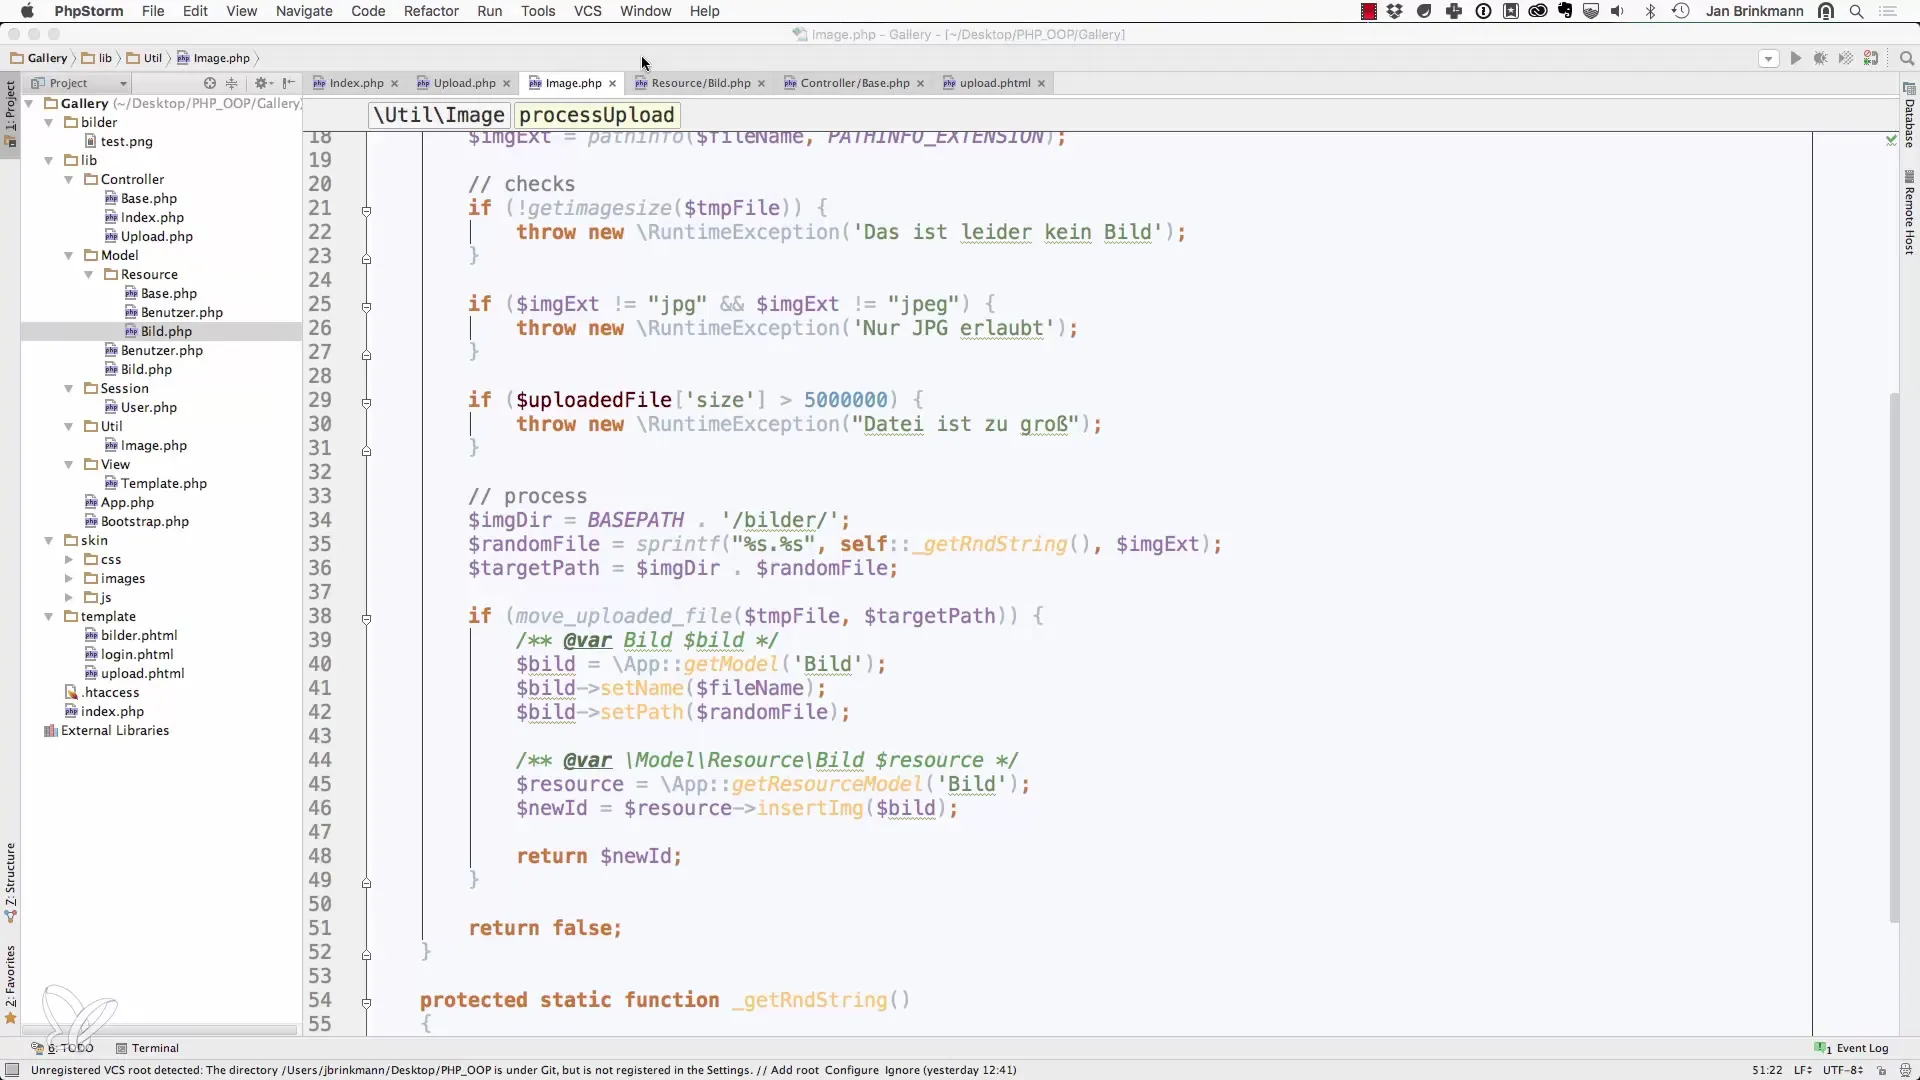
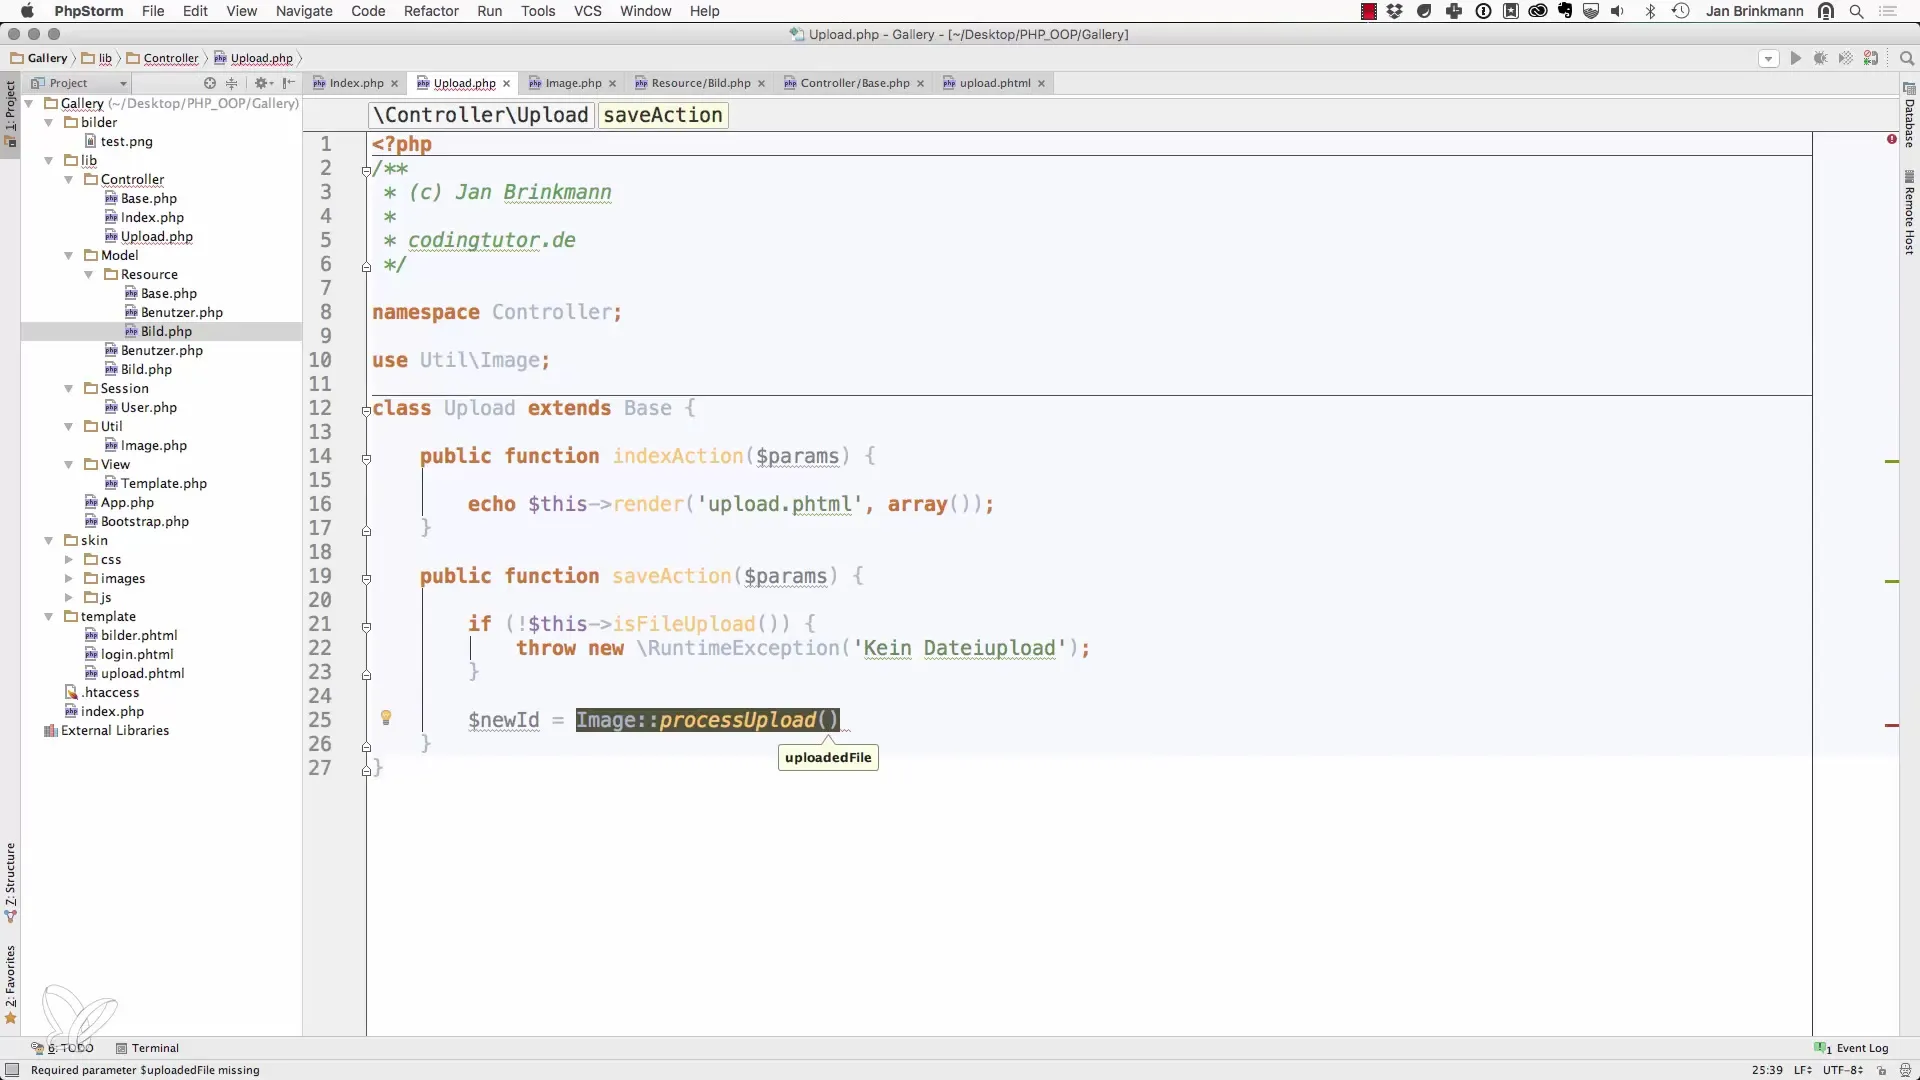
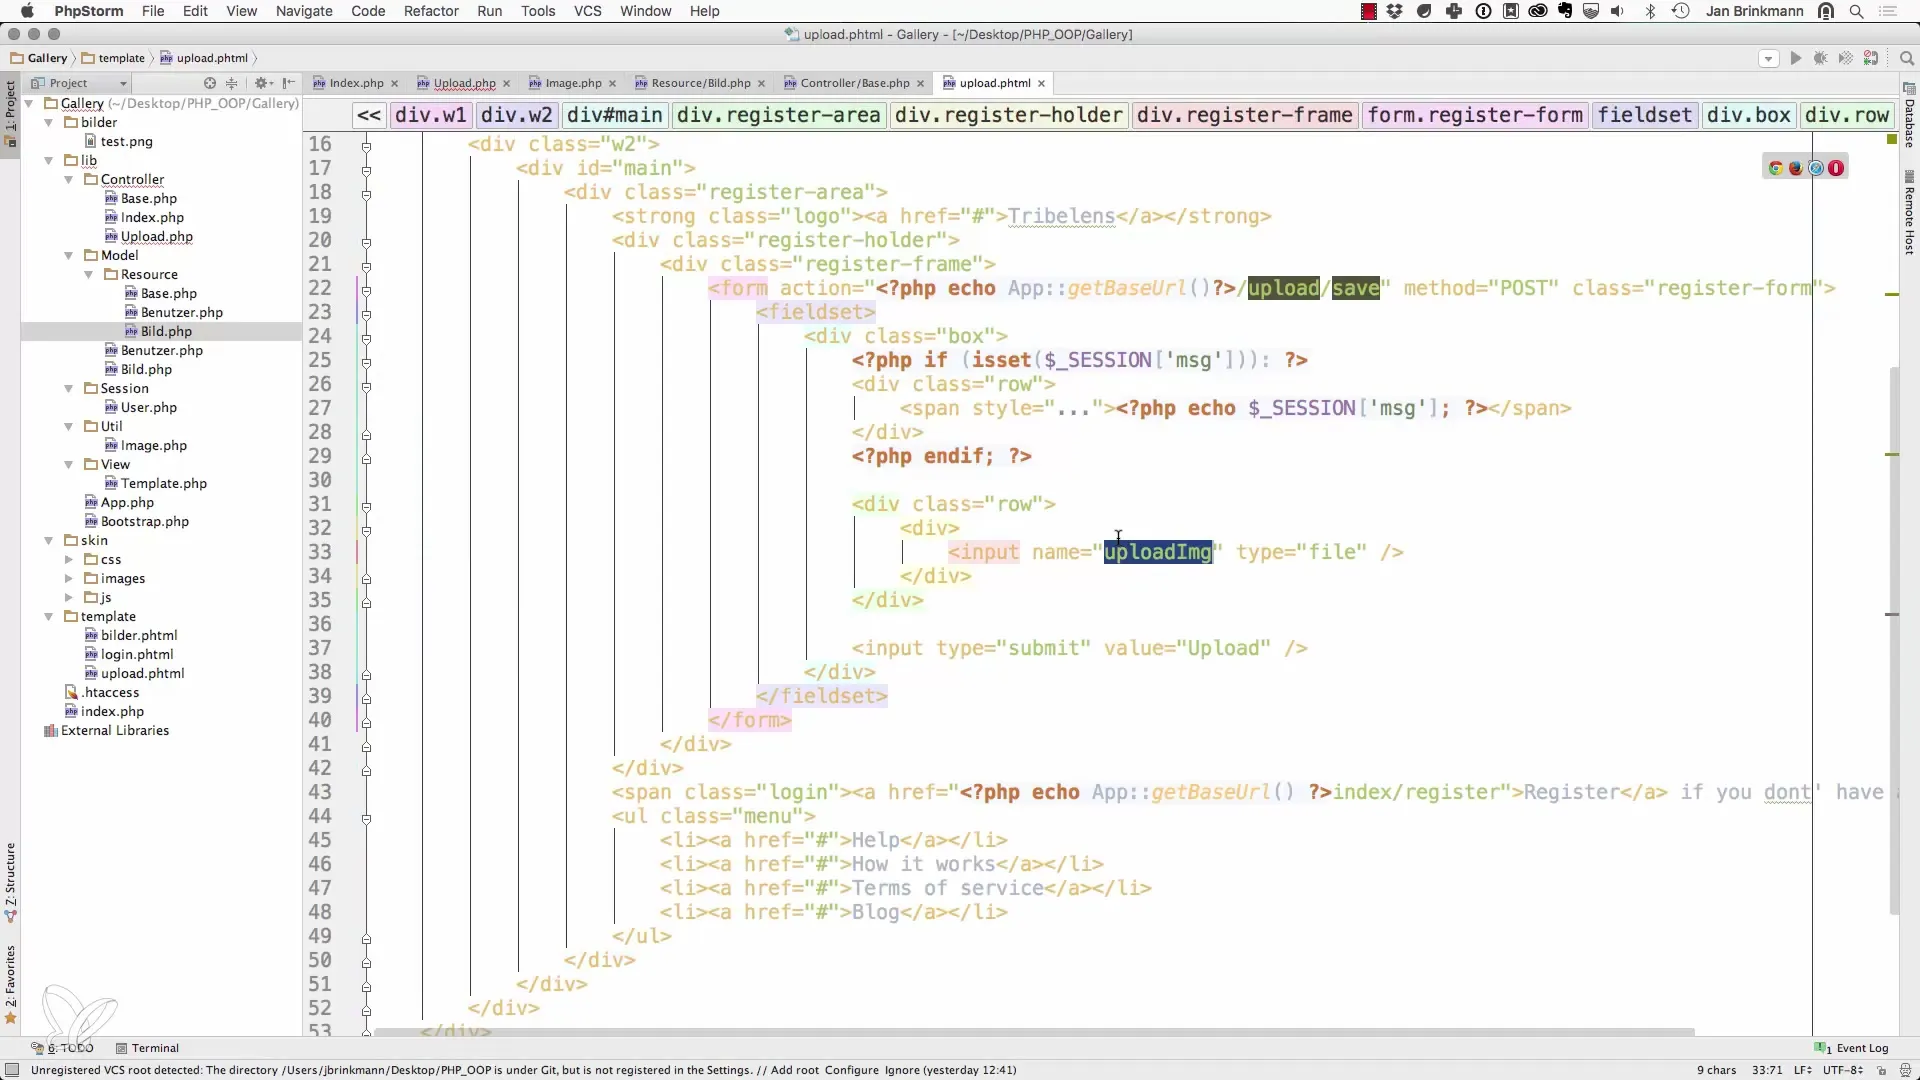
First, it is essential to ensure that the image is in the correct format. For this, we use the processUpload method of our ImageUtility class. You will pass the file you found in the $_FILES array. It is important to use the correct key from the upload field as defined in upload.phtml.
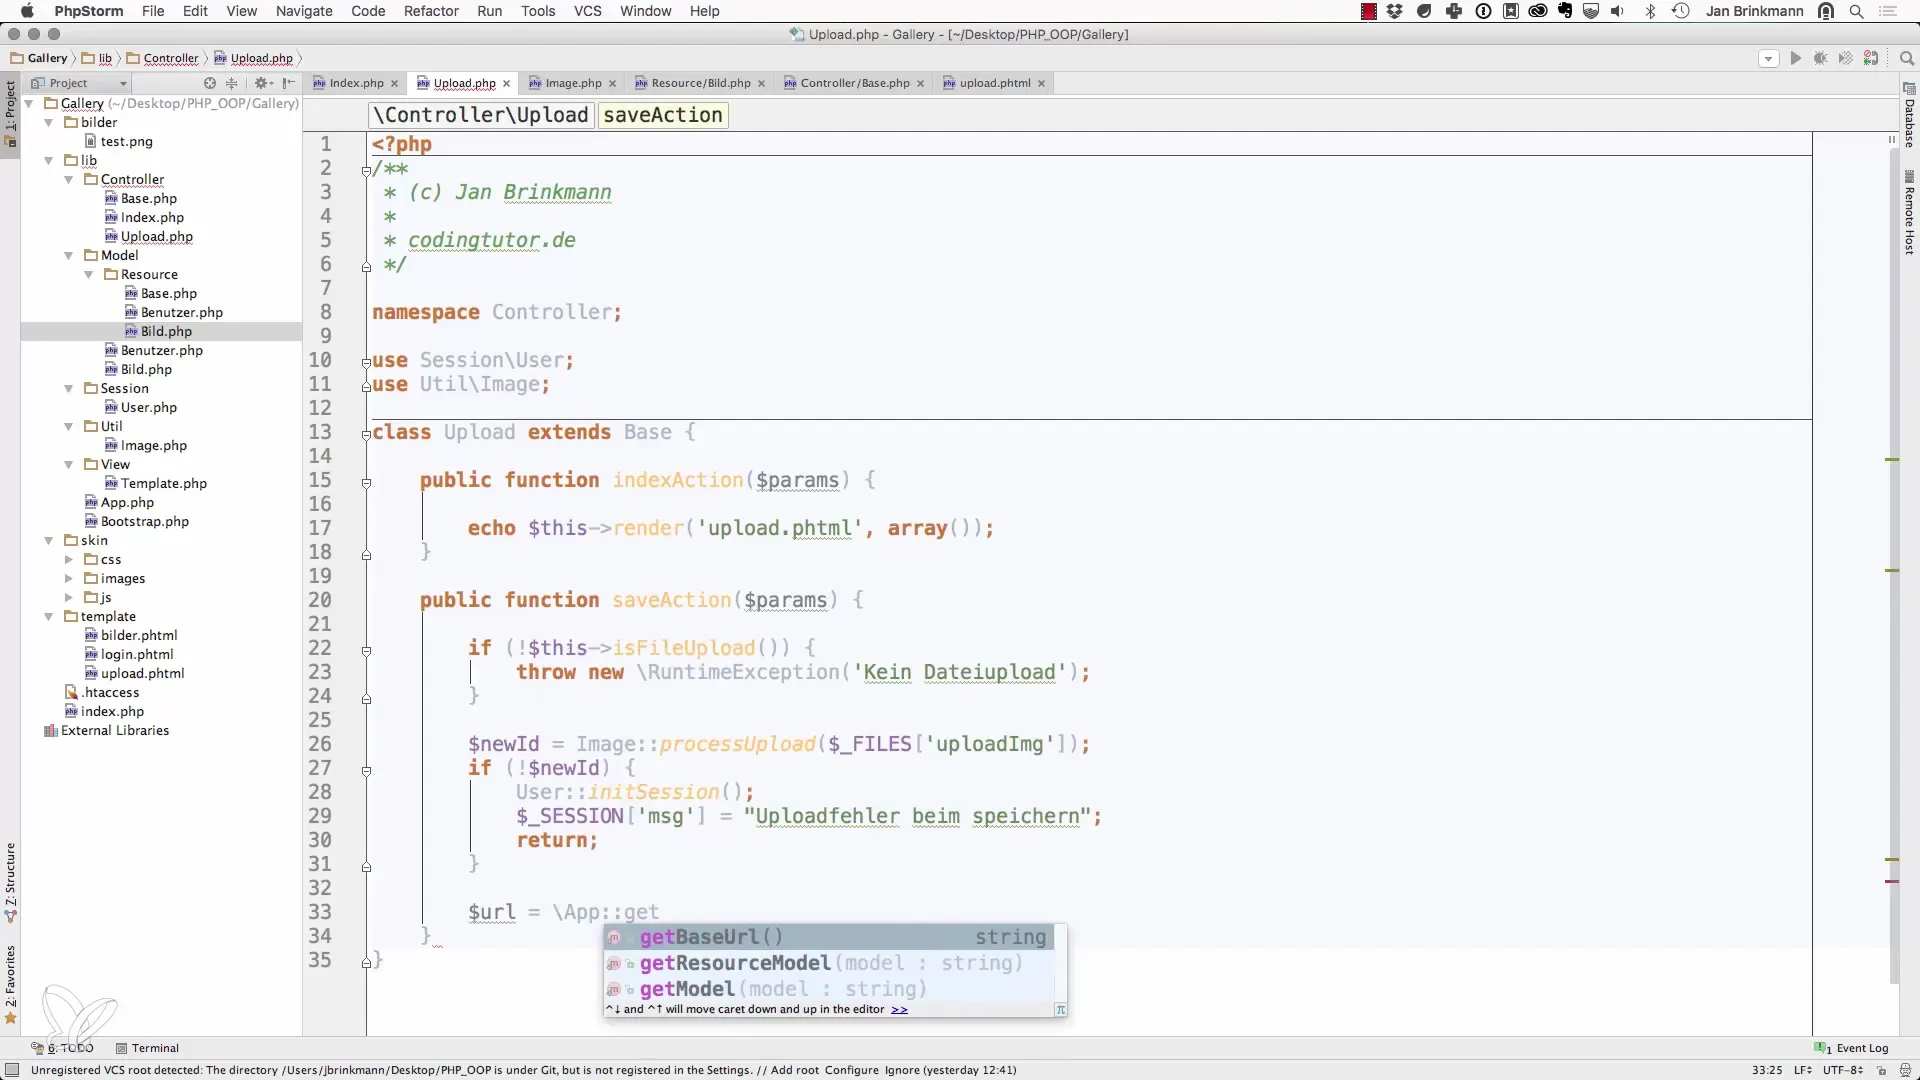
In the next phase, we check whether the upload was successful. This is done by checking the return value of the processUpload method. If something goes wrong, it is important to store a meaningful error message in the session, which you can display later in the frontend.
If the upload was successful, we can check the user session to ensure that the current user is logged in. If no session exists, you start it here.
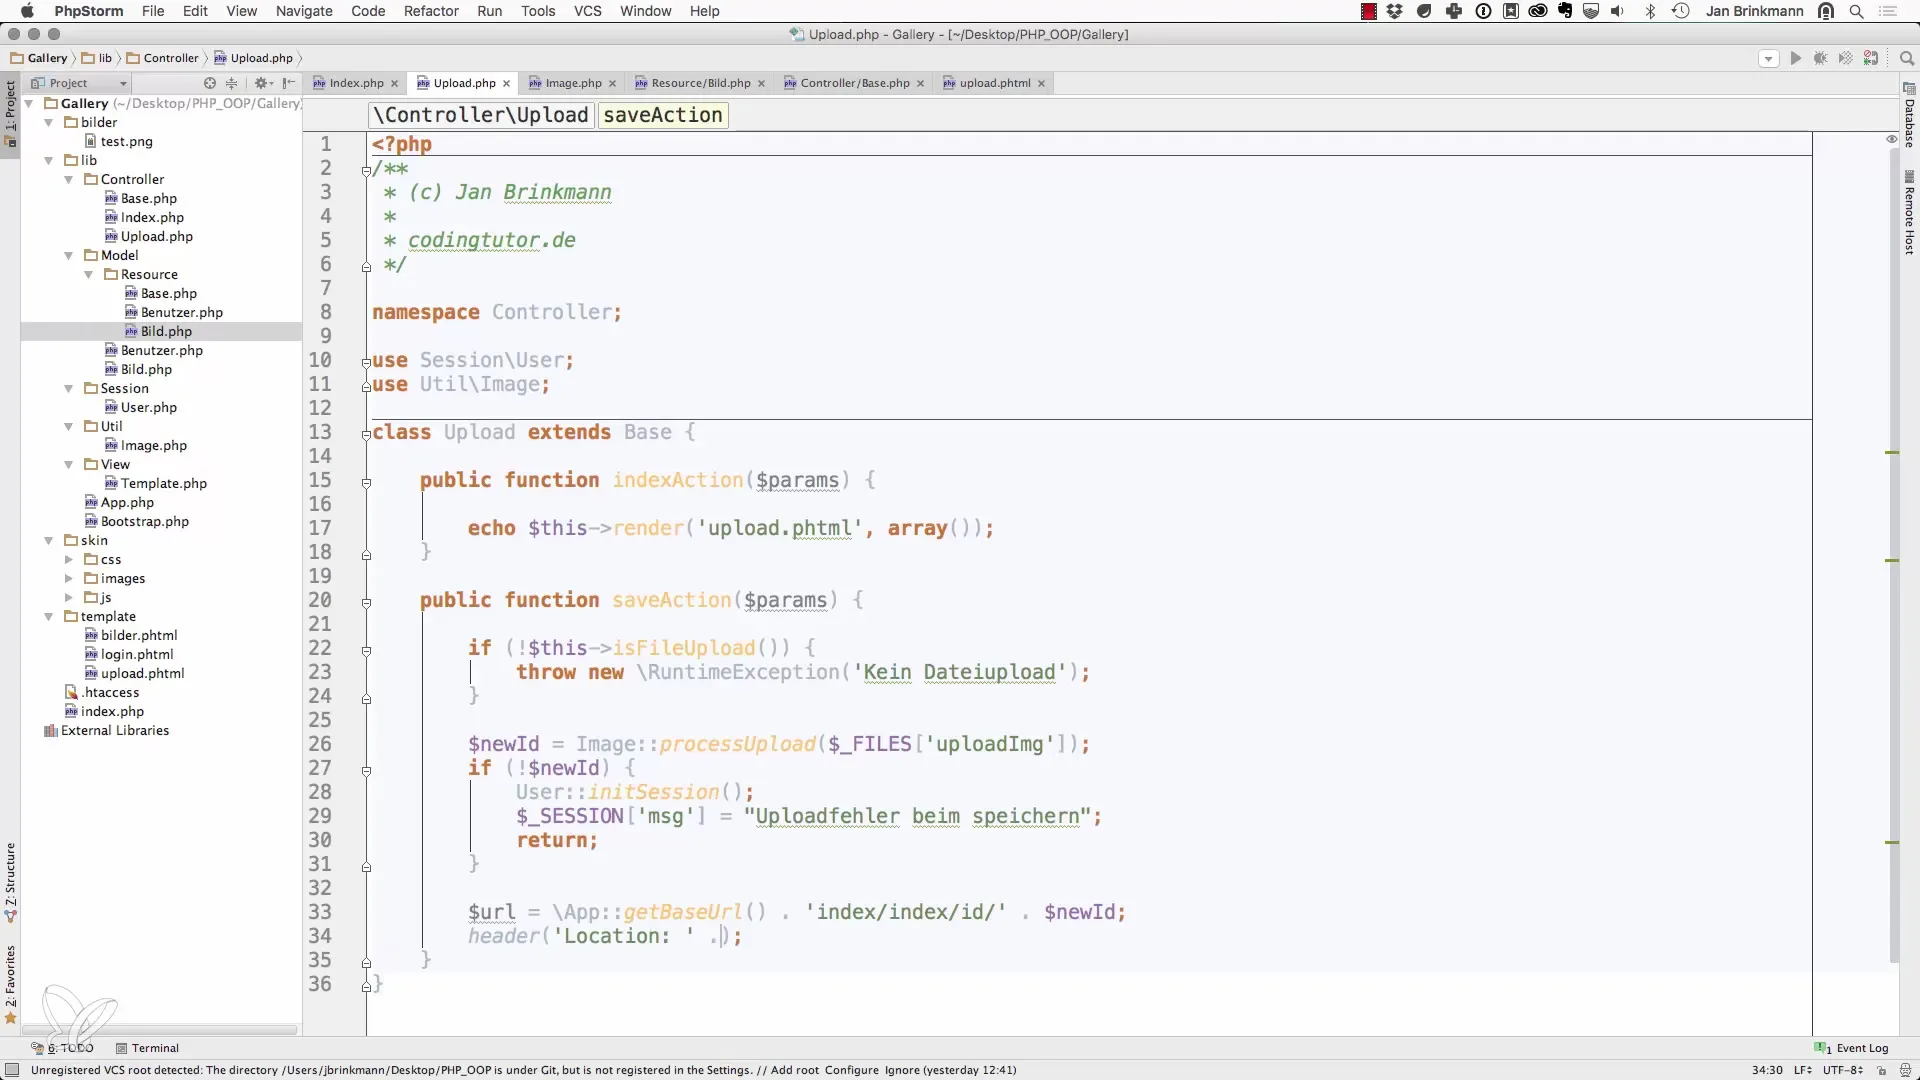
It is important to implement a redirect logic here. After a successful upload, you should redirect the user to a page that displays new information about the uploaded image. You can implement this with a URL helper that appends the ID of the new image to the address.
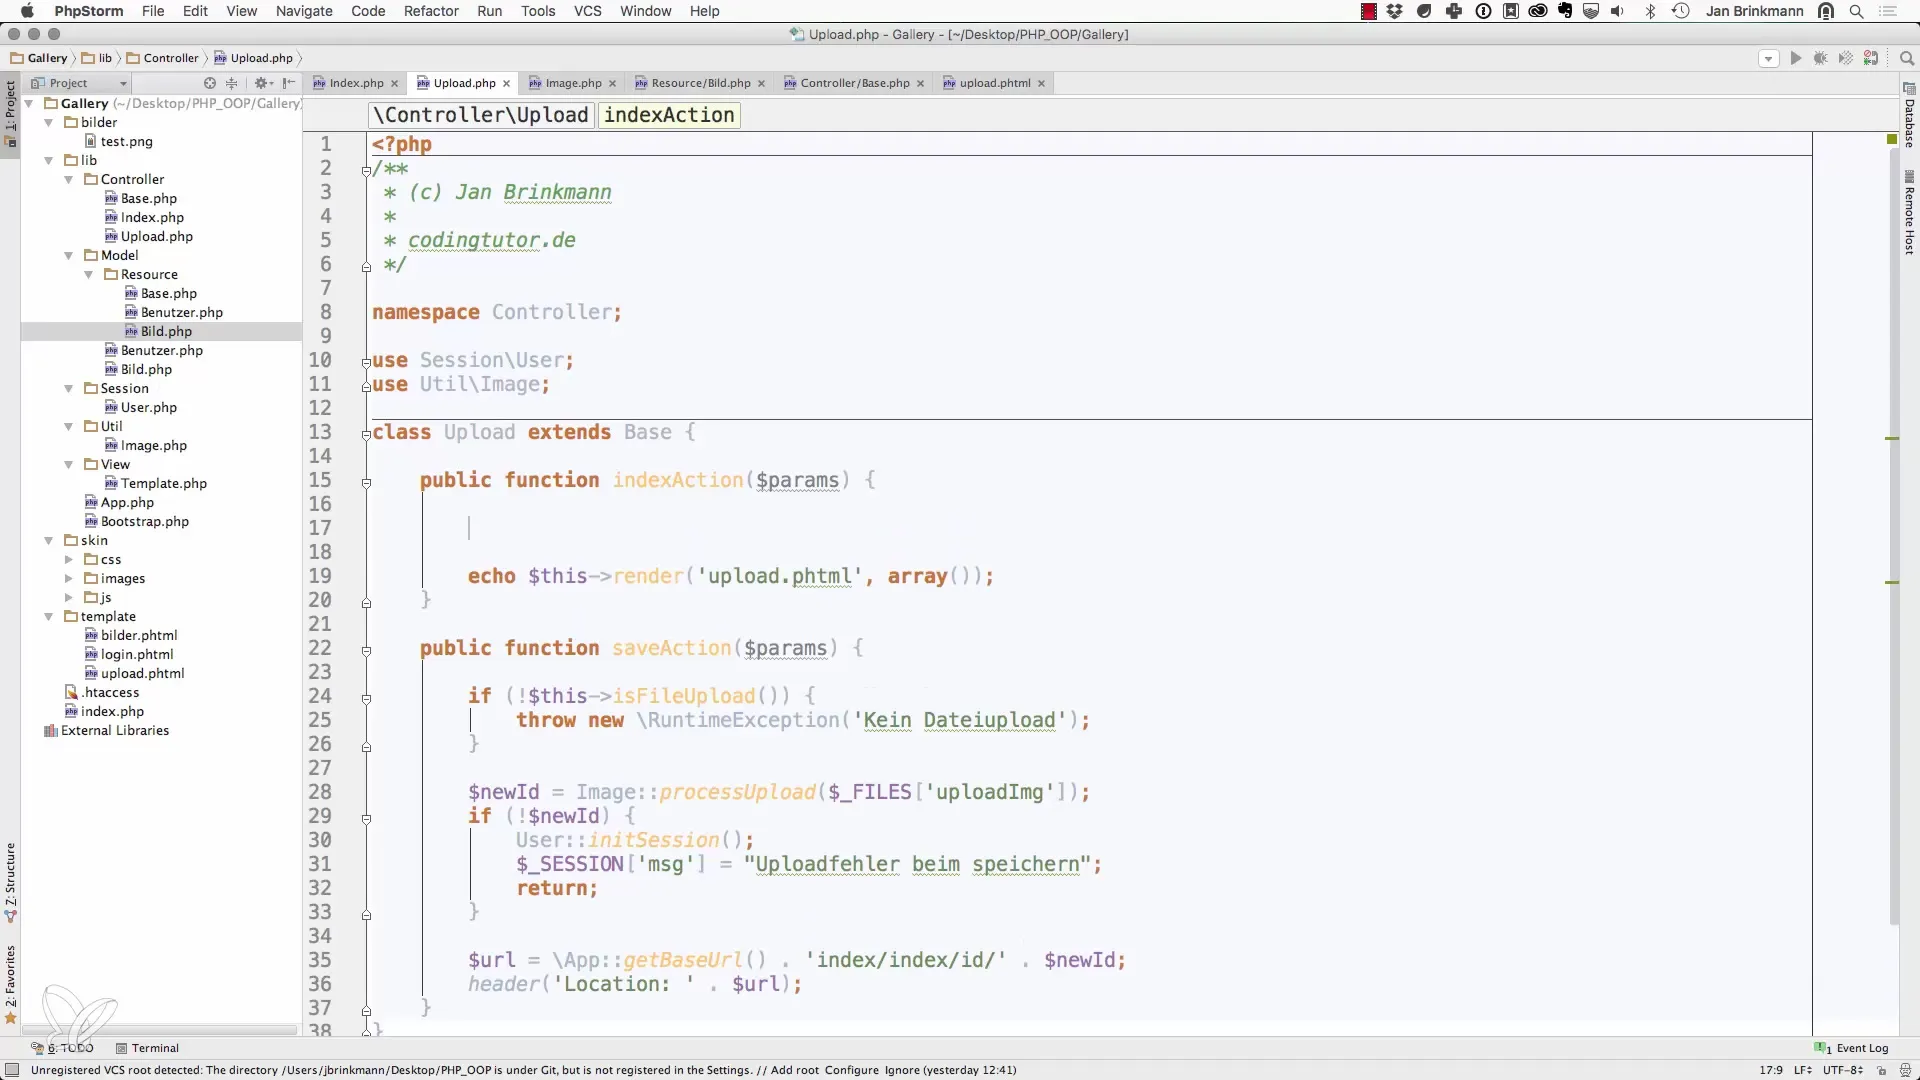
Now you implement a login check. If the user is not logged in, redirect them to the login page before they attempt to upload an image.
You can then customize your template. Ensure that the enctype in the HTML form is set to multipart/form-data so that the browser knows that binary files are being sent.
Now you can try a file upload. Select a test file and perform the upload. If the upload was successful, you will see a confirmation. Make sure you can see the ID of the new image after the upload.
If the image was successfully uploaded, it's important to check the database as well. Here you can ensure that the image was correctly saved. Check the database to see if the new entry is present.
For a better user experience, you might consider offering a detailed view of the uploaded image. However, this step requires additional code adjustments that you can design according to your preferences.
Finally, you should delete all unnecessary files, such as test images in PNG format, from the database to ease the management and processing of images. This also helps you avoid conflicts when saving similar file names.
Now you have a fully functional image upload system that not only allows you to upload images but also ensures that the image was successfully stored in the database.
Summary – Save New Image in the Database with PHP
You have now learned how to upload images in your web application using PHP and store them in a database. Through this implementation, you have acquired the knowledge necessary to effectively operate this system. Consider how this guide can be applied to your own projects and expand it according to your needs.
Frequently Asked Questions
How do I ensure that my image upload works?Check if the processUpload method returns without errors.
What should I pay attention to in the HTML form?Set the enctype to multipart/form-data so that binary data is processed correctly.
Can I upload multiple images at once?Yes, you need to adjust the HTML form accordingly and expand your logic for processing the files.
How can I display error messages in the frontend?Store the error messages in the session and output them in the template where necessary.


