
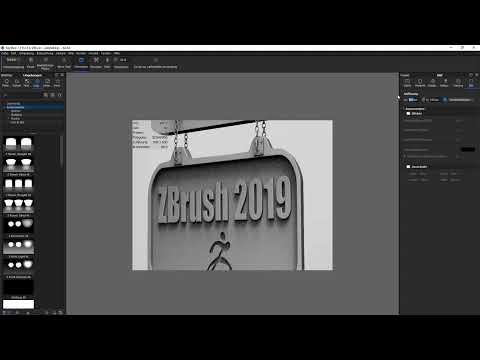
A door sign made of wood and metal quickly looks flat on screen if the lighting and the materials aren't right. That is exactly what you work on in this mini project. You build a scene in ZBrush, create two different renderings (one in the style of a drawing and one photorealistic in KeyShot), and then combine both into one artwork in Photoshop. The Universal Camera ensures that both programs use exactly the same perspective, so that the layers can later be overlaid pixel-perfectly.
The video is only loaded from YouTube when you play it – data (including your IP address) is then transmitted to YouTube/Google. More in the privacy policy
You need ZBrush 2019 with update 9.2, KeyShot, and Photoshop. You can take the door sign model from the working files or work with your own model. The only important thing is that you work with the same object in both programs.
Key Takeaways
The Universal Camera must be activated in ZBrush before you define the document. After that, you determine the format and the framing, and only then do you place your model.
A render preset with a drawing style delivers the result in ZBrush that you need for the image composition. You make the background white via the color and the range in the document.
For the KeyShot rendering, you import the image as an external render with an identical view. Then adjust materials, texture, gloss, and ambient light.
In Photoshop, you use the Move tool to drag both images exactly on top of each other and create a soft transition with a layer mask.
Step-by-Step Guide
Step 1: Activate the Universal Camera and set the focal length
Find the Universal Camera in ZBrush under the "Draw" palette. Make sure it is activated and that depth has been switched on. For a slightly wider-angle view of your model, set the focal length to 18 mm.


Step 2: Define the document size in 4:3 format
You set the document size under "Document". First remove the proportion lock so that you can set width and height independently of each other. Then choose the classic 4:3 format with 1600 × 1200 pixels and confirm the resize. ZBrush reports that the view will be distorted. In this case that is not a problem, because you will realign the view right away. To do this, switch to Edit mode and zoom out so that you can see the entire format.

Step 3: Place the model and lock the camera
Place your model the way you like. Make sure that the sign is firmly in the center, and look for a perspective that creates some tension. A slight view from diagonally above or getting a bit closer often has more impact than a neutral frontal view. As soon as the perspective is right, you lock the camera. You don't necessarily have to save it, because you will only continue working with this one format. Then you reduce the view size to half. Important: this is only the view and not the document size. This way you get a sharp image.


Step 4: Apply the render preset for the drawing style
Open the Lightbox and select the render preset "Paper on Pencil" there. Close the Lightbox again and start the rendering. You will immediately notice that the background looks like printed paper and that the scratches in the material come out nicely.


Step 5: Lighten the background and remove the darkening
So that the background really looks like light paper, you set the background color to white. You can find this in the "Document" area. The render preset also still contains a slight darkening. You remove this by setting the Range value to zero. After that, you go over the background with the color once more until it is completely white.


Step 6: Create the Final Rendering with BPR
Now start another BPR render. The result shows a clean white background with clearly visible details in the wood. You have now completed your first rendering from ZBrush.

Step 7: Save the Composite as a Photoshop File
Instead of the normal rendering, you save the composite, which already contains the filters. You can find this option in the Render Passes. Save the file as a Photoshop file, for example on the desktop, and give it a clear name, such as ZBrush-Render. This way you keep an overview when you open several files later.


Step 8: Transfer to KeyShot via the External Render
Now switch to KeyShot. To do this, select the "External Render" entry under "Render" in ZBrush. Leave the filters out, because the material will be assigned directly in KeyShot later. Load the model into KeyShot and perform a simple BPR render. The view should correspond exactly to that of ZBrush.

Step 9: Adjust the Image Size in KeyShot
Set the image size in KeyShot so that it fits the view. The size 1600 × 1200 is too large for this view. Therefore, choose 800 × 600 pixels. Make sure that with this setting you get the same view as in ZBrush.


Step 10: Assign Materials for Metal, Lettering, and Wood
Drag the material for the metal frame onto the corresponding chain via drag & drop and choose a darker variant. The color initially looks very dark, so you brighten it up a bit. This no longer corresponds exactly to a physical material, but it is suitable for this image. For the lettering, you take a material in a similar style and adjust the colors. For the wood, you choose an old wood under "Wood" and drag it onto the board. With the material properties, you can fine-tune the effect.


Step 11: Rotate and Scale the Wood Grain
The grain of the wood initially runs in the wrong direction. Open the texture settings and rotate the angle by 90 degrees. Then try out different sizes. A value of 1.2 works well in this case. You could still shift the position a little, but the result is already convincing.

Step 12: Reduce the Gloss
If the wood is too glossy, open the material's properties and reduce the value under "Reflection". This makes the surface look more natural and the scratches remain more visible.

Step 13: Set Up Ambient Lighting for an Alleyway Mood
To make the door sign look like it's in an old alleyway, switch to the environment settings. Rotate the lighting environment while holding the Control key until the light from behind and from the front casts edges onto the wood and the frame. A slight light falloff creates atmosphere.


Step 14: Hide the Ground Shadow and Blur the Background
You don't need the ground shadow in this image, so you hide it. If you have the Pro version, you can also blur the background layer. This makes the door sign look as if it were hanging somewhere in everyday life, without the background distracting from the subject.


Step 15: Set Render Resolution and Quality
Open the render menu. The resolution is already set correctly there, and a larger format would cause problems with the ZBrush rendering. Under the options, choose 256 samples. This gives you very good quality. Then start the rendering and wait until it has finished.


Step 16: Combine Both Renderings in Photoshop
In Photoshop, open the two images, that is, the ZBrush composite and the KeyShot rendering. Take the KeyShot image with the Move tool (V key) and drag it onto the ZBrush image. Hold down the Shift key while doing so so that the layers are centered exactly. Thanks to the Universal Camera, the two views are pixel-perfectly aligned, even though two different programs were used.


Step 17: Create a Soft Transition with a Layer Mask
To blend the two halves of the image, you work with a layer mask. Select the Lasso tool, draw a selection around the desired area and fill the mask accordingly. Then invert the mask with Control + I so that the right area becomes visible. A gradient would also be possible, but with the mask you keep control over every edge. You can soften the edge and unlink the layer mask at any time to adjust the result afterwards with Control + T.


Summary – Rendering a ZBrush Door Sign: Combining Universal Camera and KeyShot
In this mini project, you learned how to set a fixed perspective and a precise document format with the Universal Camera in ZBrush. With the render preset "Paper on Pencil" you get a drawing style, and by lightening the background the image looks like a sheet of paper. In KeyShot, you adopt the identical view, assign materials, correct texture and gloss, and set up an atmospheric environment. Finally, you combine both renderings in Photoshop with a layer mask, creating a coherent artwork.
FAQ
Why should I use the Universal Camera instead of setting up the view manually?The Universal Camera ensures that ZBrush and KeyShot use exactly the same perspective. This allows both renderings to be overlaid pixel-perfectly in Photoshop.
What format should the document have?For this project, the classic 4:3 format with 1600 × 1200 pixels in ZBrush is suitable. In KeyShot, a size of 800 × 600 pixels is sufficient for the view.
Why is the background made white in ZBrush?The render preset "Paper on Pencil" contains a slight darkening. By setting the Range value to zero and painting over it with white, the background looks like light paper.
Do I need to save the composite or the normal rendering?You save the composite via the Render Passes. It contains the filters that are important for the drawing style and can be further processed as a Photoshop file.
Do I need the Pro version for KeyShot?No, the rendering and the material assignment work without the Pro version. Only the blur of the background layer is available in the Pro version.
Why do I use a layer mask instead of a gradient?With a layer mask, you keep full control over every edge. You can adjust the transition at any time or unlink it and modify the result afterwards with Control + T.

