
Before you publish your first post, it's worth taking a close look at the basic settings of your WordPress installation. Many default contents and presets are of no use to you on a new site and can even get in the way. In this tutorial, you'll learn which settings you should adjust right after installation so that your site is cleanly prepared. By the way, the speaker in the video emphasizes that he does not set any affiliate links and receives no commission for the recommendations mentioned.
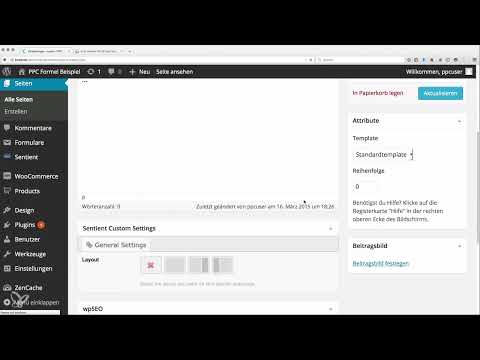
The video is only loaded from YouTube when you play it – data (including your IP address) is then transmitted to YouTube/Google. More in the privacy policy
Key Takeaways
- Default content such as the sample post and the sample page should be deleted so that your site has no unnecessary clutter.
- You set the site title and tagline deliberately. Together, they should not exceed 70 characters if possible.
- A static homepage with detailed text makes more sense than a plain list of posts.
- As the permalink structure, you choose "Post name", because short, keyword-containing URLs are more durable.
- With the SEO plugin, you control the indexing of individual pages and place your main keyword at the beginning of the homepage title.
Step-by-Step Guide
Step 1: Switch to the backend and hide annoying notices
First, log in to the WordPress backend. Right after installation, numerous messages often appear that you can safely ignore. Click on the notice "No, do not bother me again" or use the setup wizard to get rid of the messages. Many of these notices come from WooCommerce. You only need WooCommerce if you actually want to build an online shop. For a niche site with content and AdSense, it is usually not necessary.

Step 2: Understand the license notice correctly
At the top of the backend, a notice about a time-limited ten-day trial license may remain. Here you can buy a license via "Purchase license" and then enter the license key in the same area. In the video, this entry is deliberately not shown, as the license key is personal. If you decide on a paid product, you therefore have to purchase and enter the license yourself.

Step 3: Delete the sample post and sample page
During installation, WordPress creates a sample post titled "Hello World!". Delete this post so that Google doesn't get the impression that your site contains only default content. Afterwards, you also remove the sample page. Both entries first end up in the trash, from where you can delete them permanently. This way you start with a clean foundation that contains only your own content.

Step 4: Set the site title and tagline
In the menu, open the "Settings" area and there the item "General". Here you will first find the "Tagline" field. Enter a short, meaningful sentence there that explains in a few words what your site is about. An example would be a sentence with the main topic of your niche.
The site title and the tagline will later be displayed together as the title of the homepage, that is, in the title bar of the browser. Make sure that together they add up to no more than 70 characters if possible, so that the title is not cut off in the search results. Then save the changes with "Save Changes".
An advantage of the German version of WordPress, which you obtain via wordpress.de, shows in this area: The date formats are already set correctly, so you don't have to adjust them yourself.

Step 5: Create a static homepage
Now create a new page that will later serve as the homepage. As the title, assign the name or the main keyword of your niche, for example the name of your domain or the topic of the site. The page doesn't have to be perfect at first; the most important thing is that the heading is in place. You'll add the detailed text later.
Afterwards, go to the "Reading" area under "Settings". Select the option "A static page" there and set your newly created page as the homepage. The reason is simple: On a static page, you can write 800 to 1200 words describing your topic and lead visitors directly to your most important topic areas. A plain list of post excerpts, on the other hand, often doesn't reveal what the site is about. In addition, from there you can link specifically to your most important pillar articles, for example to a checklist, a template package, or a guide.

Step 6: Configure blog pages and newsfeed
In the same "Reading" section, you specify how many posts are displayed on the blog page. The default is ten, which is fine to start with. For the newsfeed, the speaker recommends displaying the full text instead of just an excerpt. In the past, the short version was considered more sensible from an SEO perspective. Nowadays you can use either, depending on which presentation suits your site. Then save the settings.

Step 7: Change permalinks to "Post name"
The permalinks determine what the addresses of your individual pages and posts look like. Under "Settings" and the item "Permalinks", a technical ID is set by default. While this works, it tells visitors nothing about the content. In addition, the keyword is then missing from the URL.
Instead, select the "Post name" option. This way, the address contains only the title of the post, for example with the main keyword. Avoid additional elements such as categories so that the URL stays short. The fewer words in the address, the higher the share of your keyword and the clearer the designation. Save the change with "Apply changes". You can ignore the settings below that are related to WooCommerce.

Step 8: Use the SEO plugin for fine-tuning
The video uses the SEO plugin Yoast SEO, which you can find via the plugin management. Two functions are particularly important here. The first is manual control of indexing for pages. Enable this option so that you can deliberately exclude individual pages from indexing by Google. This makes sense, for example, for the legal notice, which does not need to appear in search results.
The second function concerns the title of your homepage. In the search appearance section, you can adjust the order of the components via drag and drop. Drag the page title to the front so that your main keyword is at the beginning of the title. This gives the keyword more weight and ensures that visitors immediately recognize what the page is about. Save your changes, and the basic configuration is then complete.

The video announces that further episodes will cover the theme, the creation of the important pages, the menu, and the later integration of AdSense.
Summary – Setting up the WordPress basics: Step by step for niche sites
With these steps, you have cleanly prepared the foundation of your WordPress installation. You have hidden notices, removed the default post and the sample page, and set the site title and tagline. You have also set up a static homepage, adjusted the blog display, and changed the permalinks to "Post name". With the SEO plugin, you control indexing and place your main keyword at the beginning of the title. Your foundation is now ready for the next steps, namely theme, page structure, menu, and AdSense.
FAQ
Question: Do I have to install WooCommerce to set up my site?Answer: No, WooCommerce is only necessary if you actually want to run an online shop. For a content site, you can ignore the corresponding notices.
Question: Why should I delete the sample post "Hello World!"?Answer: The default post has no content value for your site. If you remove it, only relevant content remains, which Google and your visitors see.
Question: What is the difference between site title and tagline?Answer: Both are displayed together as the title of the homepage in the browser and in search results. Together, they should preferably not exceed 70 characters.
Question: Why is a static homepage better than a post list?Answer: A static homepage can contain detailed text that explains your topic and links to important content. A pure post list, on the other hand, shows only excerpts and rarely reveals what the site is about.
Question: Which permalink structure should I choose?Answer: Choose "Post name". This makes the URL short, descriptive, and contains your keyword, which benefits the longevity of your content.
Question: Why should I exclude pages from indexing?Answer: Pages such as the legal notice have no use in search results. With the SEO plugin, you can deliberately keep these pages out of the Google index.


