Bokeh effects are an excellent way to intuitively control the focus in your images. They create a gentle blur at the edges of a photo, bringing the main subject into the center of attention. In this guide, you will learn how to create targeted Bokeh effects with Analog Efex Pro 2 to visually enhance your photographic works.
Key insights
- Bokeh allows you to sharply highlight objects.
- The shape and intensity of the blur can be adjusted individually.
- Bokeh can be used to create miniature effects.
- A playful experimentation with different aperture shapes can significantly change the look.
Step-by-Step Guide
1. Activate Bokeh Effect
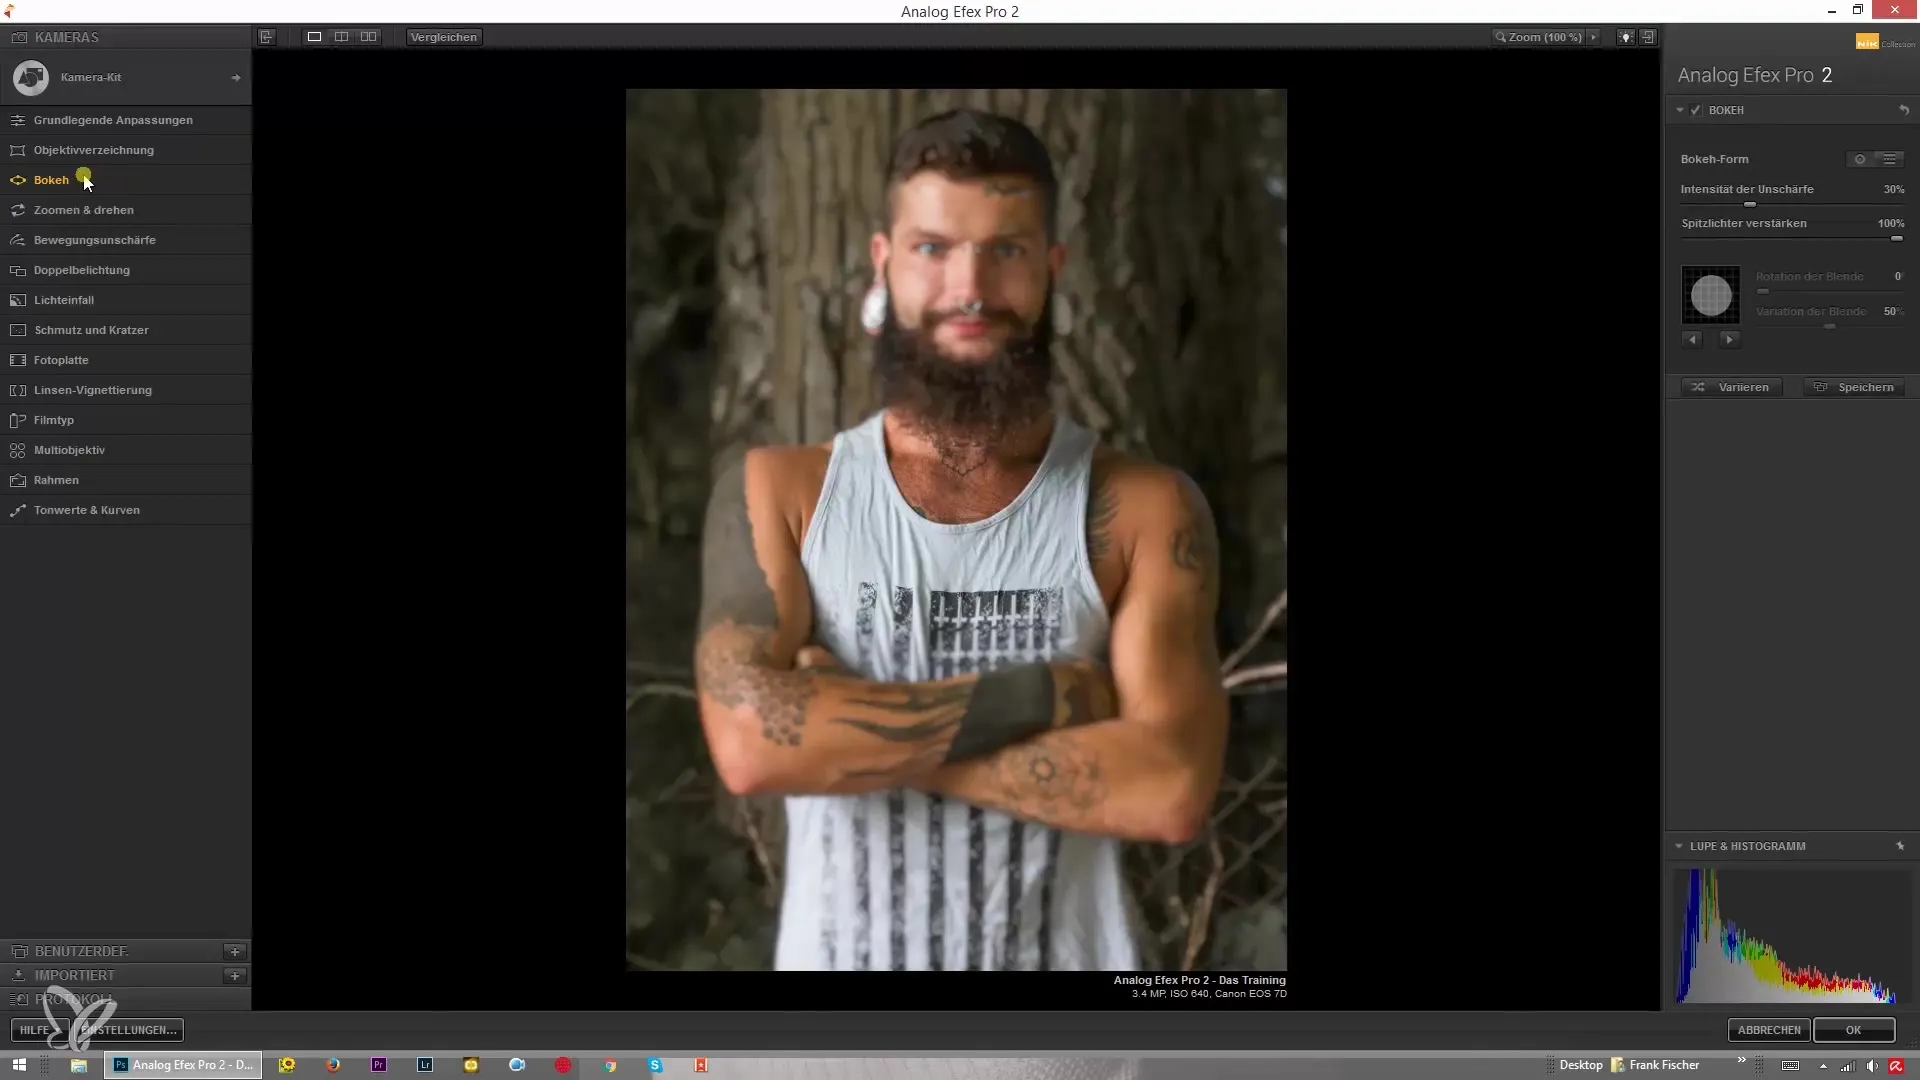
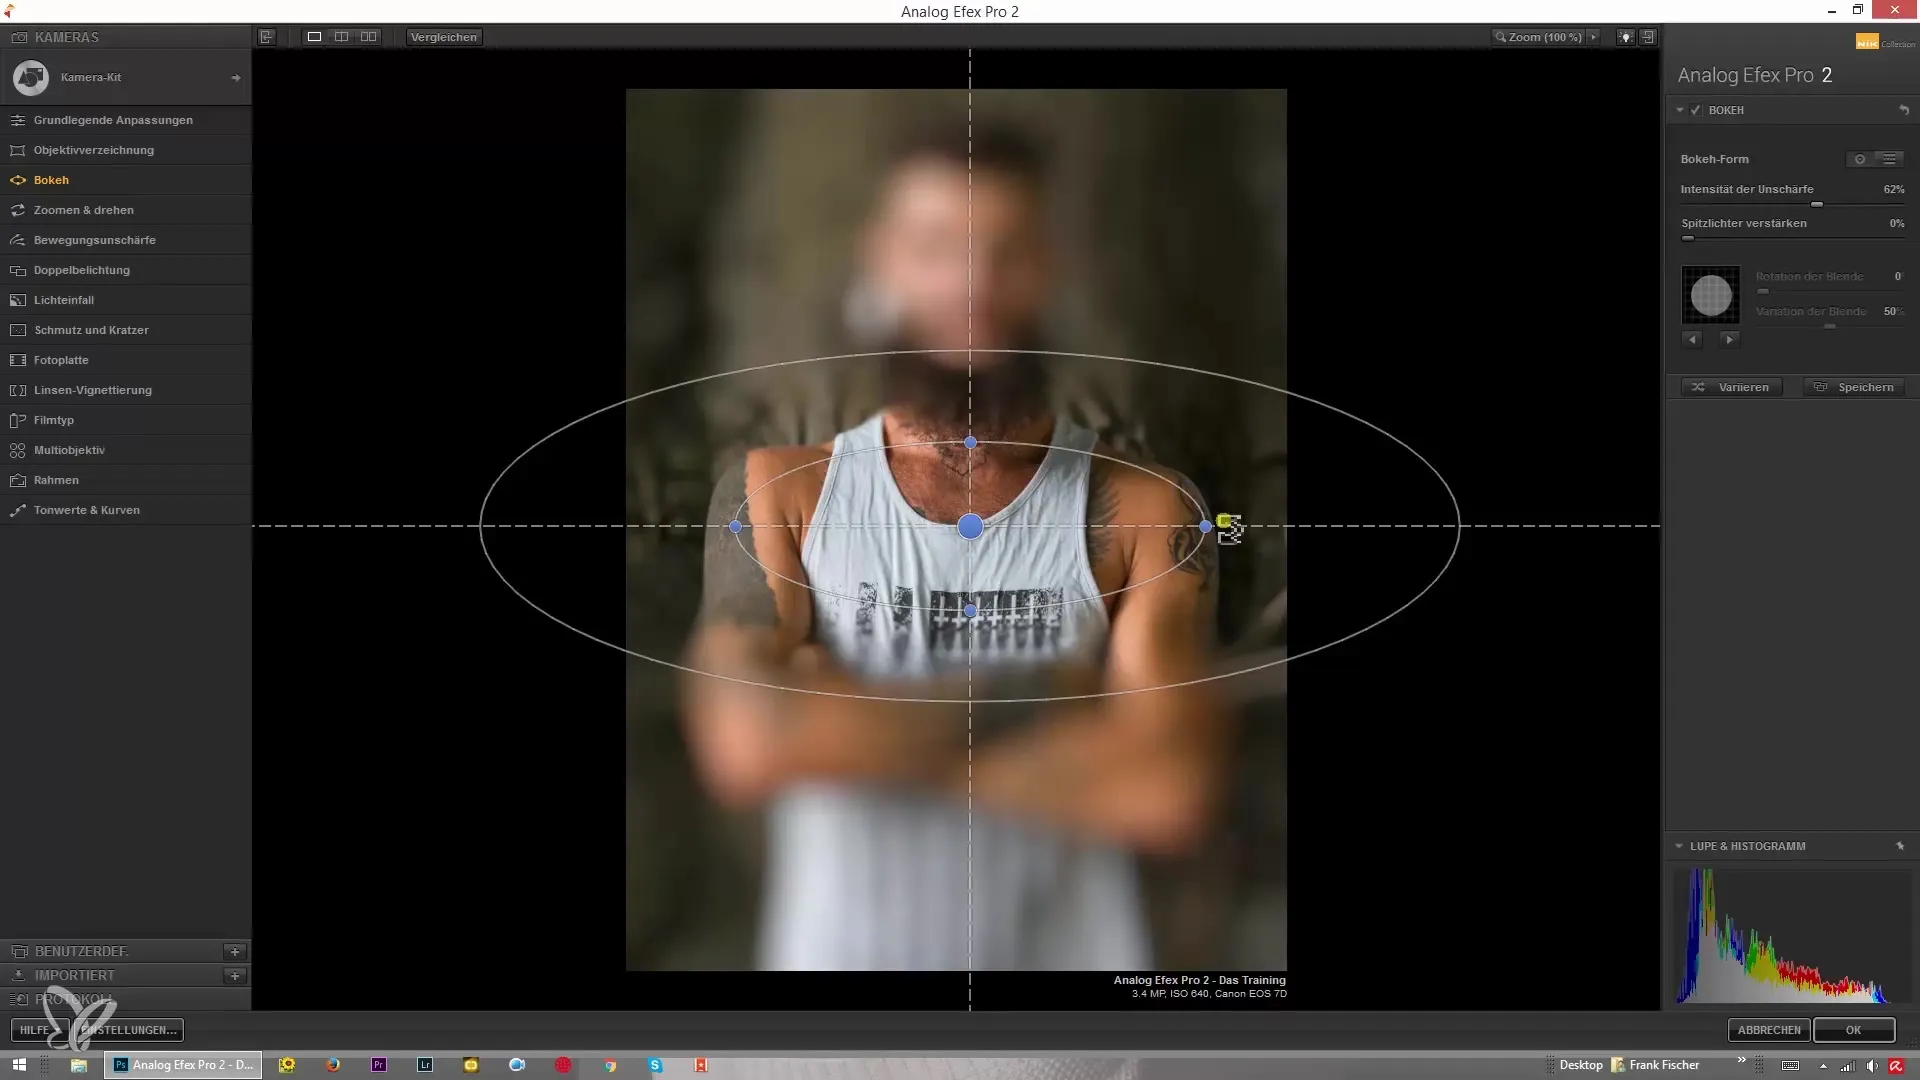
To activate the first Bokeh effect, start the program and select the image you want to edit. It is important to determine the center of the image where the focus should remain. You can easily move the center to set the desired sharp area. This gives you a clear center while the edges become increasingly blurry.
2. Adjust Bokeh Shape
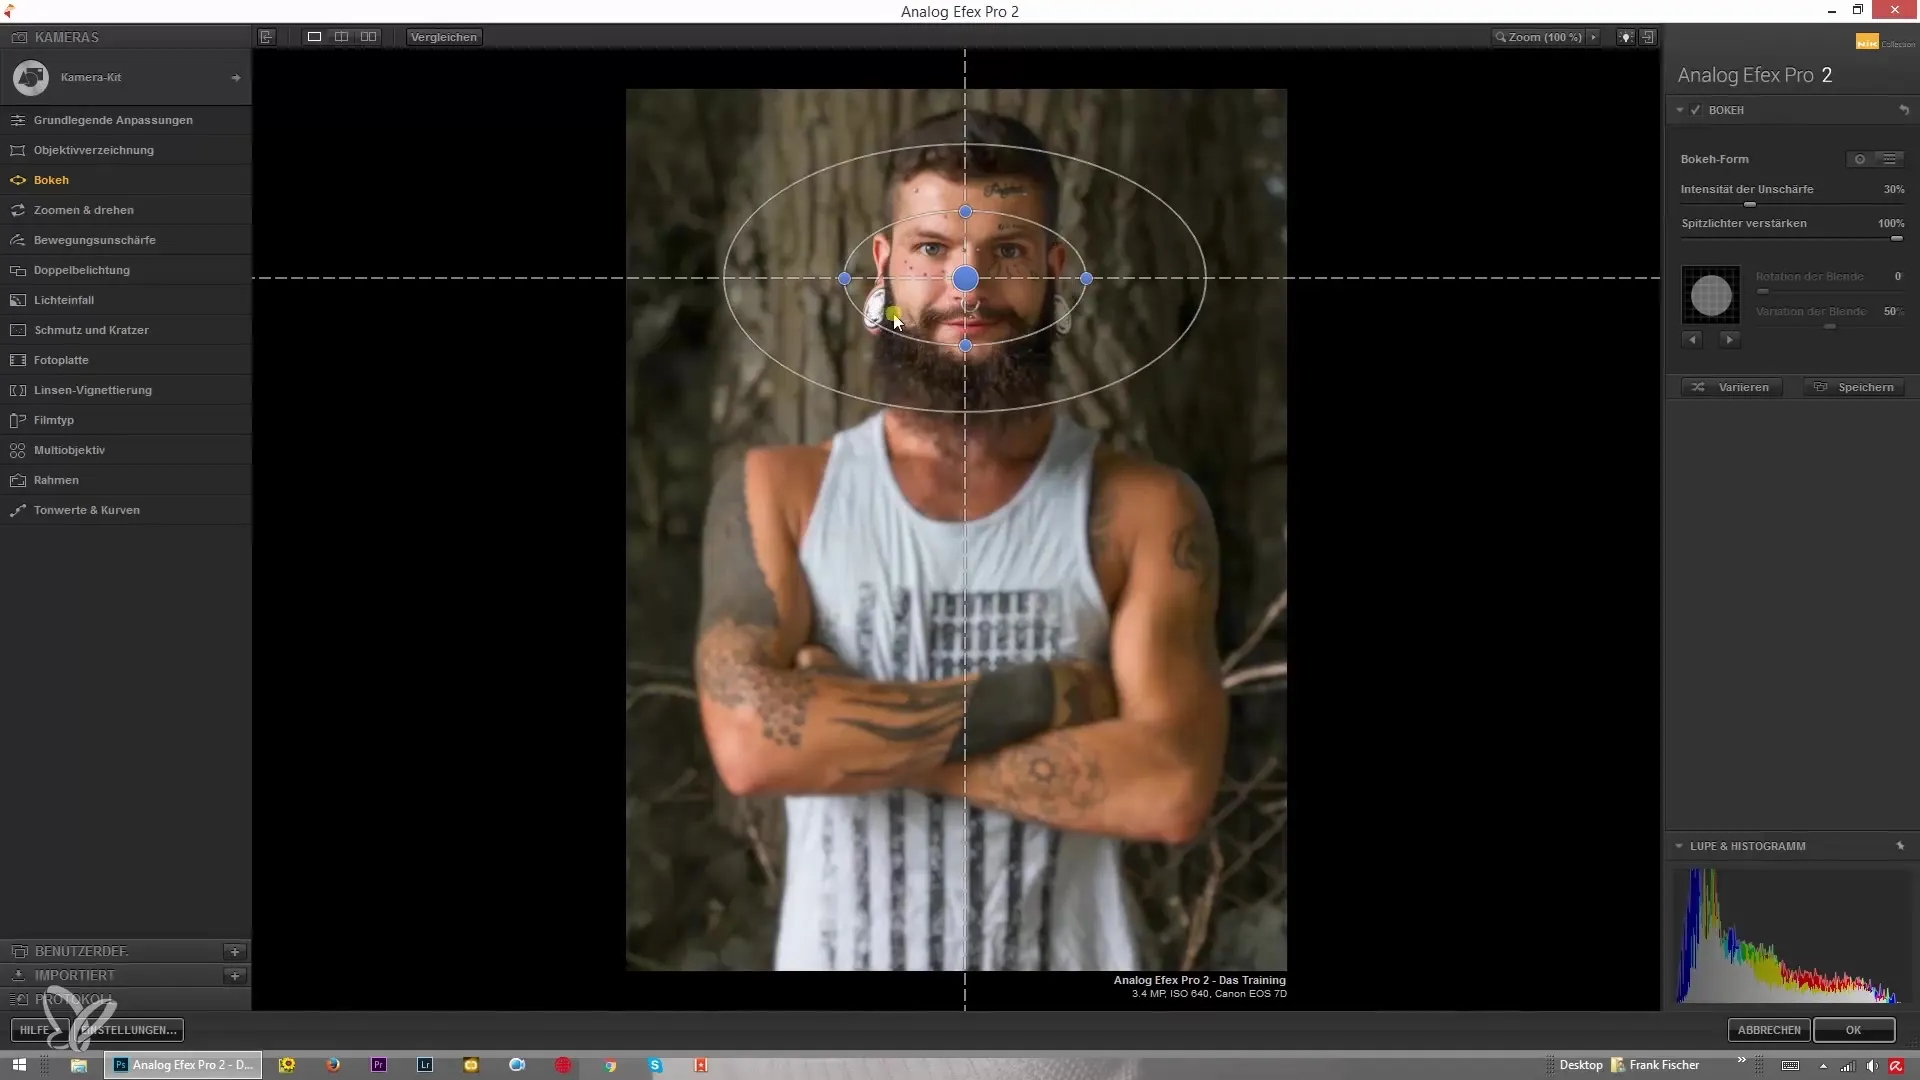
In this step, you can adjust the shape of the blur. You have the choice between various shapes such as round or elliptical. Adjust the width and height to achieve different visual effects. Experiment with these settings to vary the transition from sharp to blurry. Adjusting the shape is crucial to leaving the desired impression.
3. Try Tilt-Shift Effect
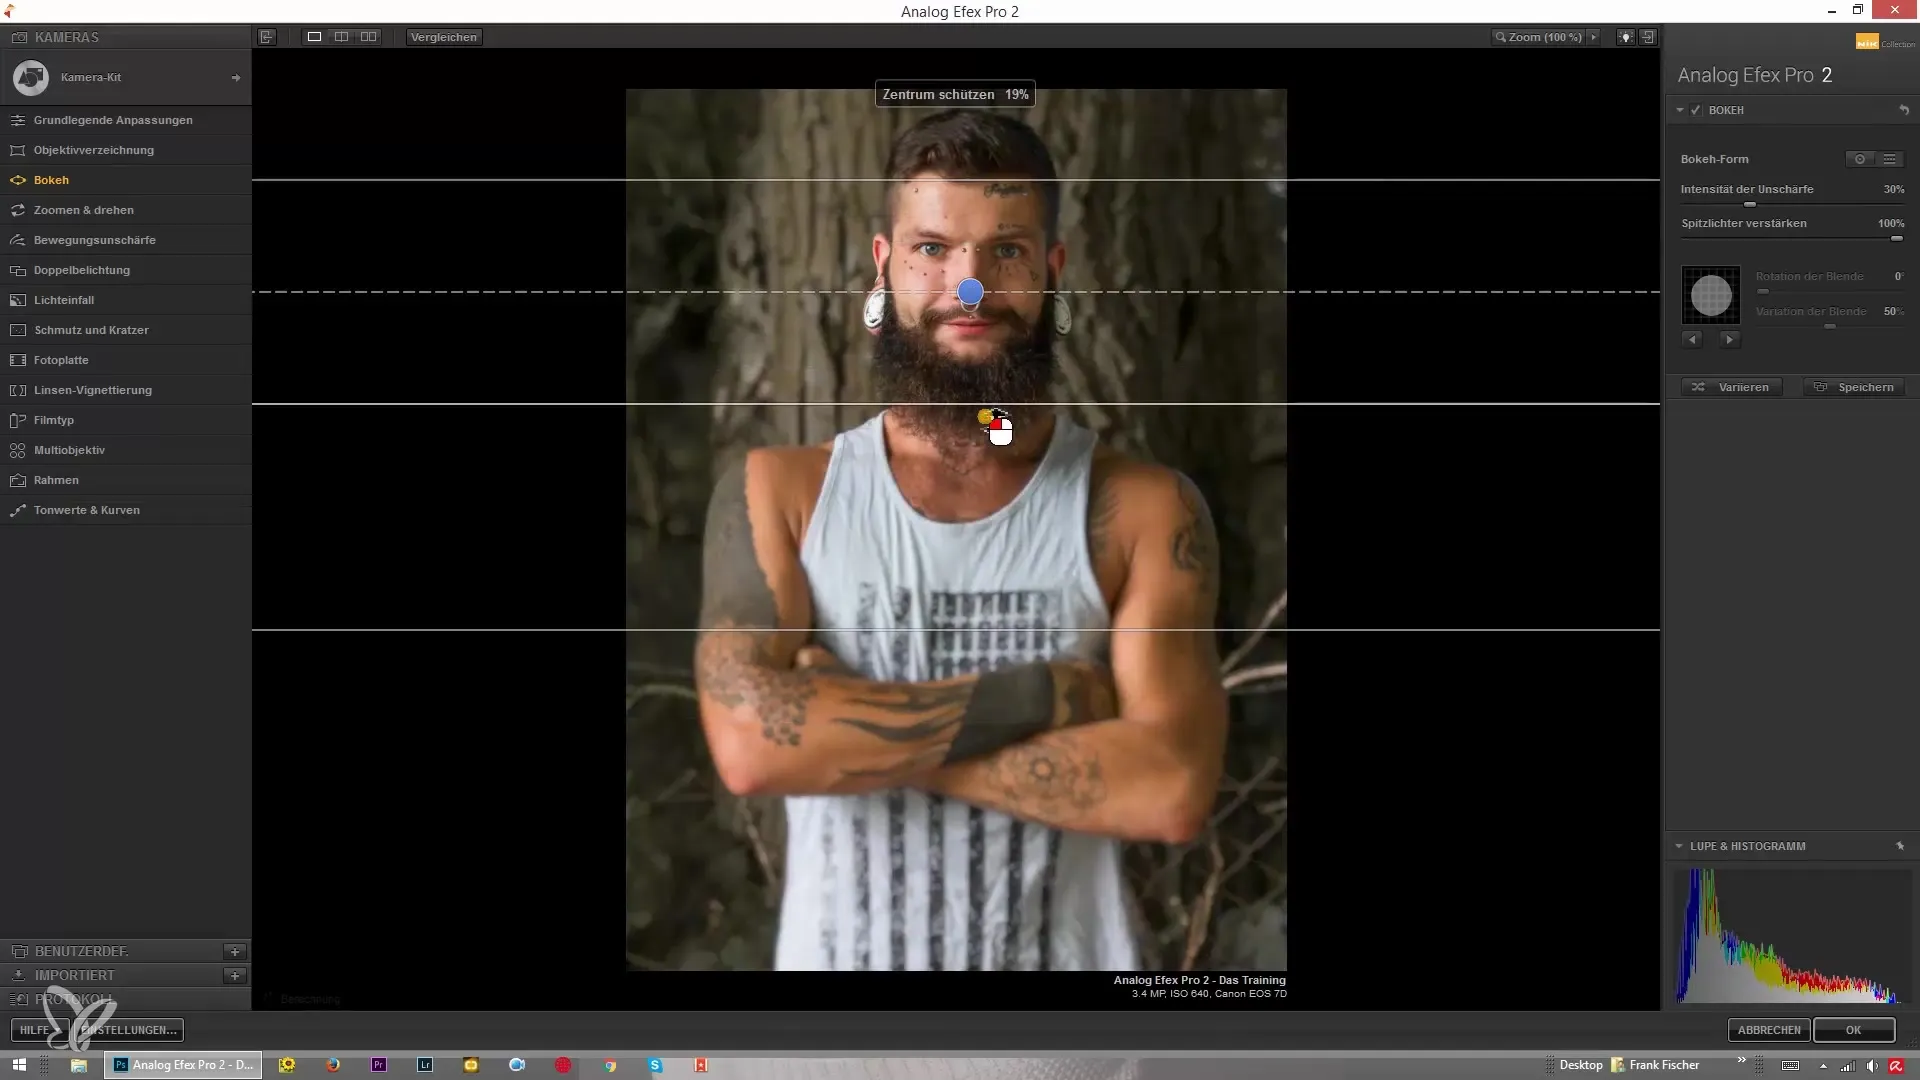
A special feature is the Tilt-Shift effect. Here, you load the image and can manually set the transition from blurry to sharp. This is especially useful if you want to try creating a miniature landscape. The adjustments give your image a unique and creative touch.
4. Adjust Blur Intensity
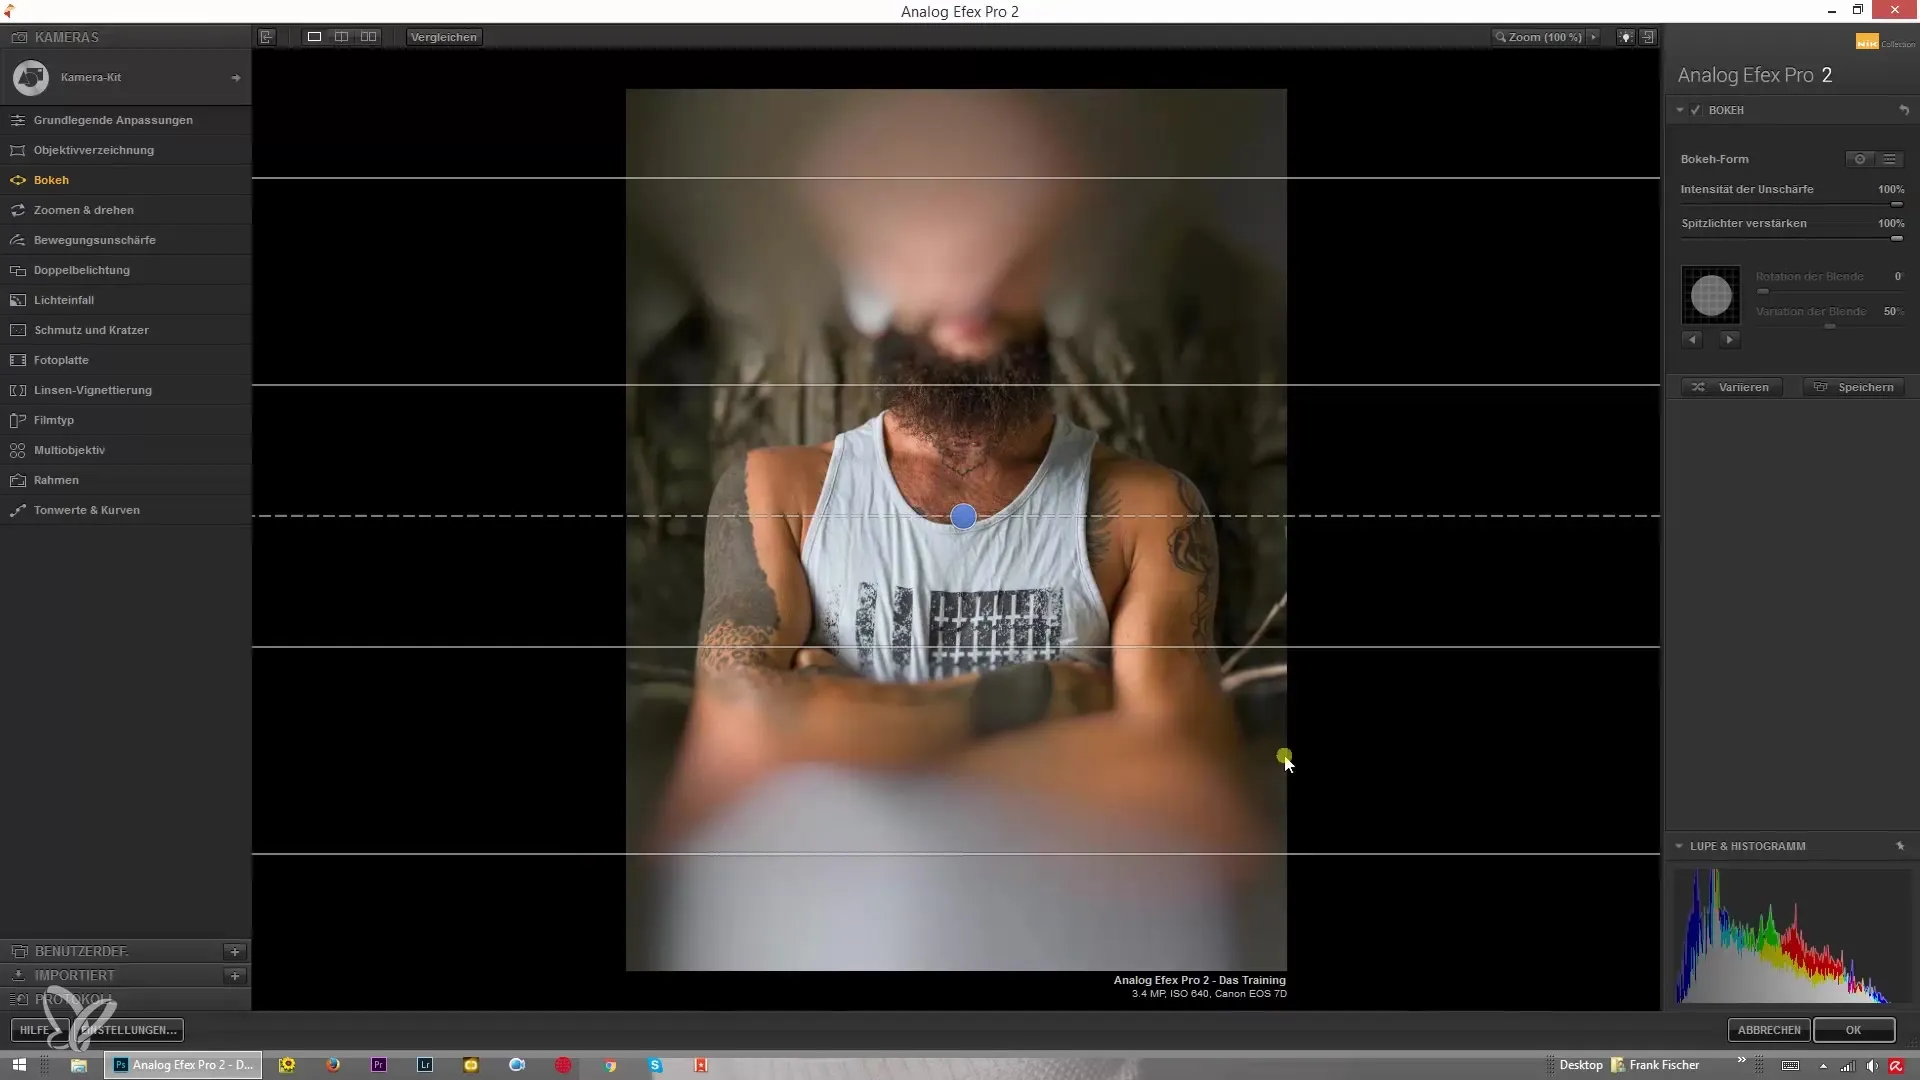
This is about increasing or decreasing the intensity of the blur. Using the slider, you can determine the weight of the blur. With high intensity, the image appears dreamlike, while subtle application creates more understated effects. Try different values to find the perfect look for your image.
5. Choose Aperture
The aperture plays a crucial role in the visual style of your photography. You can switch from round to special aperture shapes like star-shaped or even heart-shaped. This is a great way to control the character of the blur in your image. Choose the aperture that best fits your photo and watch how the look changes.
6. Fine-tune the Aperture
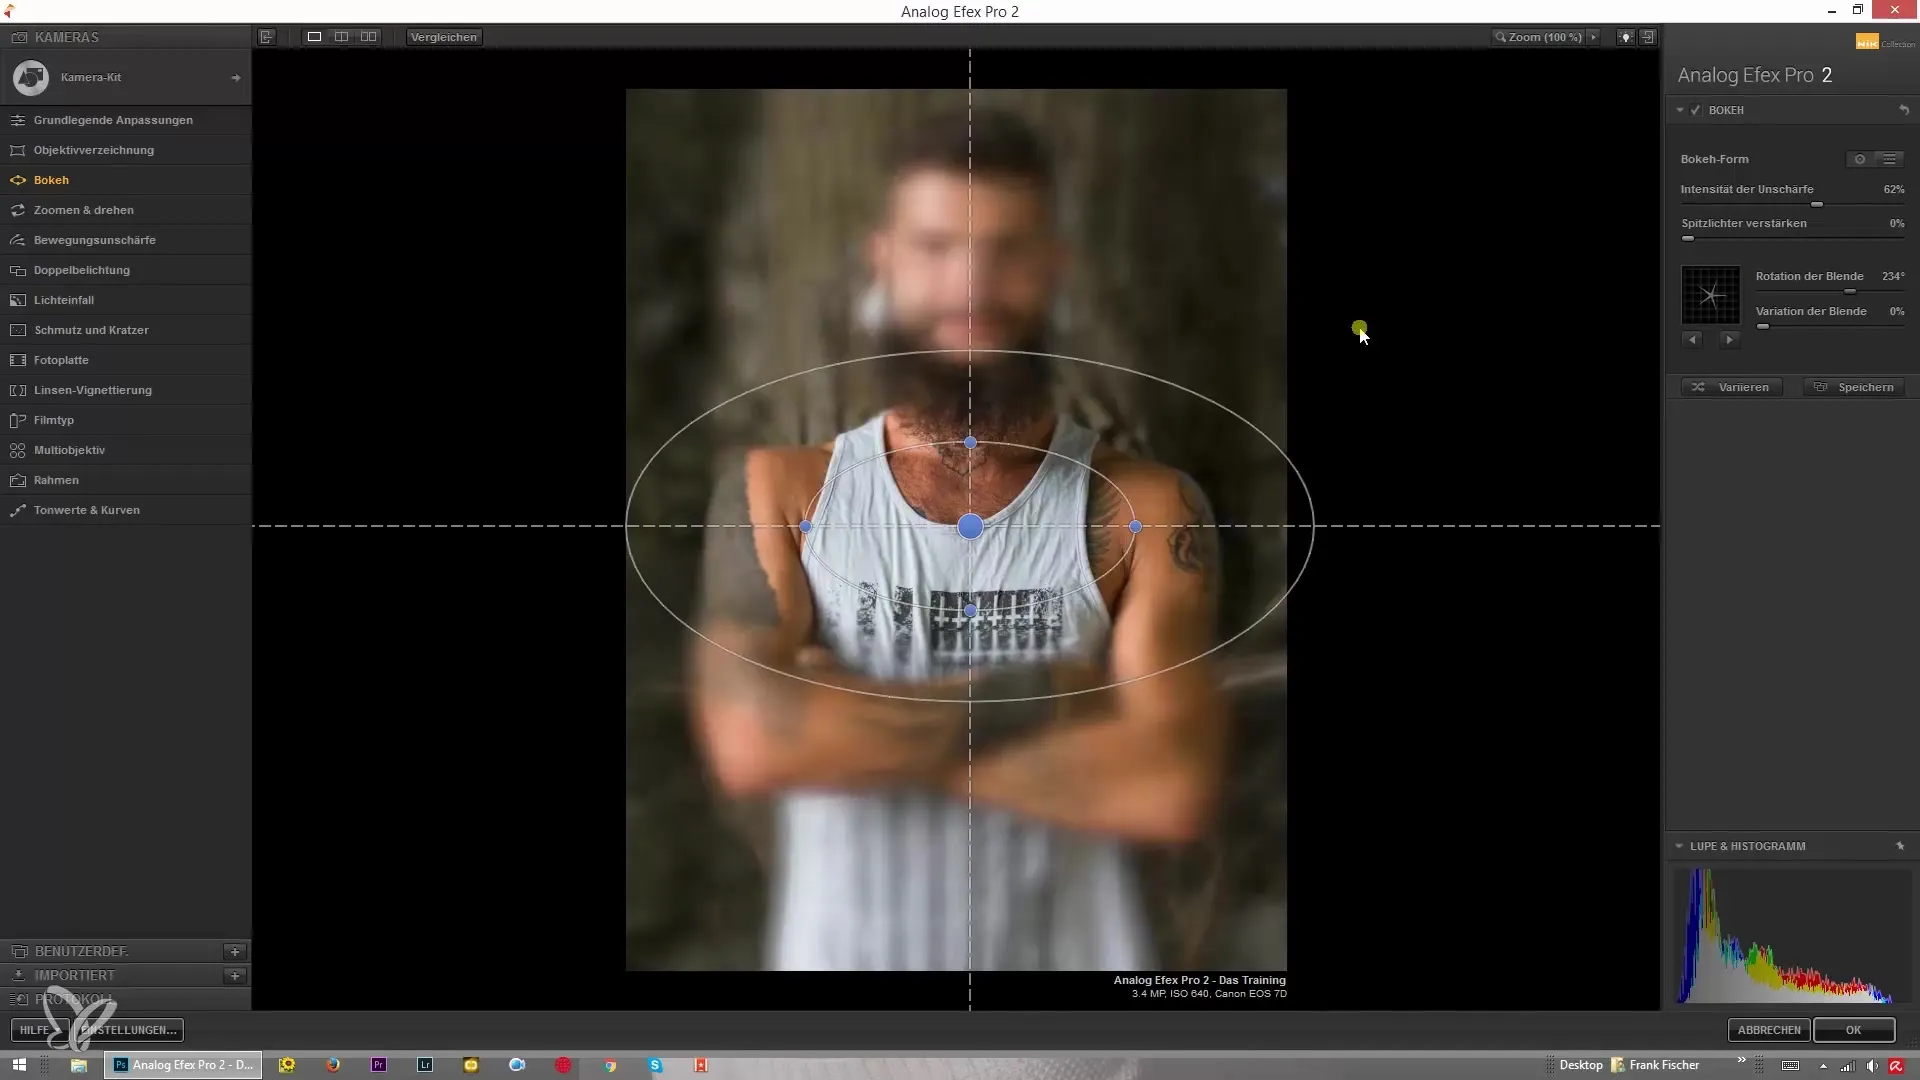
Now you can experiment with the shape and orientation of the aperture. Depending on which aperture you have chosen, you can adjust the outer aperture edges to achieve the desired degree of awareness. Here you have the option to change the structure and appearance of the lights in the blurry area. Enjoy the creative process and play with the shapes!
7. Make Final Adjustments
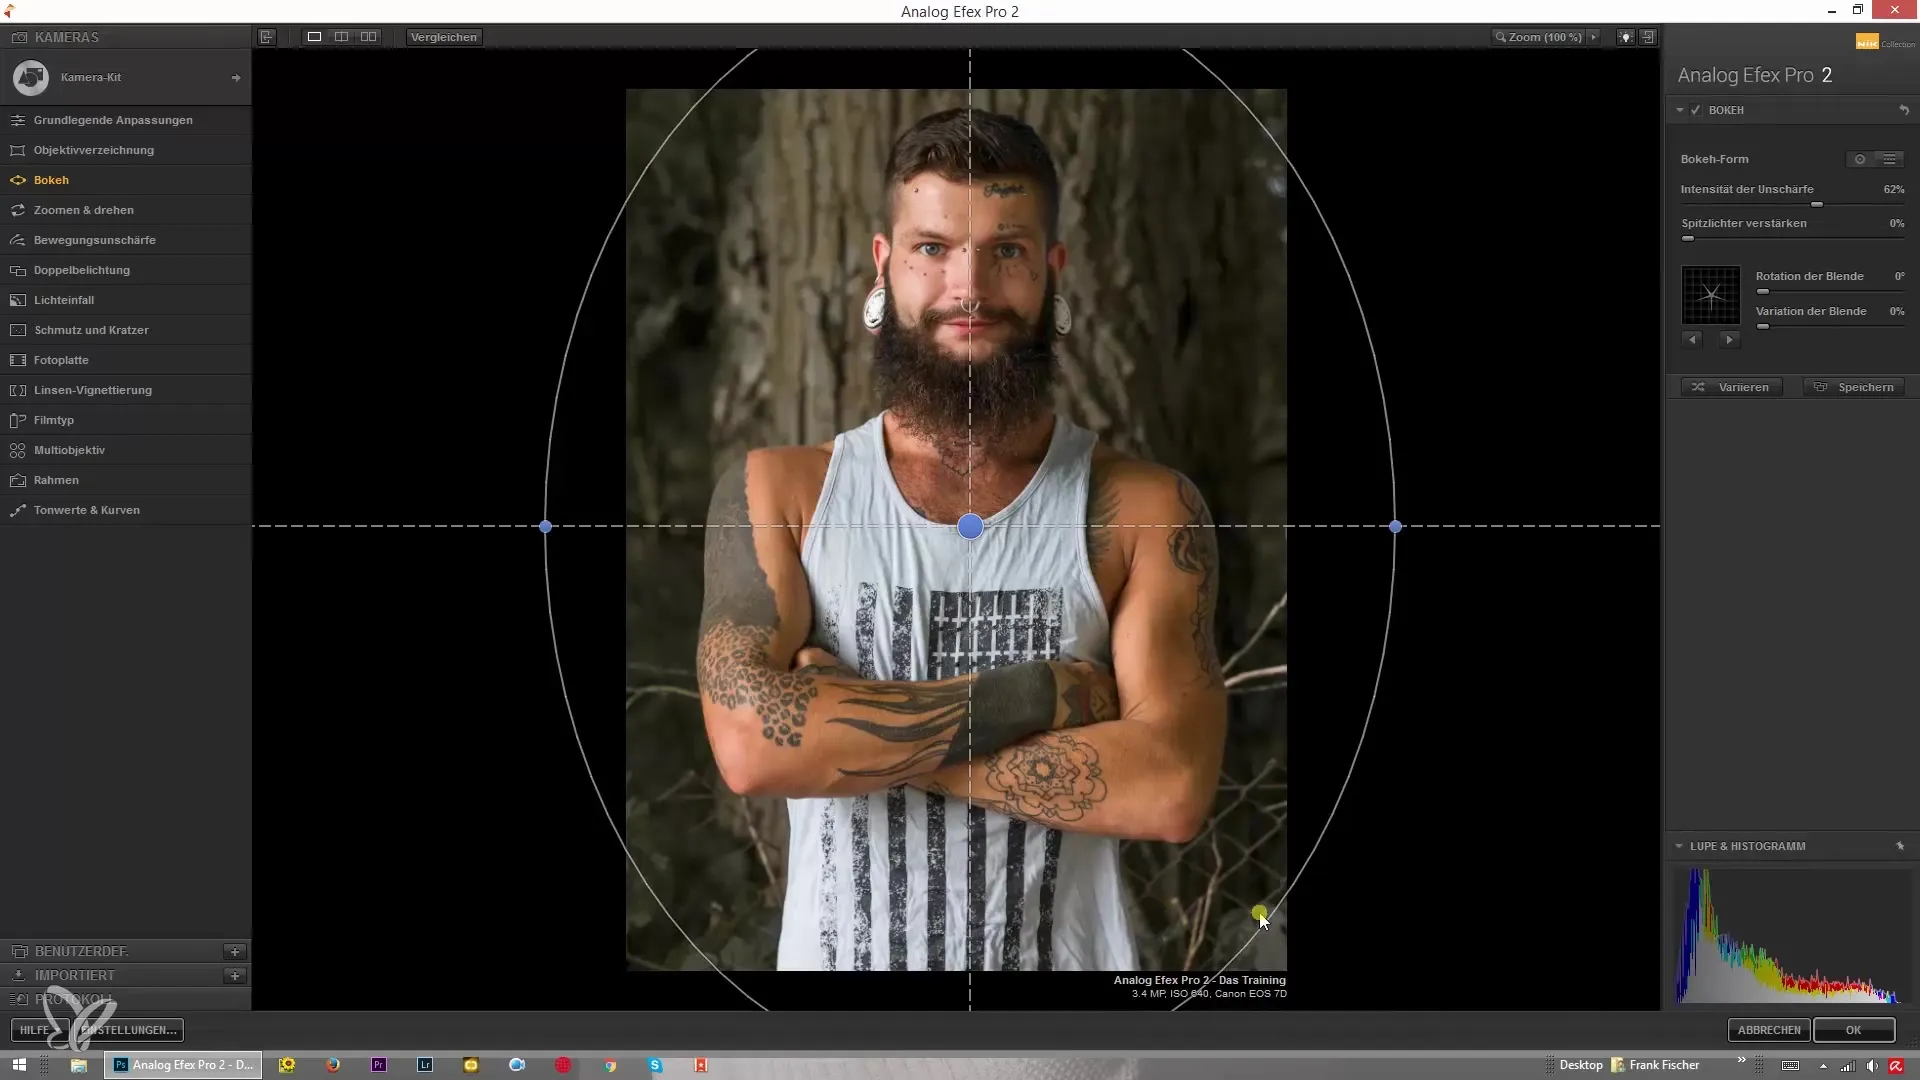
After all other settings have been made, it is time to review the entire image and make any final adjustments if necessary. Here you can again adjust the intensity of the blur or the aperture shape to ensure that everything looks harmonious. Your image should now be ready to be published or showcased as part of your collection.
Summary – Creatively Use Bokeh Effects with Analog Efex Pro 2
With these steps, you can optimally use the Bokeh effect in Analog Efex Pro 2 and give your photos a new visual appeal. Be creative and experiment with the various settings to achieve the best results. Have fun!
Frequently Asked Questions
How can I activate the Bokeh effect?To activate the Bokeh effect, select the image and determine the center where the focus should remain.
Can I adjust the shape of the blur?Yes, you can choose from different shapes like round or elliptical and adjust the width and height.
What is the Tilt-Shift effect?The Tilt-Shift effect allows you to manually control the transition from blurry to sharp in an image.
How do I change the intensity of the blur?You can increase or decrease the intensity of the blur as desired using a slider.
What does selecting the aperture do?The choice of the aperture influences the visual style of your images and can vary from round to special shapes.


