Working with images is not just a matter of creativity, but also of technical skills. One of the most important tools for image editing is the histogram. It provides you with valuable information about the lighting conditions and the distribution of colors in your image. In this guide, you will learn how to read and use the histogram in Analog Efex Pro 2 correctly to further optimize your photographs.
Main insights
- The histogram represents the brightness distribution of an image: the left side shows dark areas and the right side shows light areas.
- You can use the zoom function to make focused changes to specific areas of the image.
- A conscious adjustment of brightness can prevent details in the shadows or highlights from being lost.
Using the histogram and zoom function
The histogram is a fundamental tool in image editing to analyze the tonal distribution in the image. Let's start with the basics.
Displaying the histogram
Open Analog Efex Pro 2 and look for the histogram in the lower corner. This shows you how the light is distributed in your image.
The histogram is divided into two areas: On the left side, you see the dark areas, while the right areas represent the lighter tones. When you work with the image, you can see the distribution of tonal values directly, which is helpful in determining whether details are lost in dark or light areas.
Focusing with the zoom function
To specifically work on certain areas of the image, the zoom function can be very useful. You can find this in the lower part of the program as well. You can enlarge the image with the mouse and dive into the details.
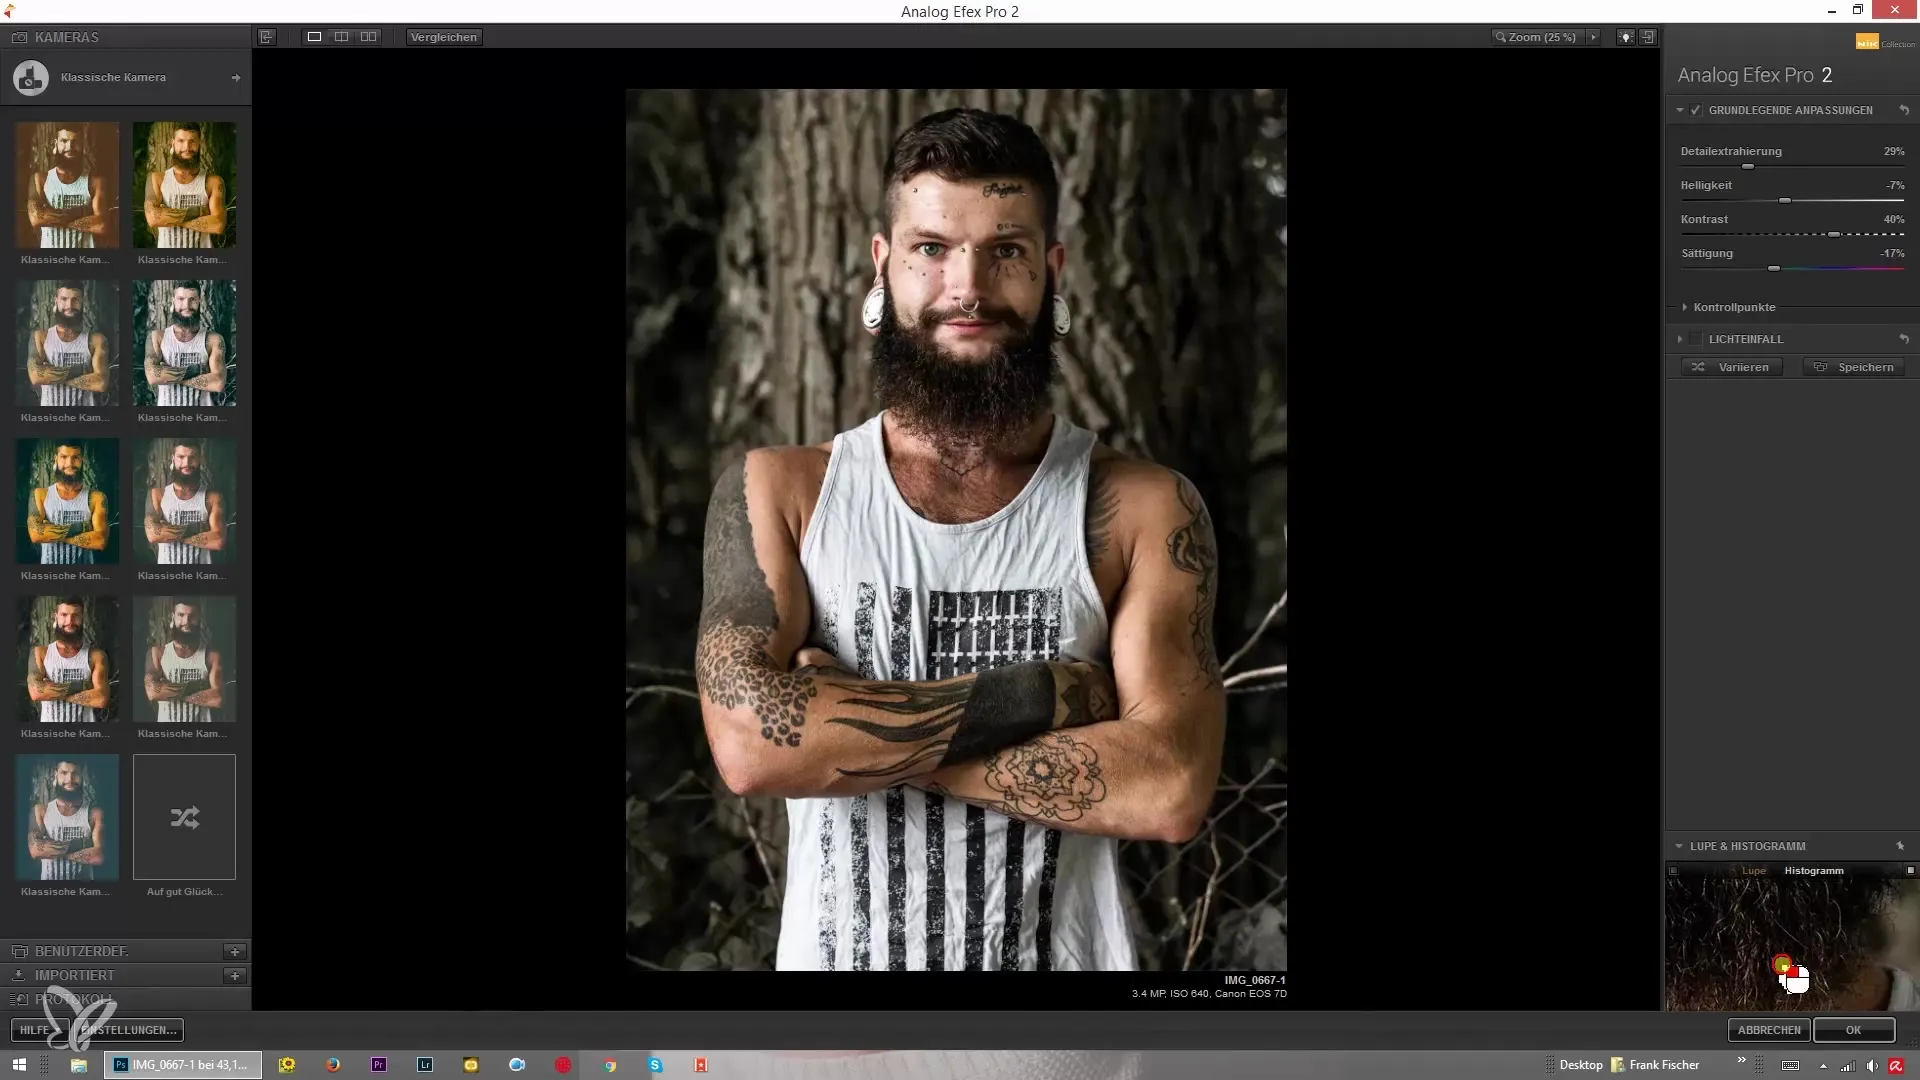
Now that you have the image in the zoom view, it's important to know that changing values can affect the entire image. However, you can also define a specific point that you want to focus on. You do this by clicking on the small needle in the zoom view.
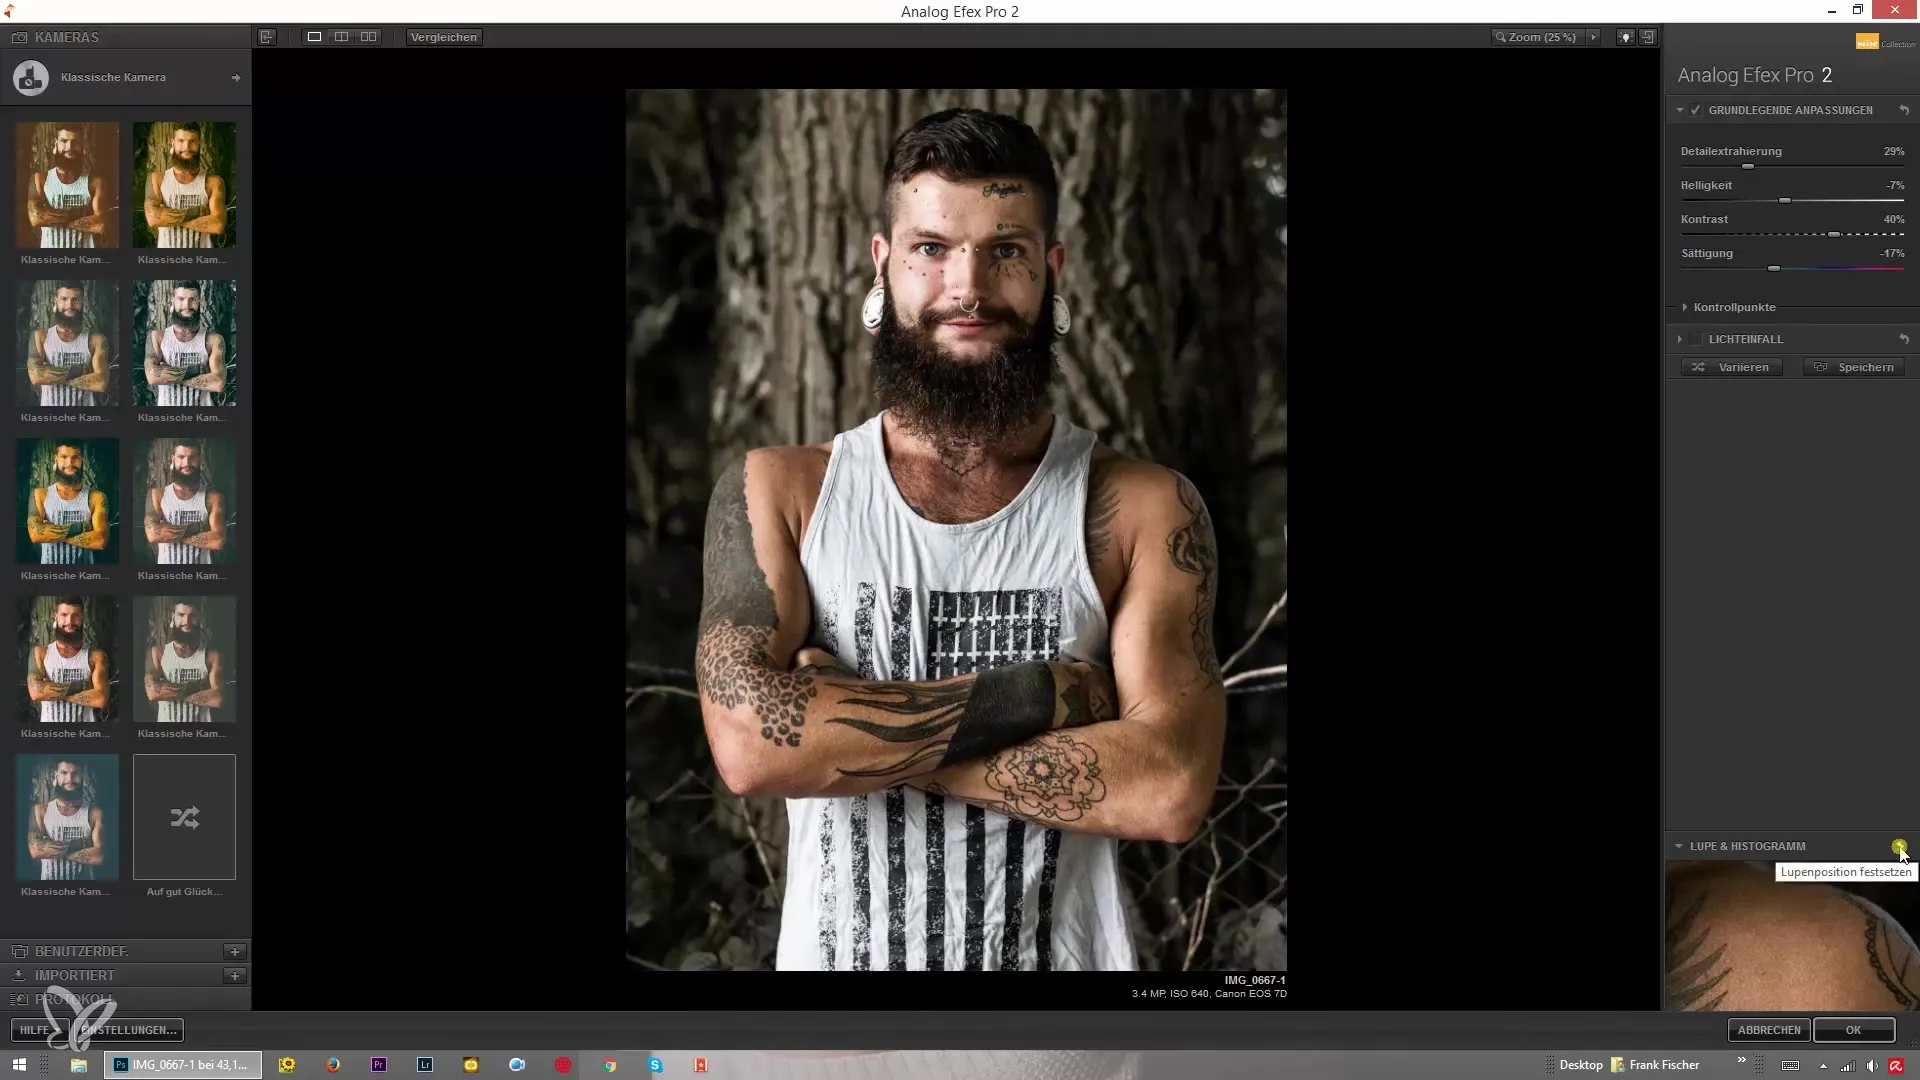
Now you can click on a specific point in the image, for example on an eye, and the view will remain fixed on that spot while you make other adjustments.
Adjusting brightness and observing the histogram
A central aspect of image editing is brightness adjustment. As you increase the brightness, you will notice that the peaks in the histogram shift to the right.
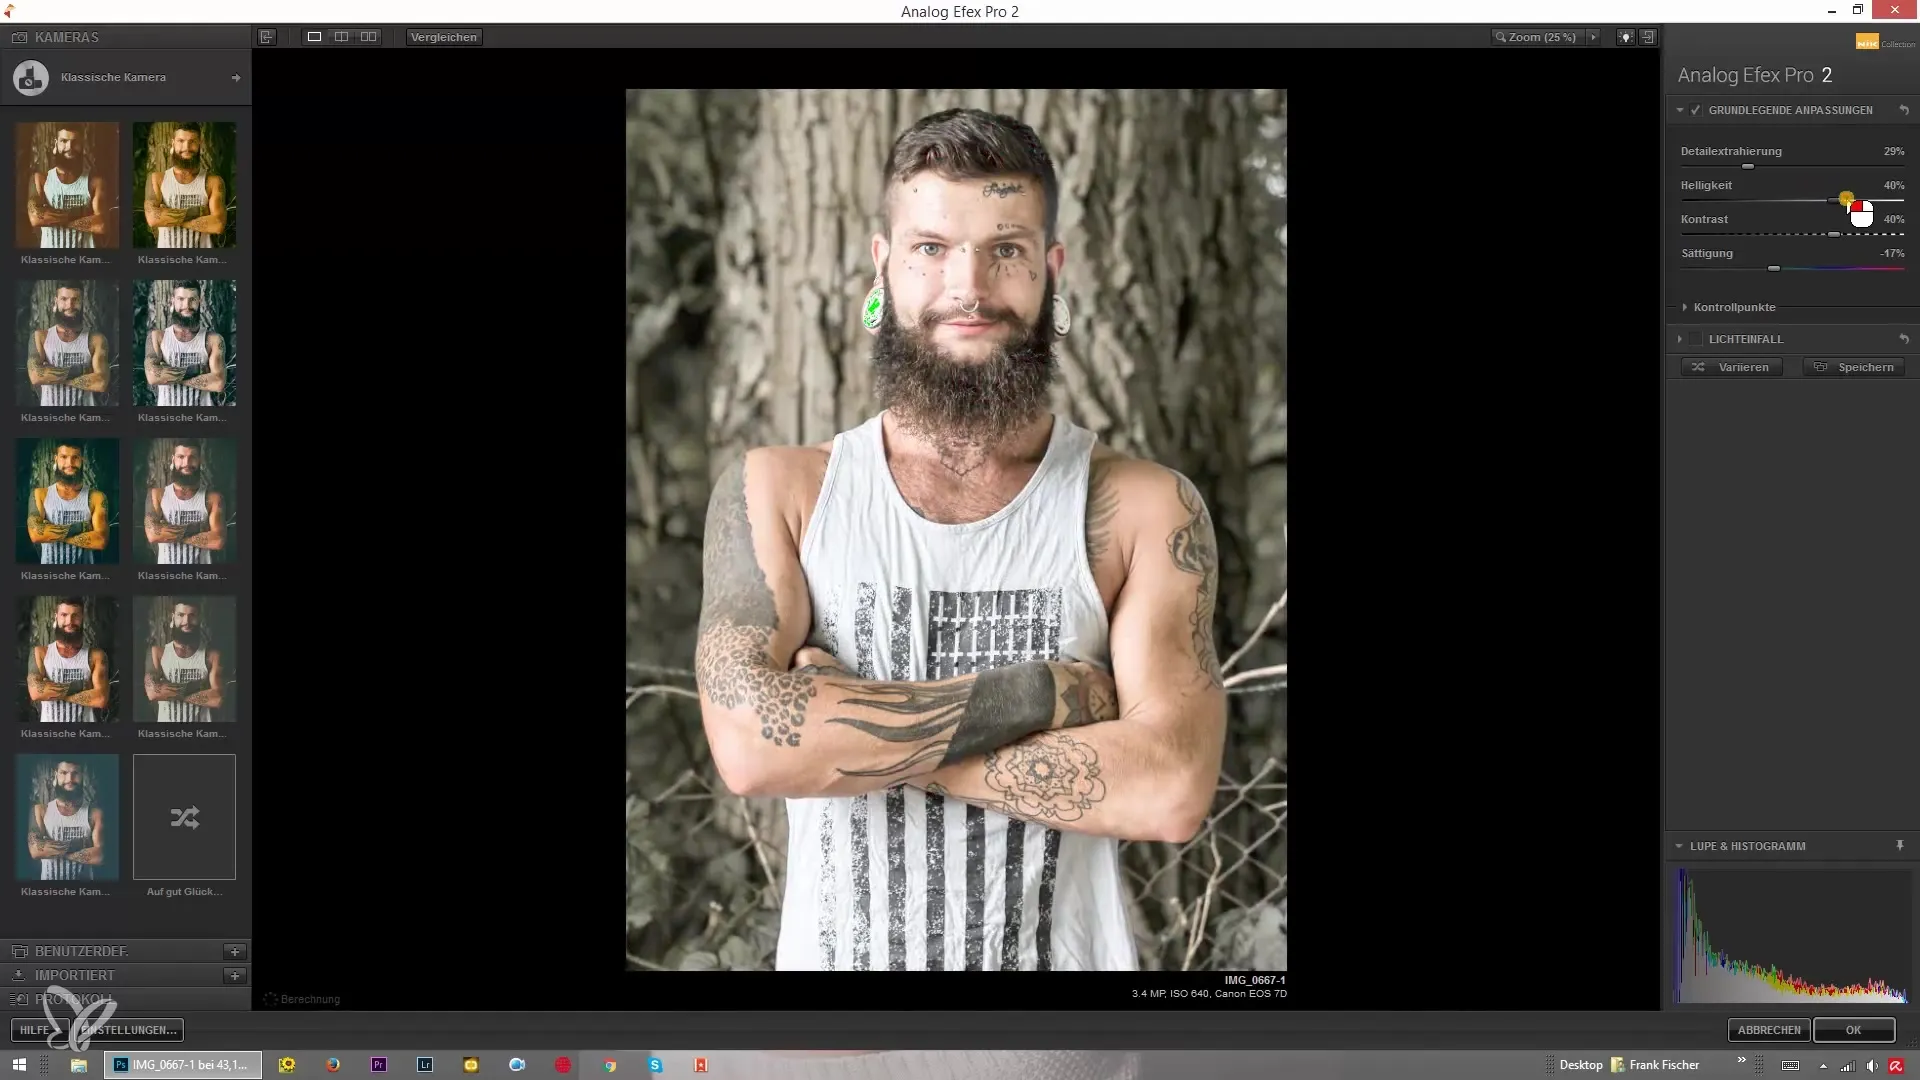
This is an important moment, as it allows you to see if you are possibly overexposing details in the light areas and thus losing them. It is crucial to find a balance between light and shadow to make your image lively and inviting.
If you notice that the histogram is shifting too far to the right and there is no more detail in the light areas, you should reduce the brightness slightly again.
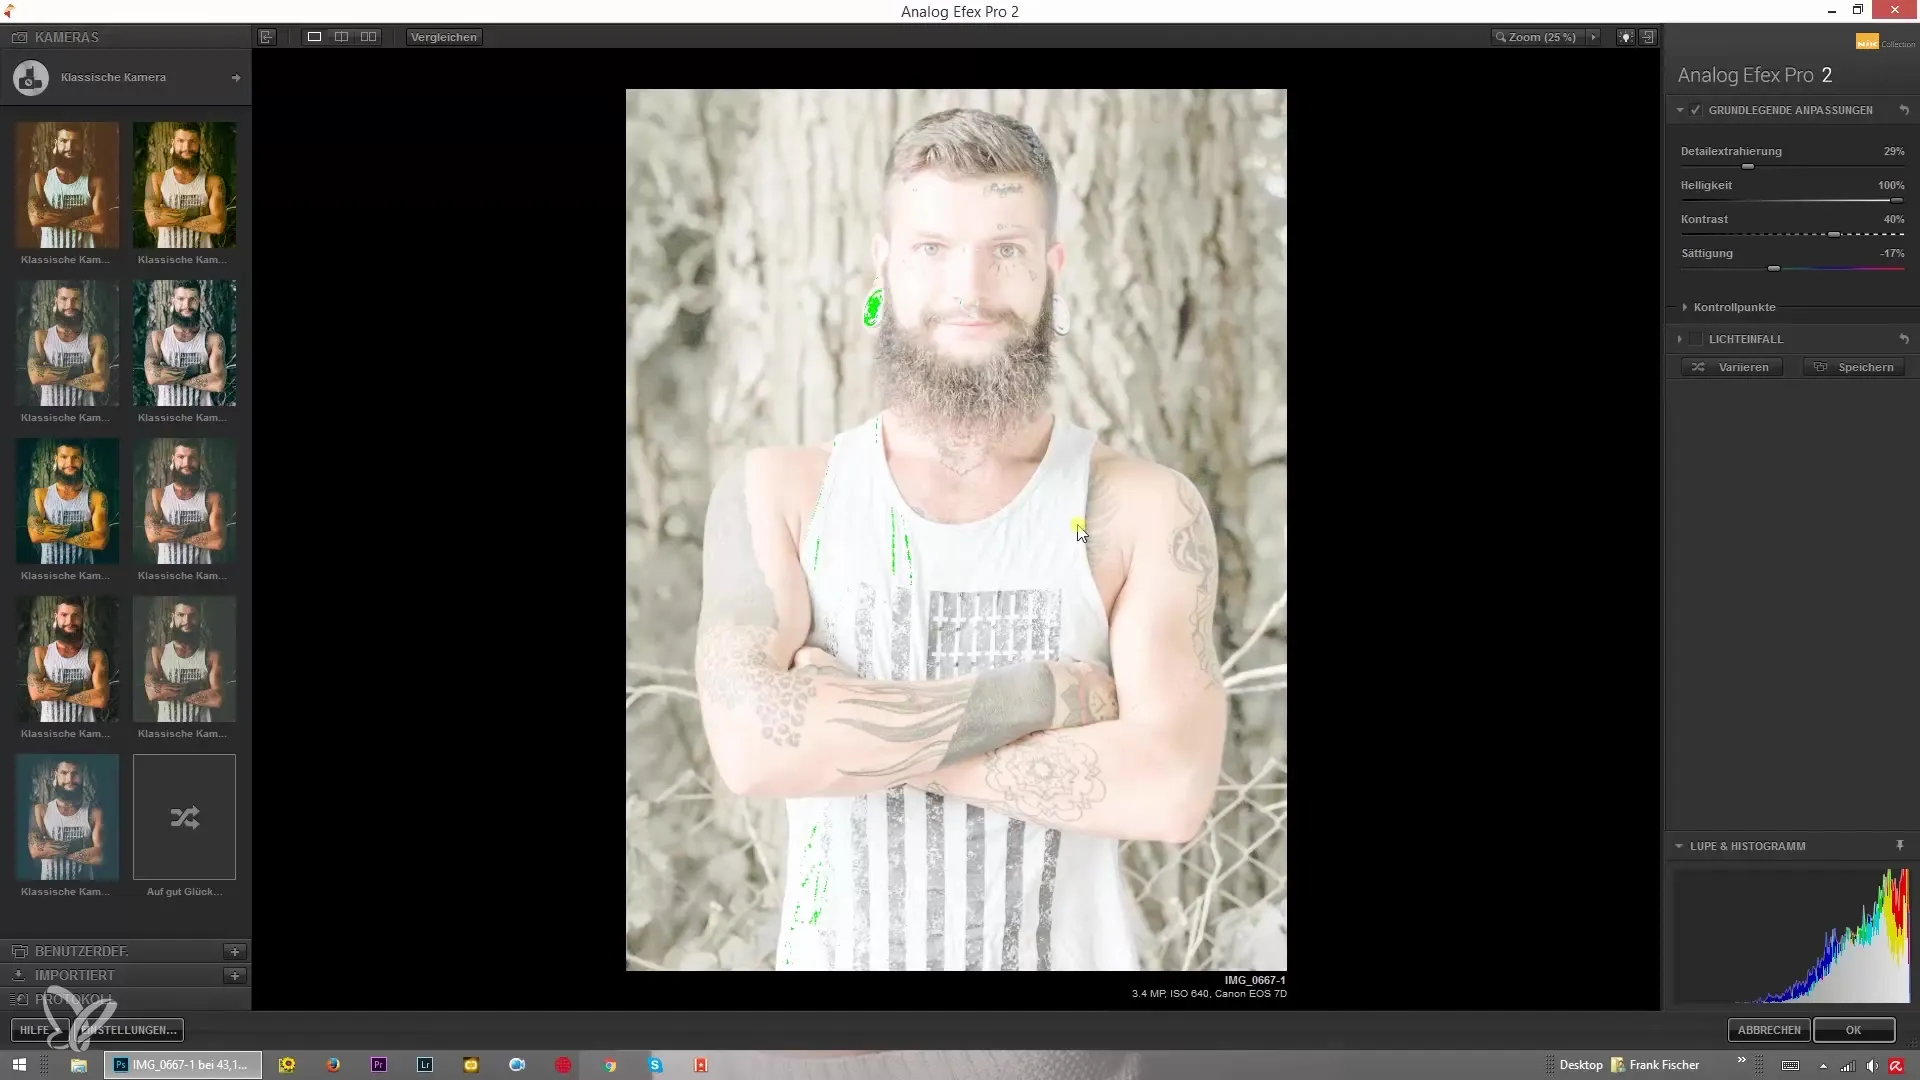
Analyzing the histogram in different colors
The histogram also allows you to analyze the individual color channels. Click on the options in the histogram to display only the color representations for red, green, and blue.
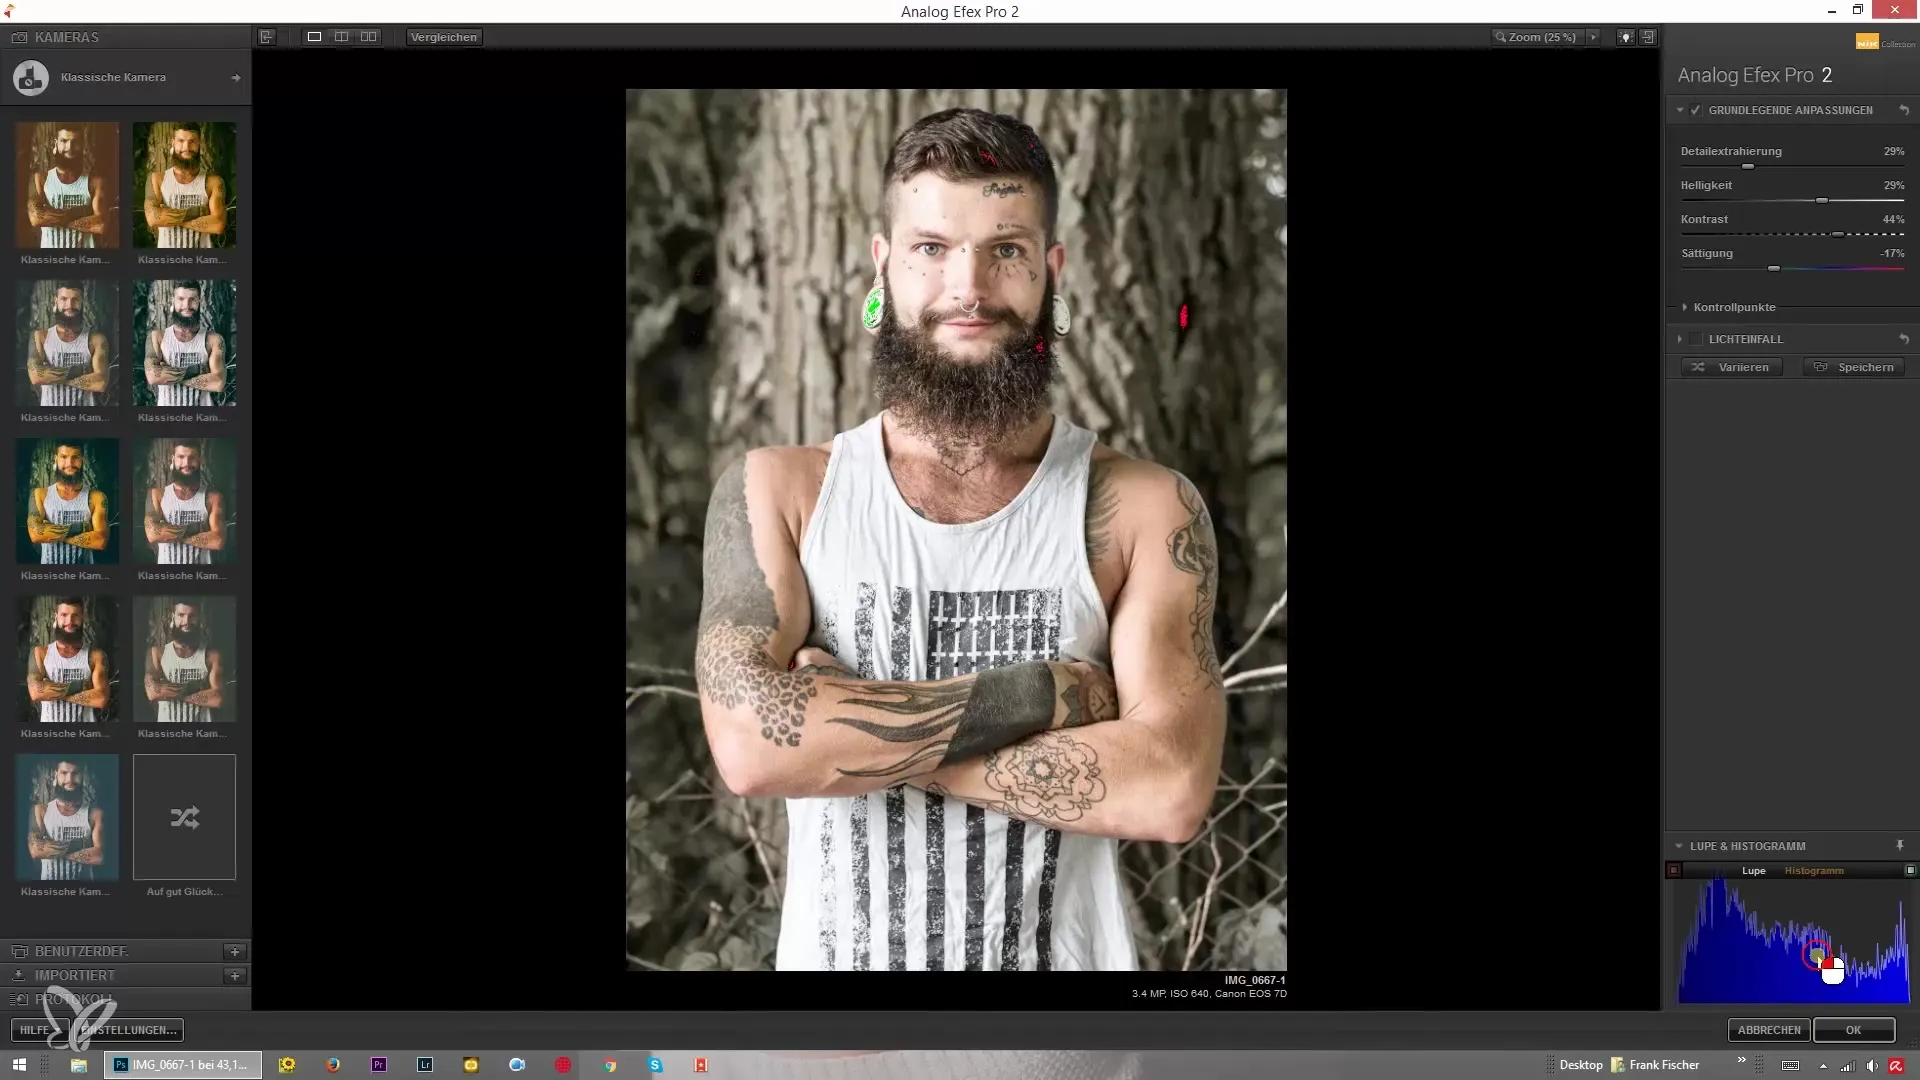
This allows you to specifically detect color shifts and take action to improve the color balance if necessary. This is particularly important when working with extensive adjustments.
Strategies for optimizing the image
While adjusting the brightness and color of an image, always keep in mind: Do you want to preserve the black areas or have an image full of detail? It is entirely up to you what standards you set for your image.
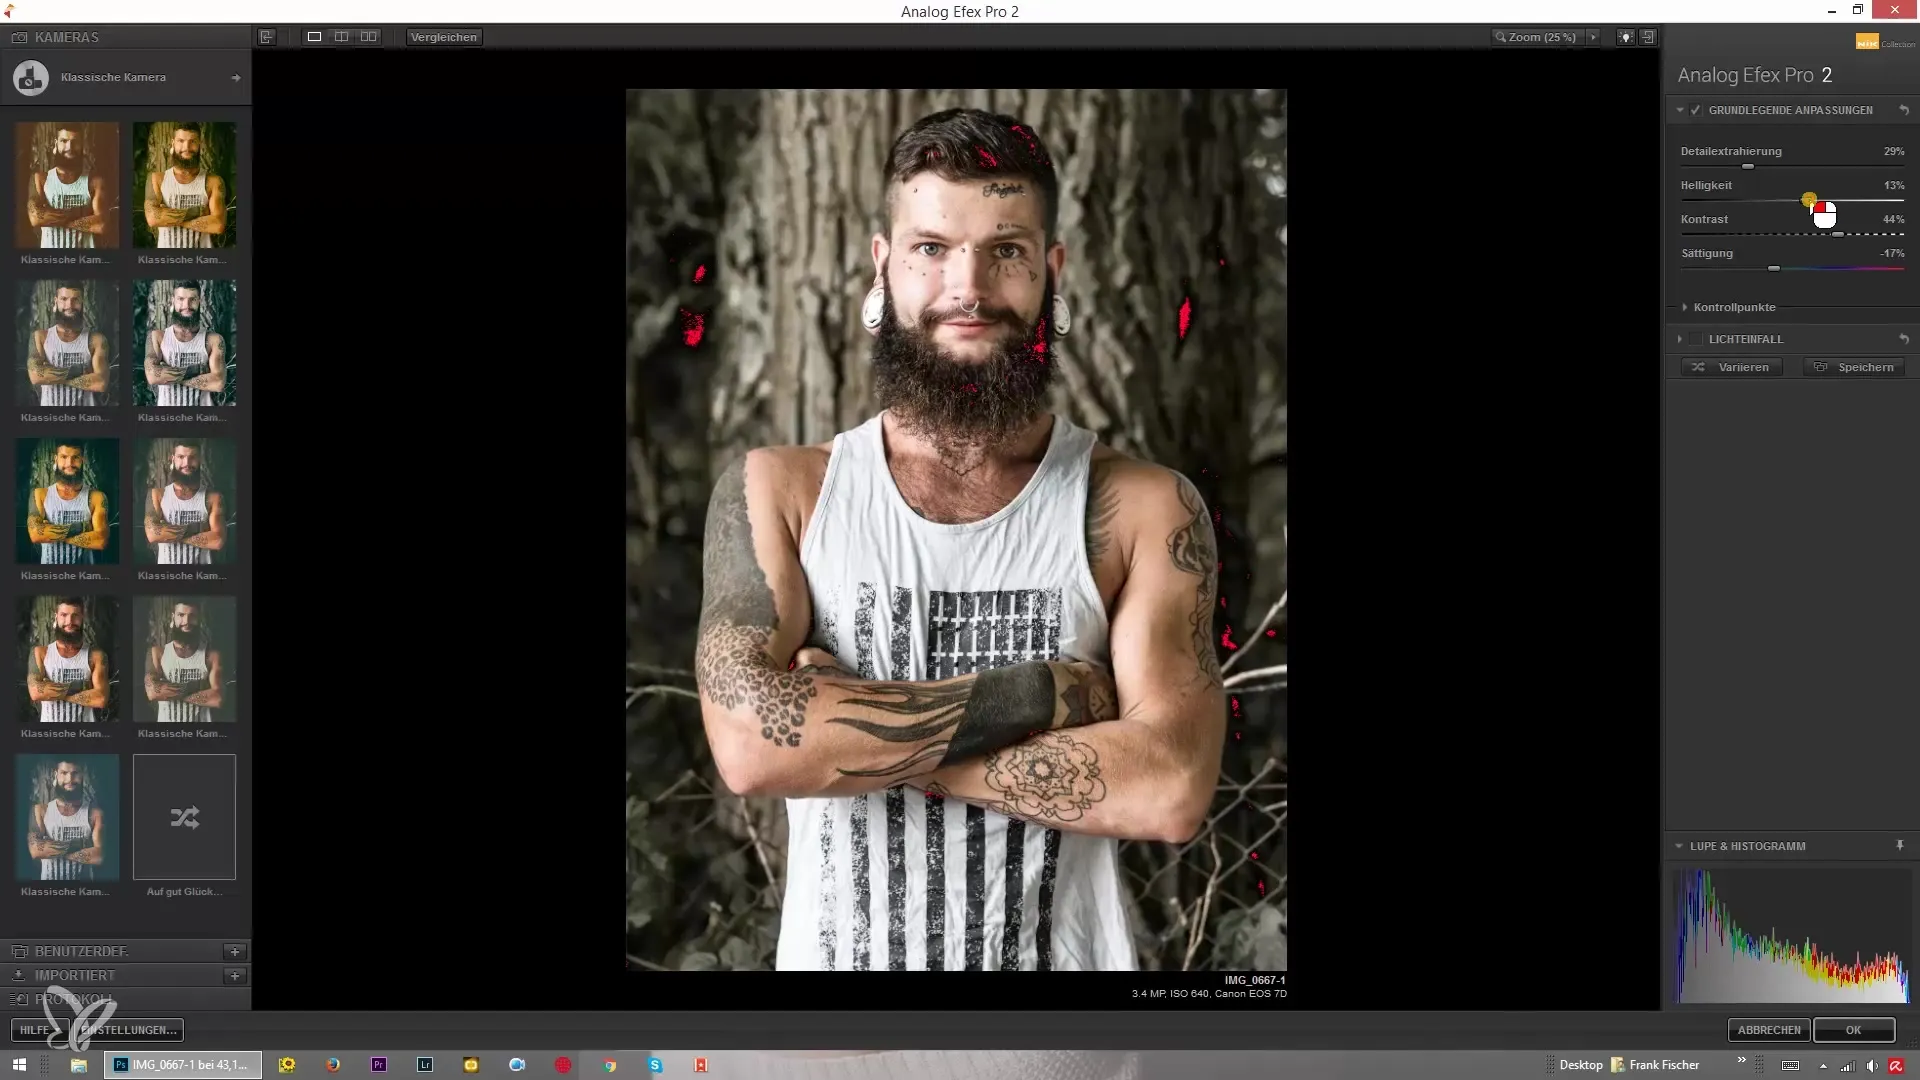
A good strategy is to start with small adjustments and regularly check the histogram. This way, you can avoid overexposures or too dark spots that could make the image unattractive.
Summary – Understanding and effectively using the histogram in Analog Efex Pro 2
In summary, the histogram plays an essential role in image editing, especially in Analog Efex Pro 2. The combination of the histogram and zoom function allows for a detailed adjustment of your image. By specifically observing and adjusting brightness as well as analyzing the color channels, you can significantly enhance your photographs.
Frequently asked questions
How can I display the histogram in Analog Efex Pro 2?You can find the histogram in the lower corner of the program, where the distribution of lighting conditions is displayed.
What does the zoom function do for me?With the zoom function, you can enlarge specific areas of the image and make targeted changes without having to re-evaluate the entire image.
How can I ensure I don't lose any details?When adjusting brightness, make sure that the histogram does not shift too far to the right, which indicates overexposure.
How can I analyze the color distribution in the histogram?Click on the corresponding color displays in the histogram to view only the respective color channel (red, green, blue).
Can I adjust other areas of the histogram as well?Yes, you can adjust brightness and clarity to achieve your desired results. Always keep an eye on the implications in the histogram.


