With the Nik Collection, especially with Analog Efex Pro 2, you get a powerful tool to create special image collages. These collages allow you to highlight various parts of the image and showcase particularly striking retouches. In this guide, you'll learn how to create a creative collage using the multi-lens. Let's dive straight into the creative process.
Main insights With the multi-lens, you can capture various perspectives, adjust the image sections as desired, and use different styles and effects to create a unique collage.
Step-by-Step Guide
Step 1: Correctly use the multi-lens and adapter
To work with the multi-lens, you need a second lens and a suitable adapter. This adapter is screwed onto the front of your camera. Make sure everything is connected correctly and securely to obtain high-quality images during shooting.
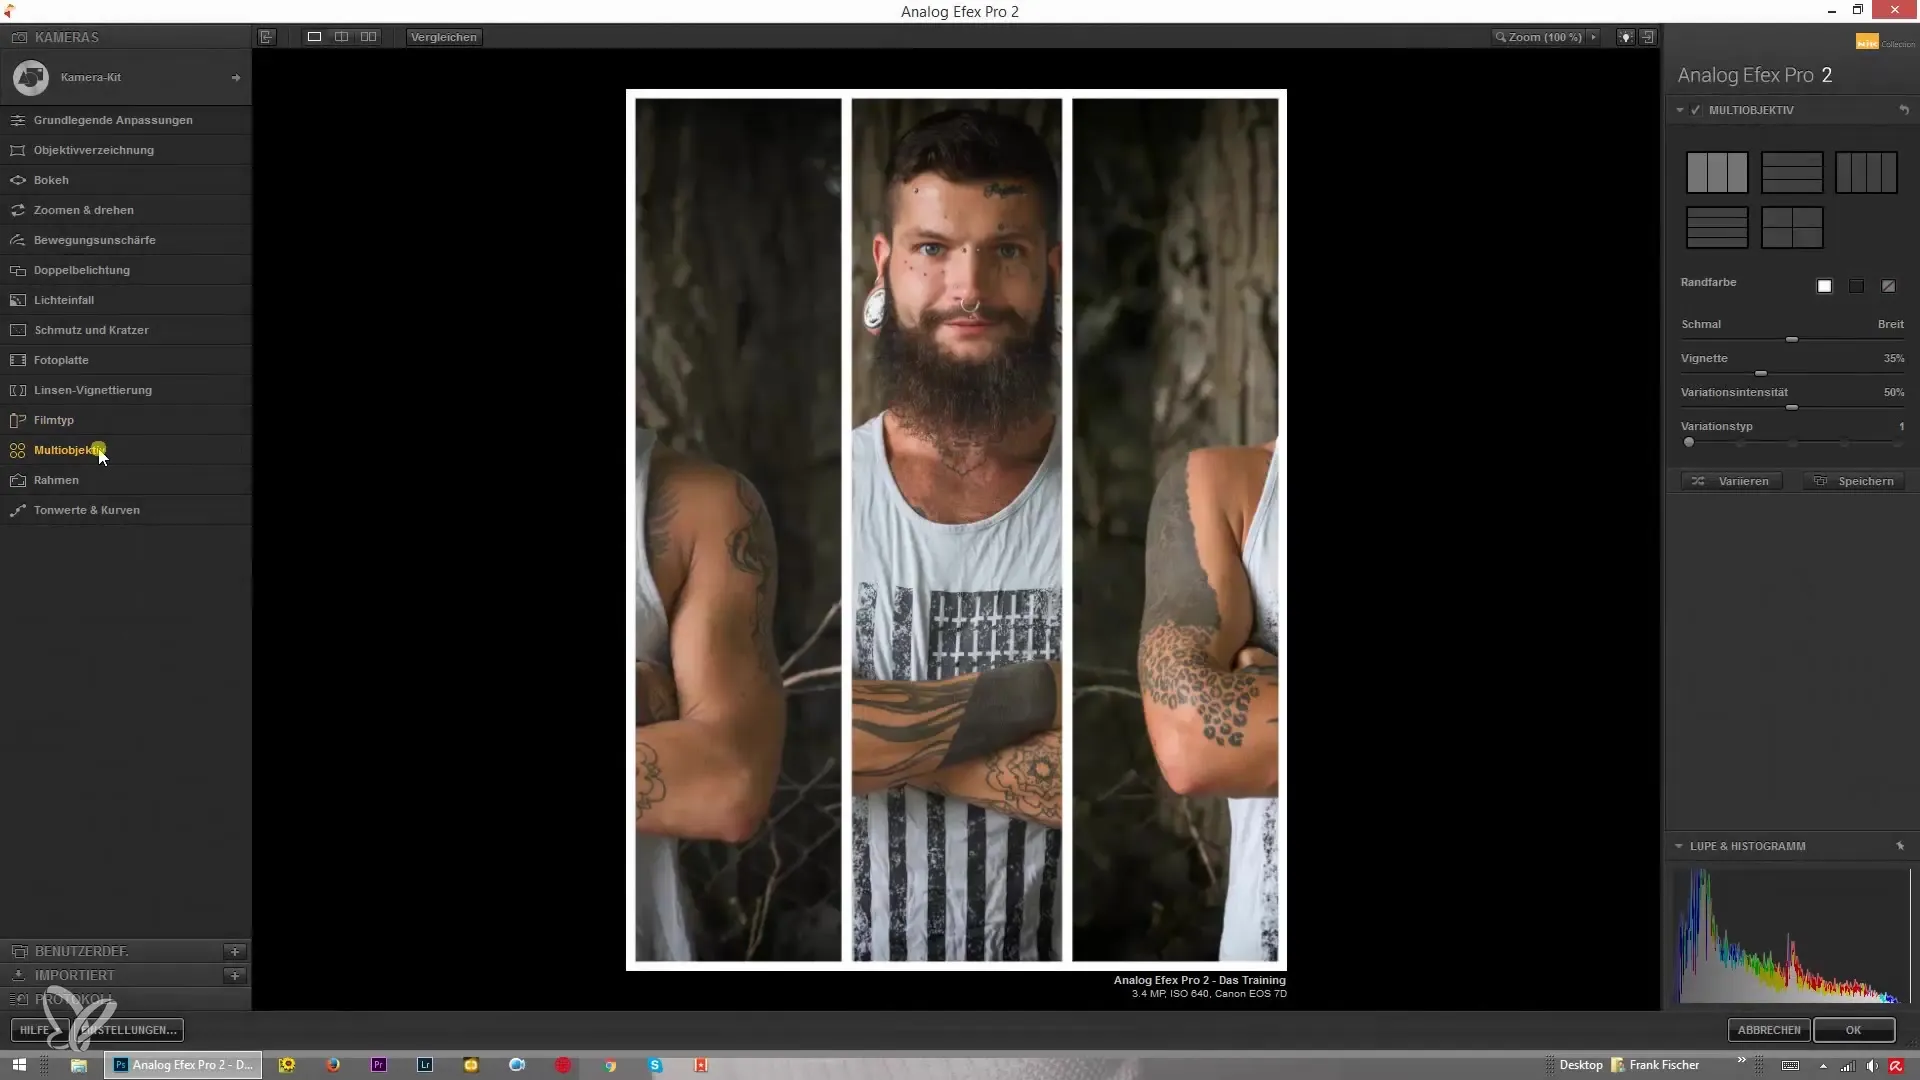
Step 2: Take pictures and choose perspectives
The multi-lens allows you to capture different subjects and perspectives simultaneously. Think in advance about which scenes you want to capture and select the appropriate perspectives. You will be able to take the same image from different angles, providing you with a variety of options for your collage later on.
Step 3: Choose the image arrangement
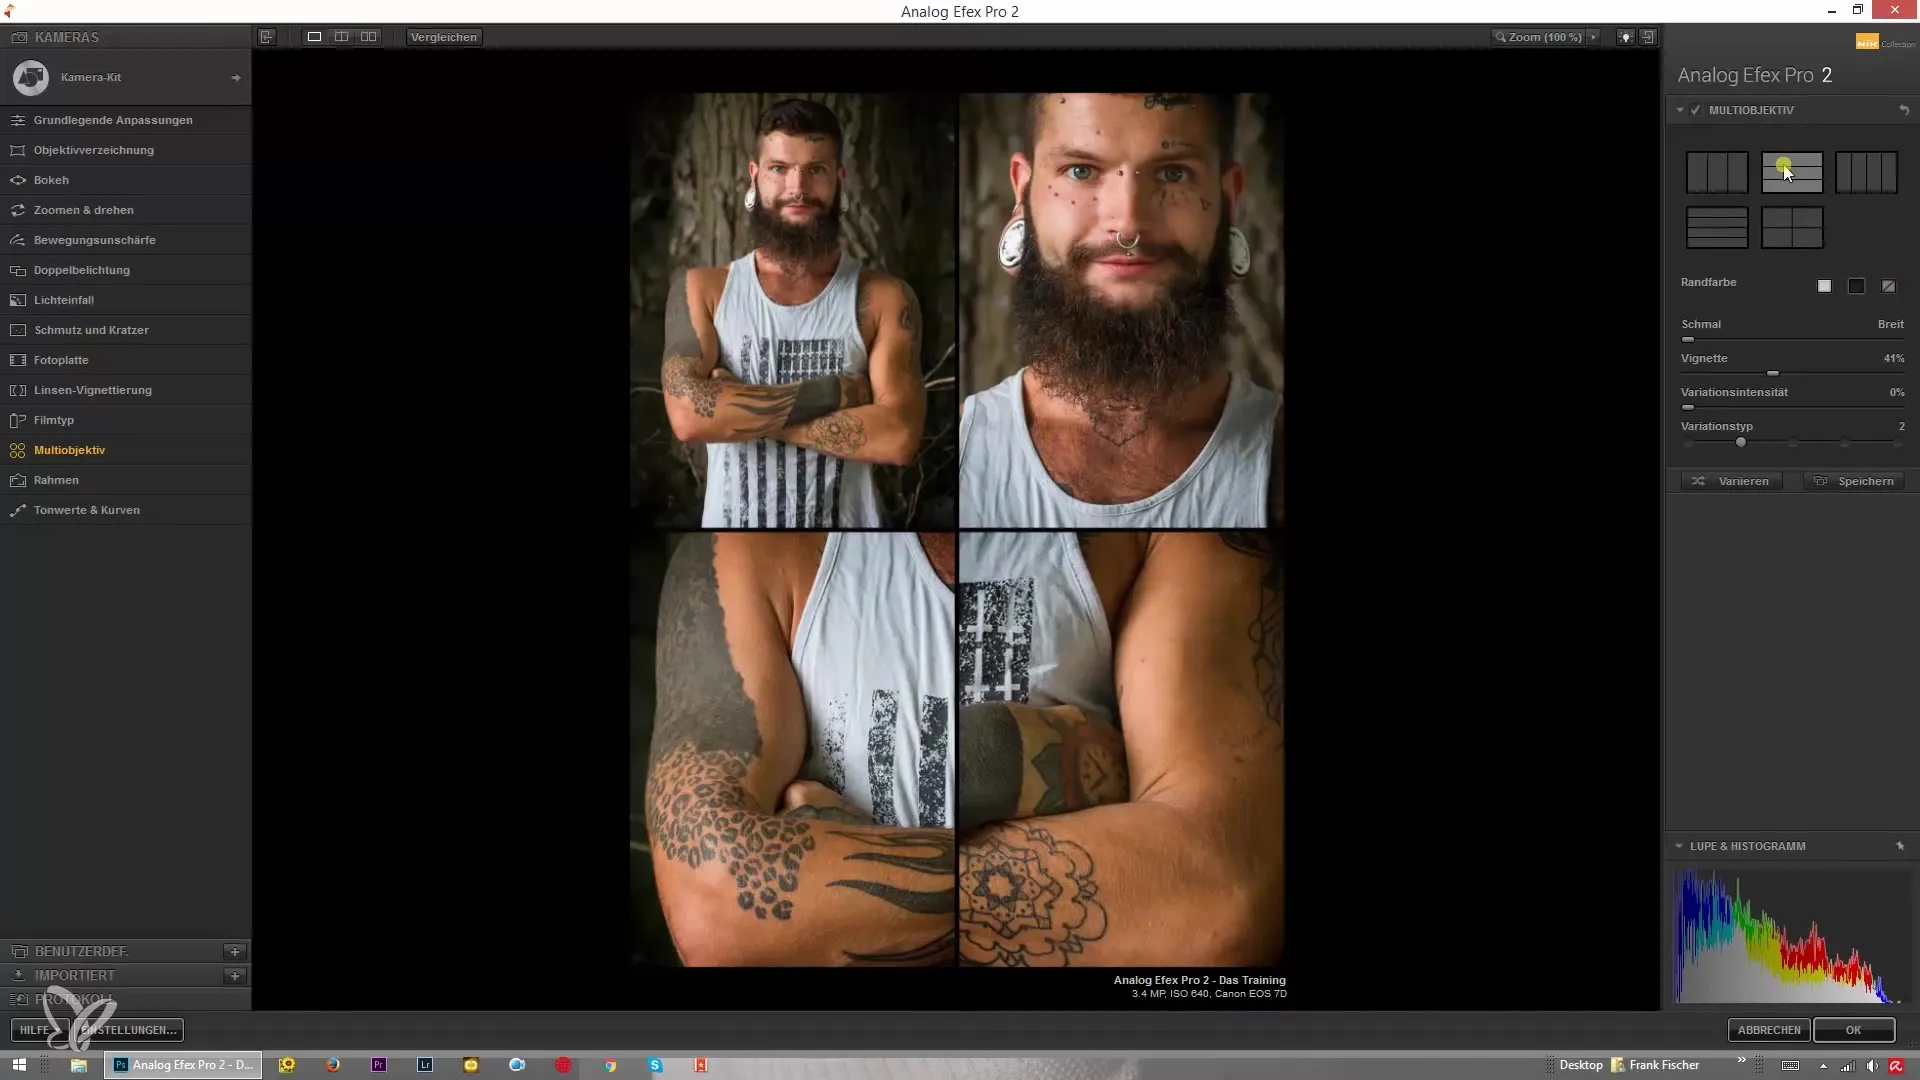
Once you've taken the shots, open the software and upload your images. You will now see various options for arranging your images. You can choose whether the images should be arranged side by side or stacked on top of each other. You can customize the arrangement individually, so choose the option that best fits your project.
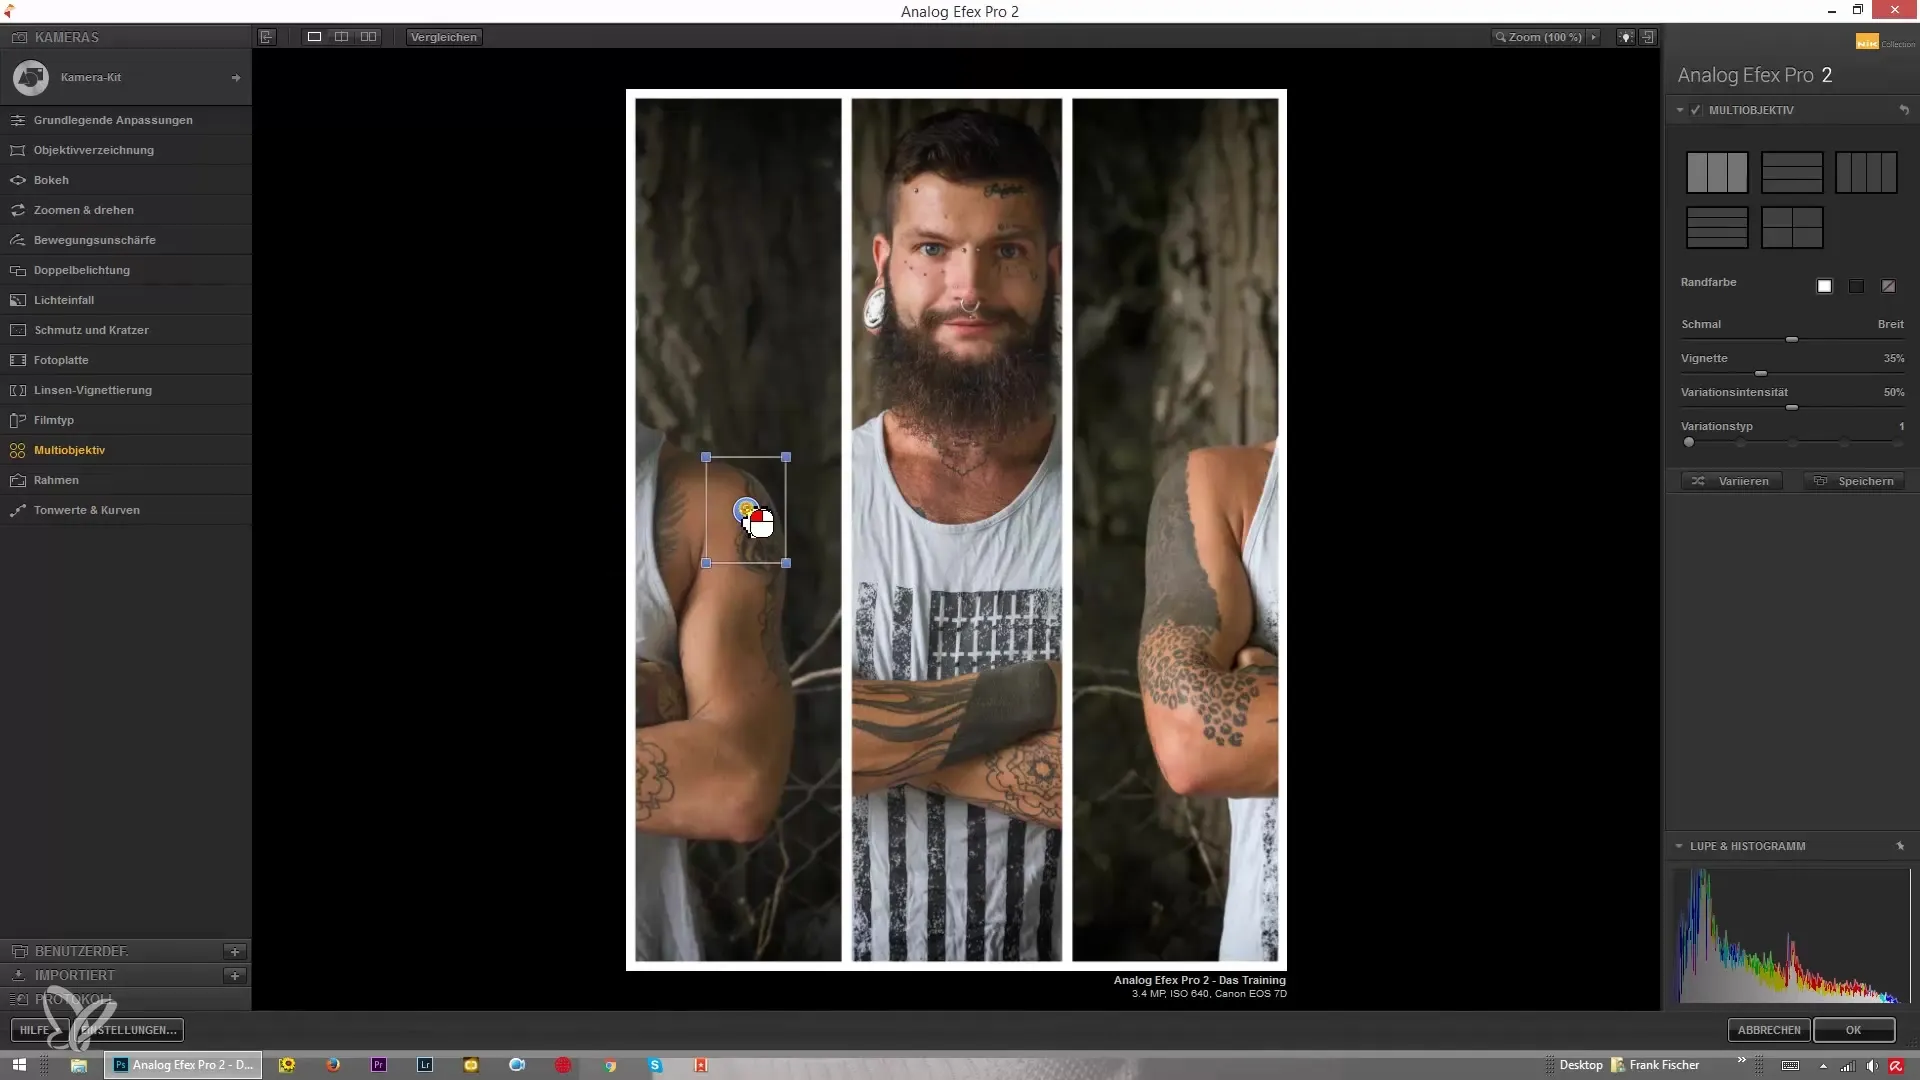
Step 4: Adjust image sections
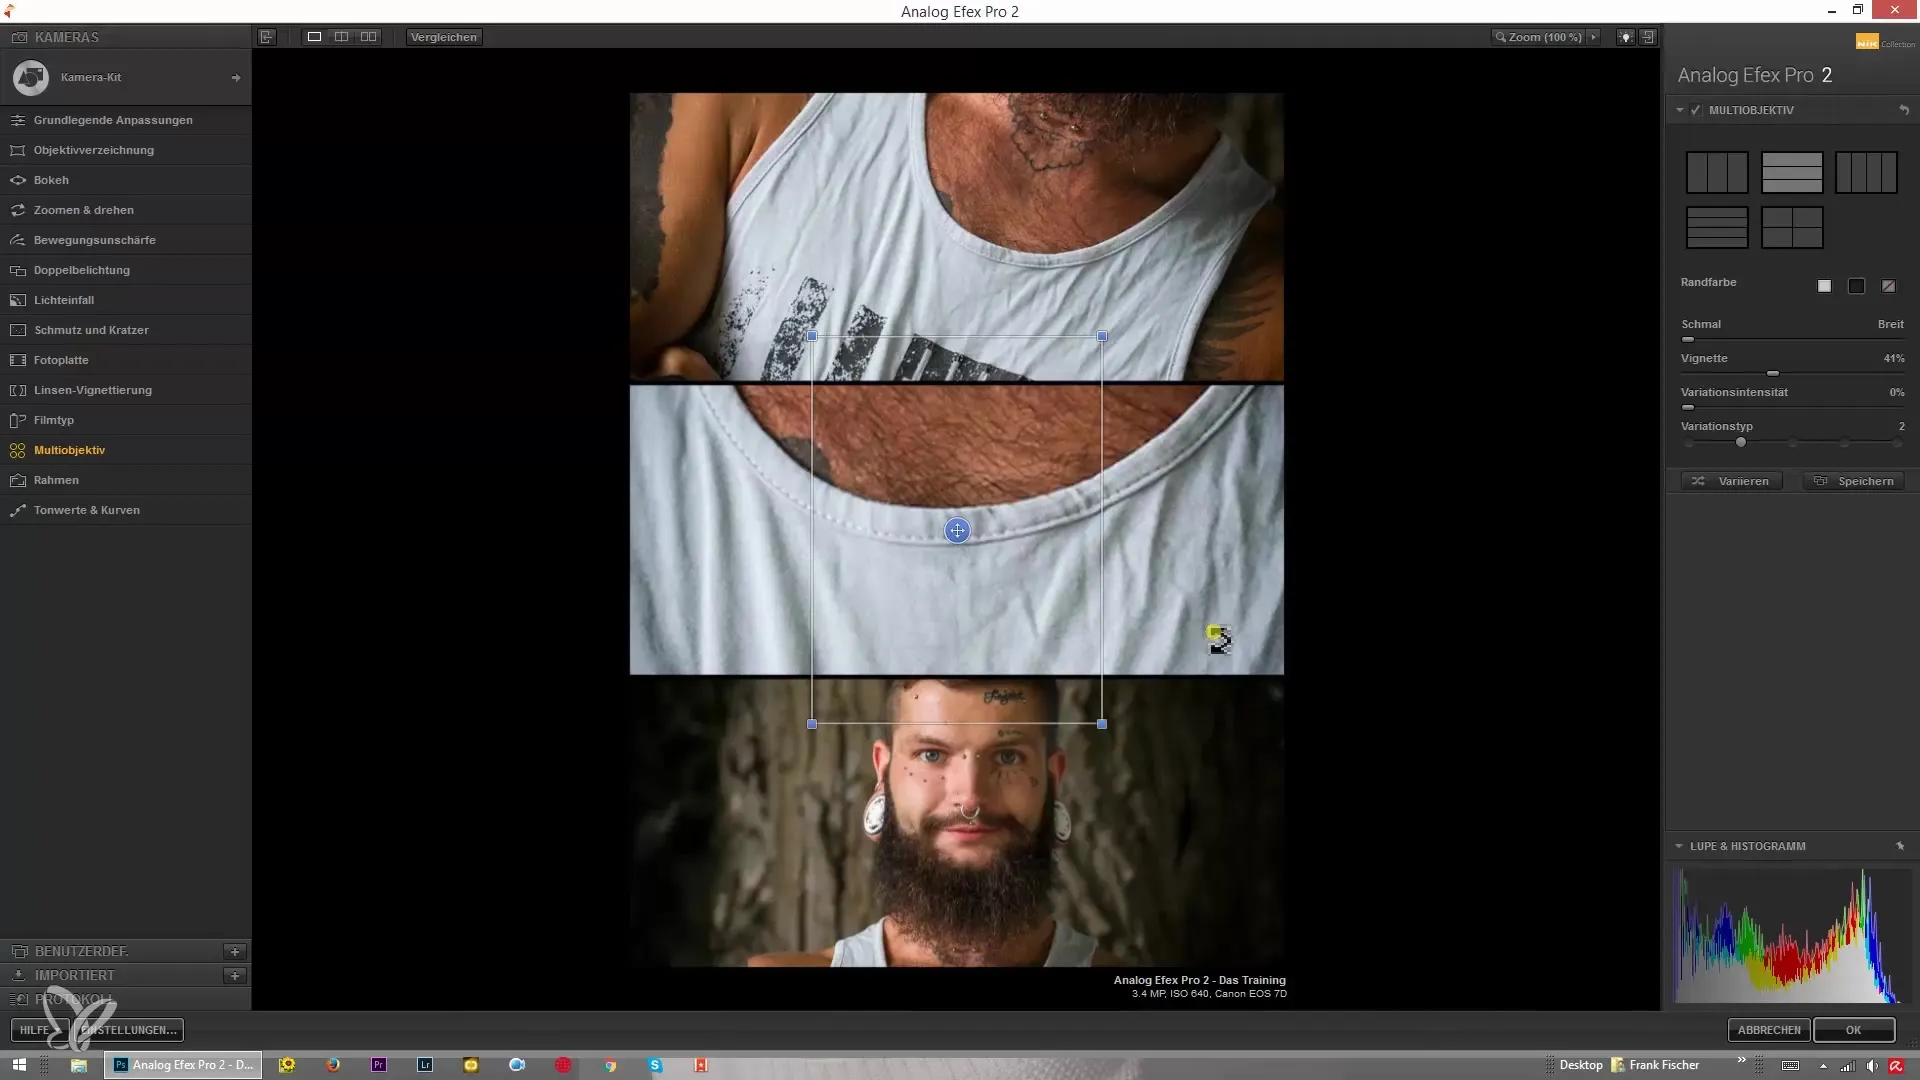
Now begins the creative part. You can adjust the size of the individual image sections and enlarge or reduce them. Your focus could be, for example, on the facial features of a portrait. Play with the arrangement and position of the images to achieve the best possible presentation.
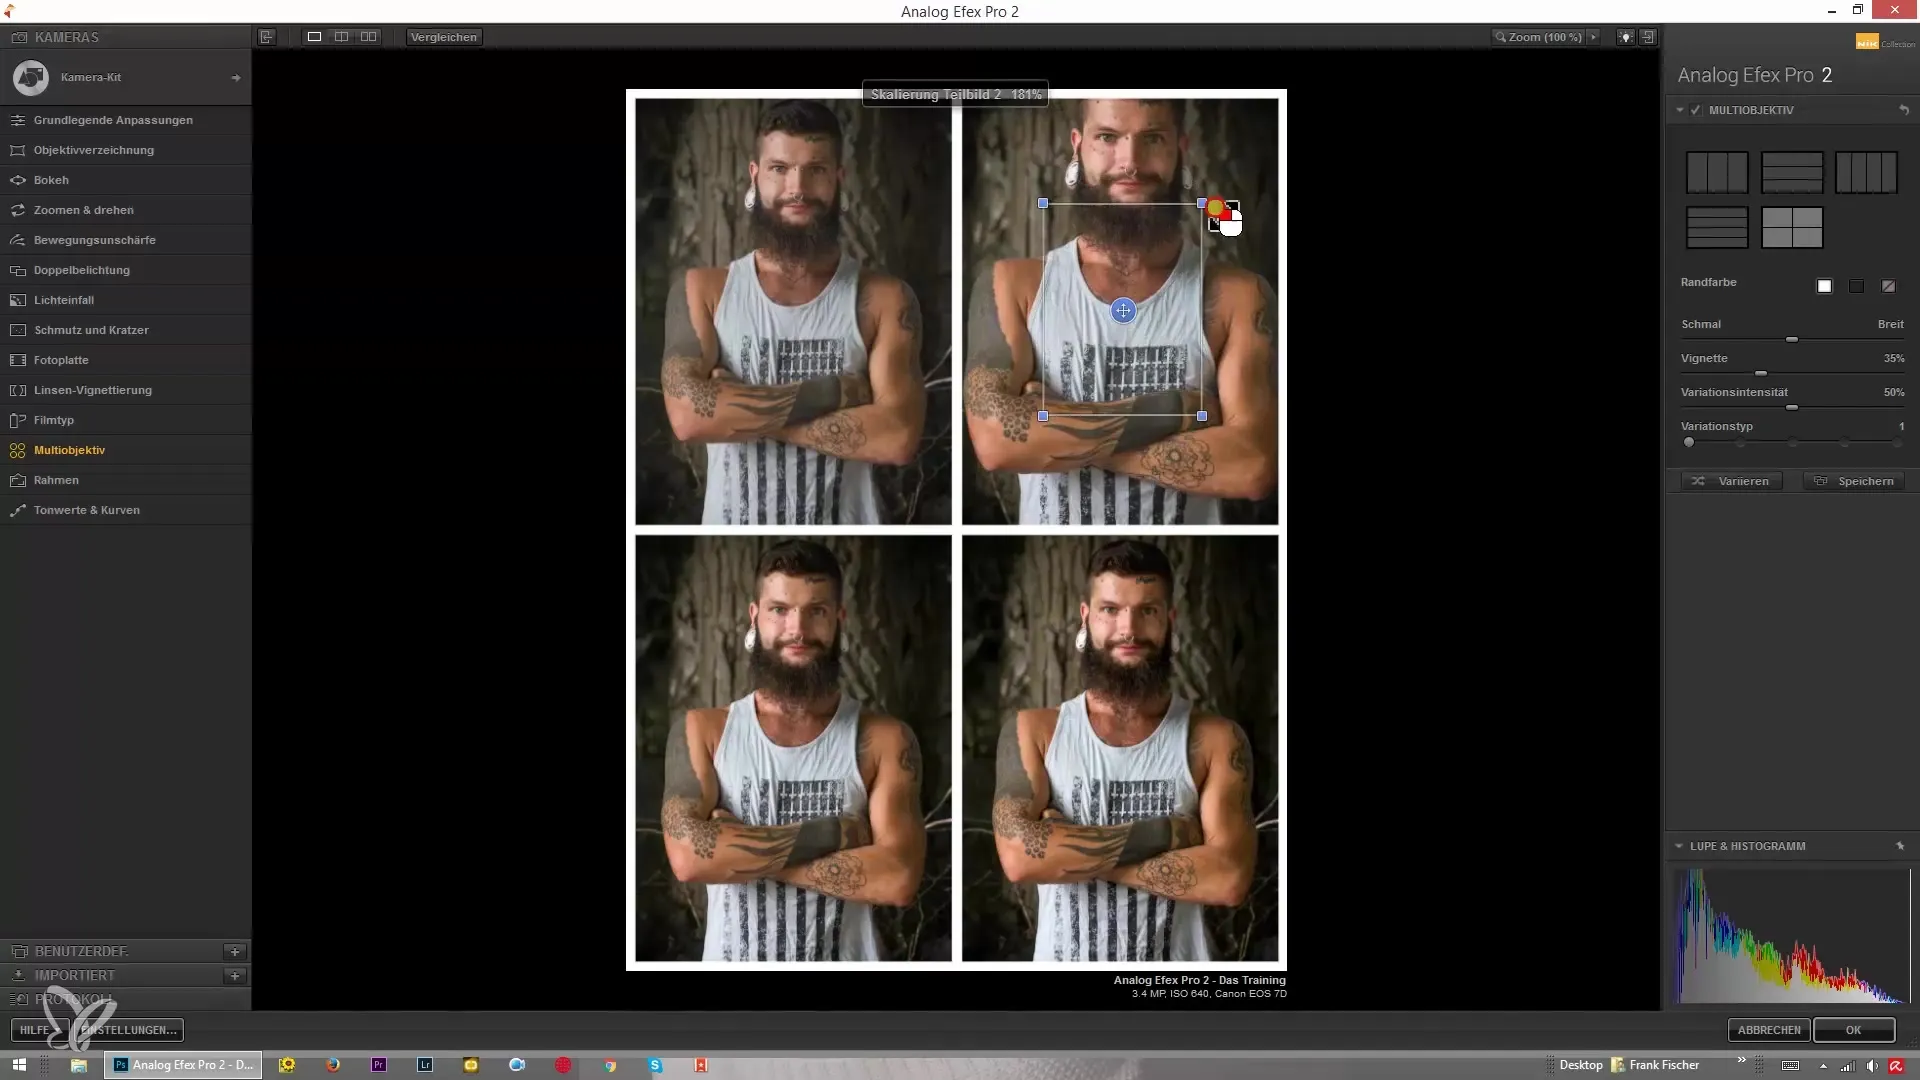
Step 5: Add frame options and vignettes
You have the choice of whether to add a white or black frame around each image or to leave the images completely without a frame. This affects how the images visually interact with each other. Additionally, you have the option to add a vignette. Choose between a strong and a subtle vignette to optimize the overall picture.
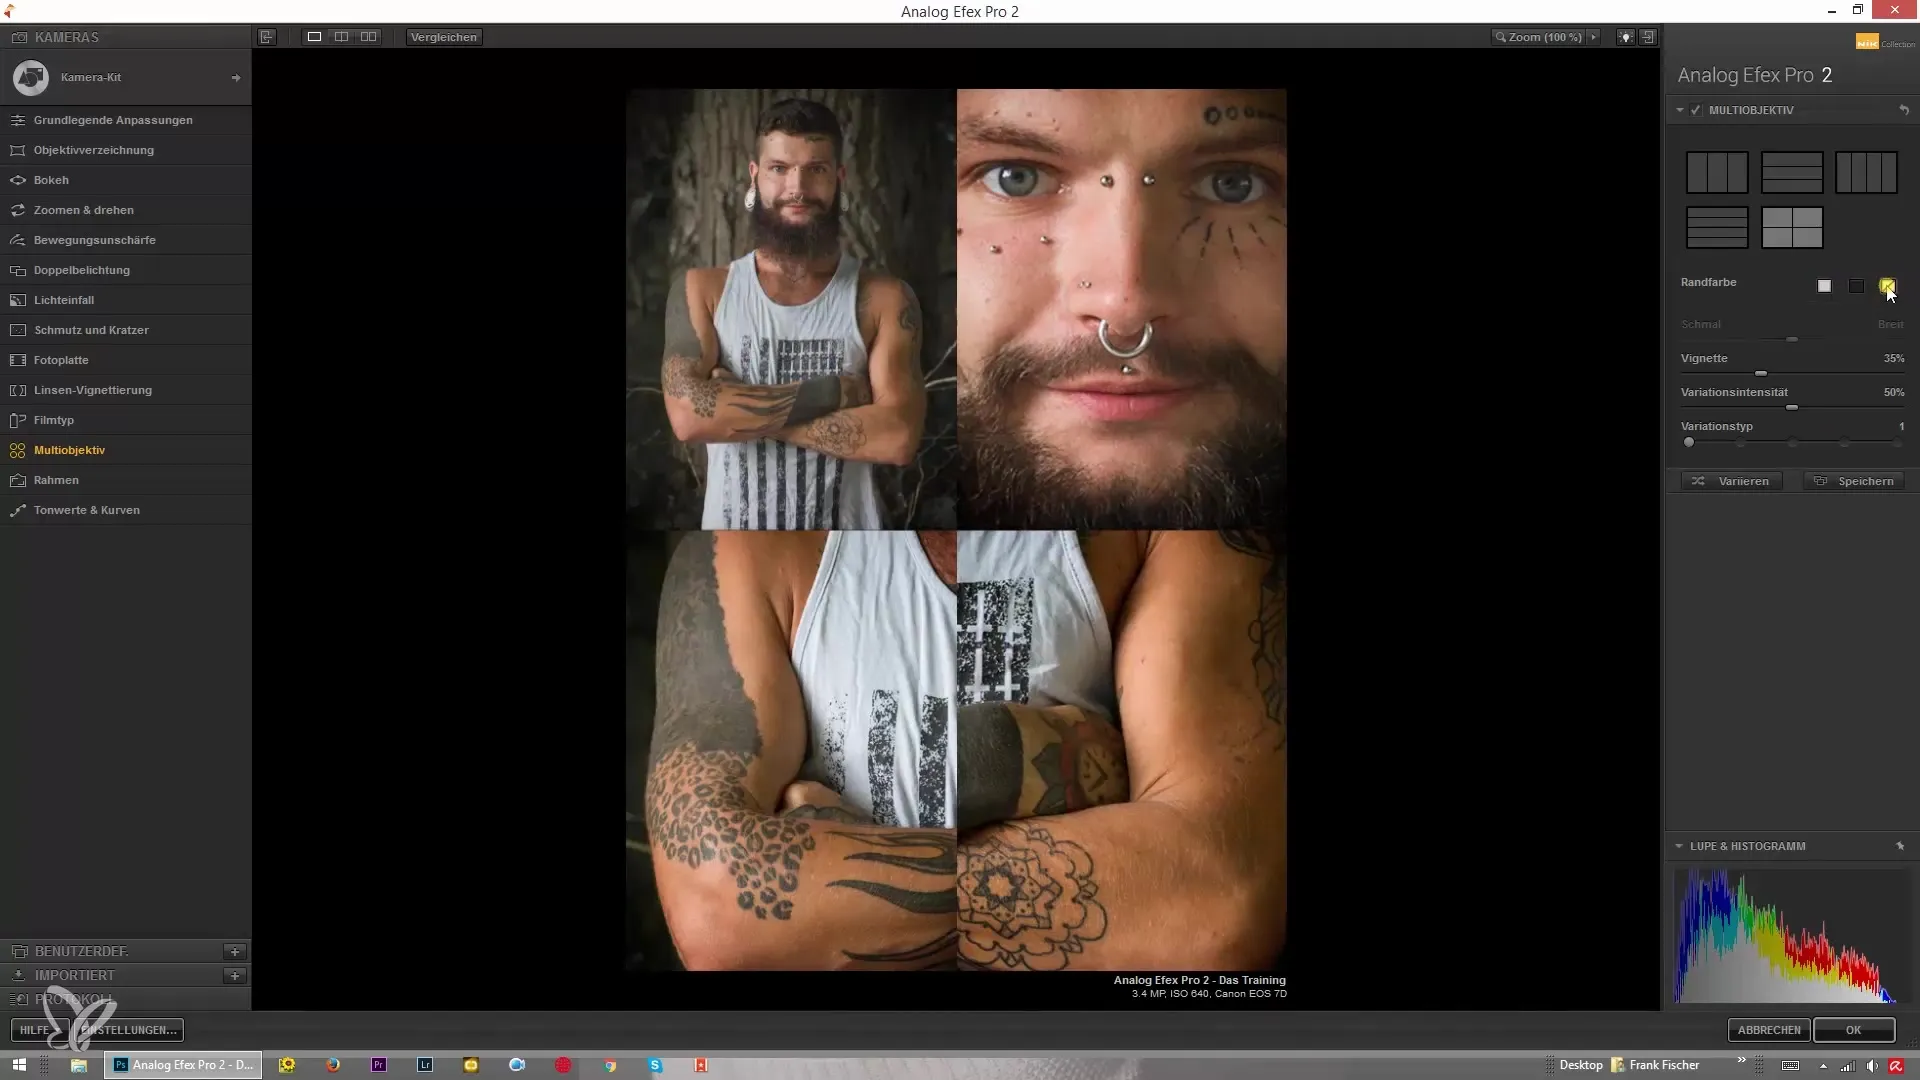
Step 6: Adjust variations of images
Adjusting the variation intensity is an important step. If you want to clearly represent the original image, the variation intensity should be set to zero. Otherwise, you can increase the intensity to achieve a more interesting, yet potentially less clear effect. Here you can be creative, depending on what you want to depict.
Step 7: Make fine adjustments
You now have a rough collage created. Now you can make smaller adjustments. Rotate, enlarge, or move the individual images to align them perfectly with each other. This step allows you to let your creativity flow.
Step 8: Polish your final product
Once you are satisfied with the arrangement and adjustments, check the overall view. Take a closer look at the compilation of different perspectives. Make sure everything looks harmonious and nothing distracts. Your goal is to create a vivid collage that presents your retouching details in an interesting way.
Summary – Guide to Creating Special Collages with Nik Collection Analog Efex Pro 2
The creation of collages with the Nik Collection Analog Efex Pro 2 can be an exciting and engaging experience. You have the opportunity to express your creativity while showcasing various image perspectives in an appealing format. Make sure to maintain your style and vision during the editing process, and use the arrangement and effects to effectively communicate your intent.
Frequently Asked Questions
How do I correctly use the adapter for the multi-lens?The adapter is screwed onto the front of your camera, and the second lens is then attached to it as well.
Can I change the size of the image sections?Yes, you can adjust the size of the individual image sections and enlarge or reduce them.
What frame options do I have for my images?You can choose either a white frame, a black frame, or no frame at all.
How does the variation intensity affect my images?The variation intensity determines how visually distinct each image is. At zero, the image remains unchanged; at higher values, different effects are applied.
What is the best way to present my retouching details?By keeping the variation intensity low and strategically selecting the image sections, you can showcase the best details of your retouching.


