The lens vignetting is a powerful tool in image editing. It helps you direct attention to certain areas of your photo by gently darkening the corners. With Analog Efex Pro 2, you have a user-friendly way to effectively utilize this feature. Whether you want to enhance the focus on a person's face or another central element – this guide will show you step by step how to adjust the vignetting.
Key insights
- Lens vignetting can be used to intentionally guide the viewer's gaze.
- You can individually adjust both the shape and size of the vignette.
- Regulating the vignette strength is crucial for the effect and can vary from subtle to strong.
Step-by-step guide
To create a vignette in Analog Efex Pro 2, first open your image in the program. You will find the option to adjust the vignetting in the effects.

The first step is to set the strength of the vignette. You can choose how dark the corners of your image should become. Experiment with the sliders to find the effect that suits you.
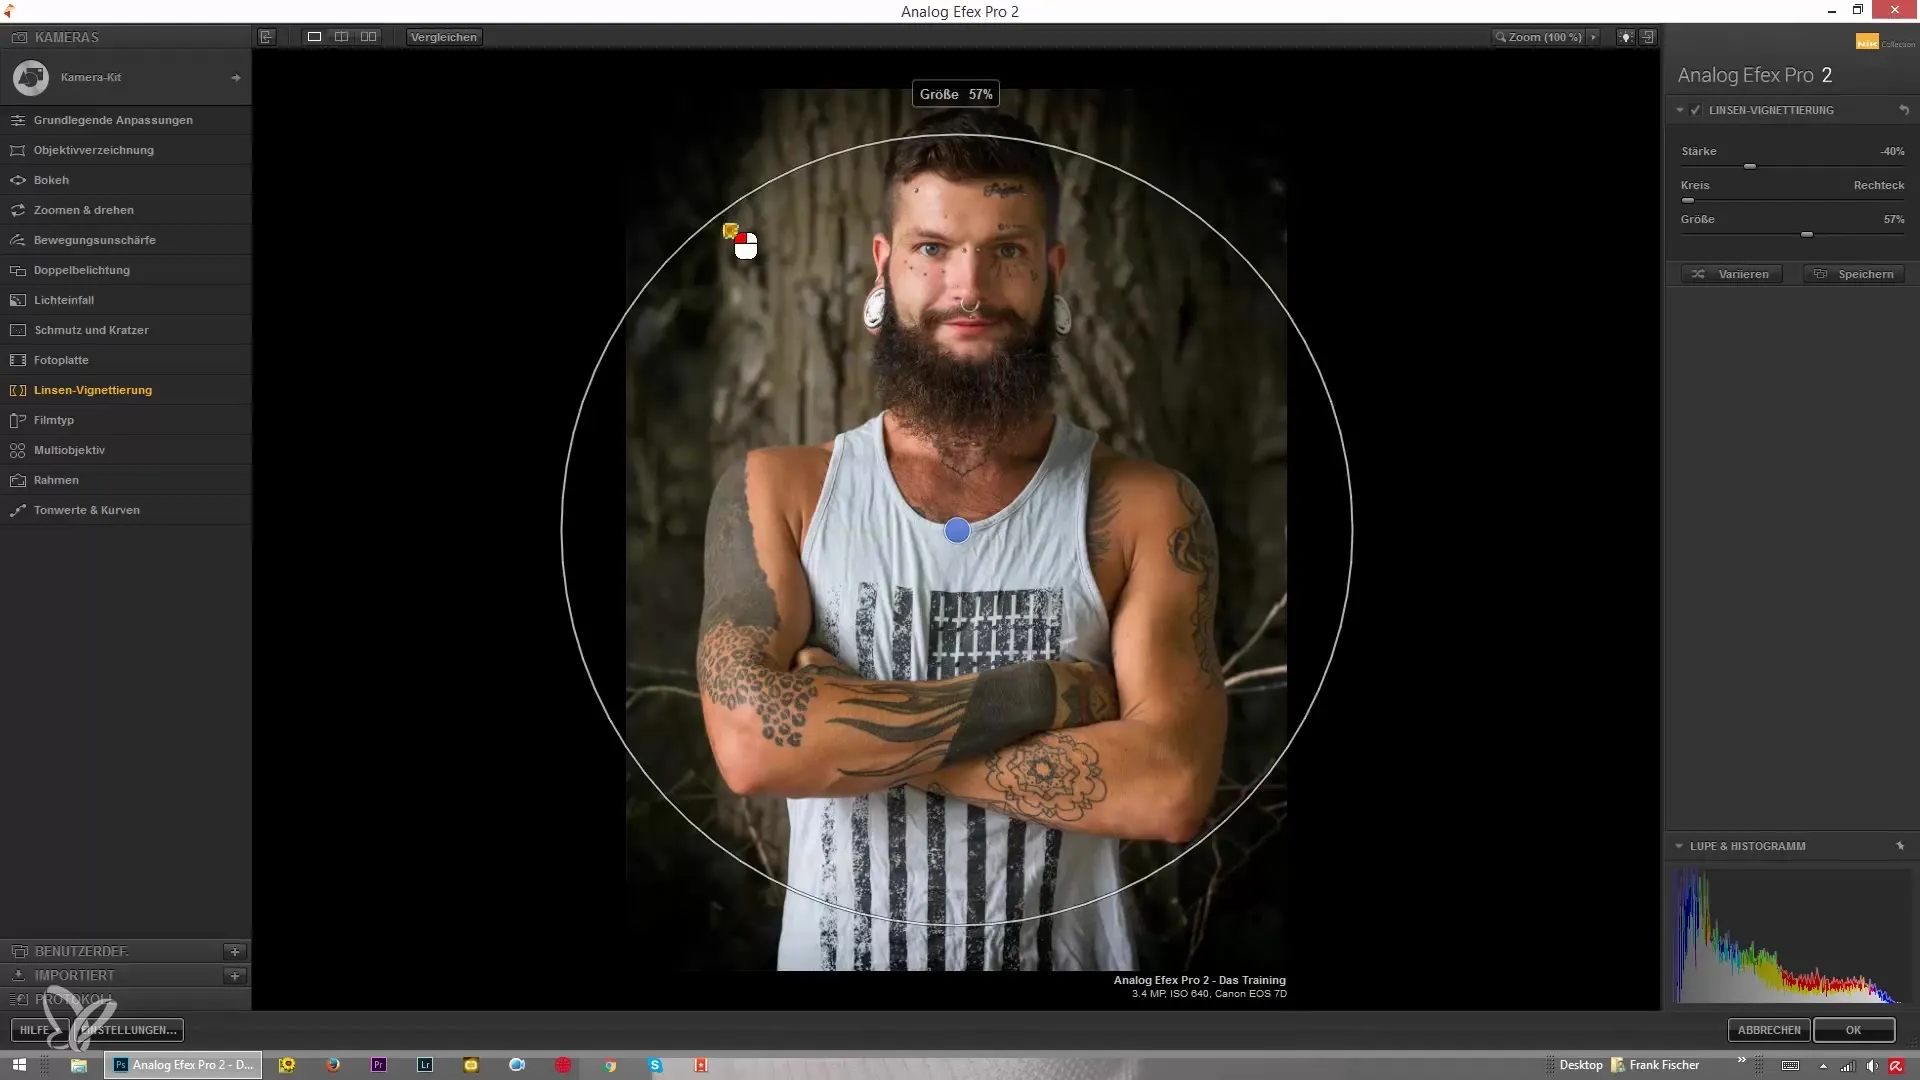
With the controls for the size of the vignette, you can give the vignette more or less space. Pay attention to how the vignette behaves at the edges while you change the size. This is an important point to ensure that your main focus remains clear.
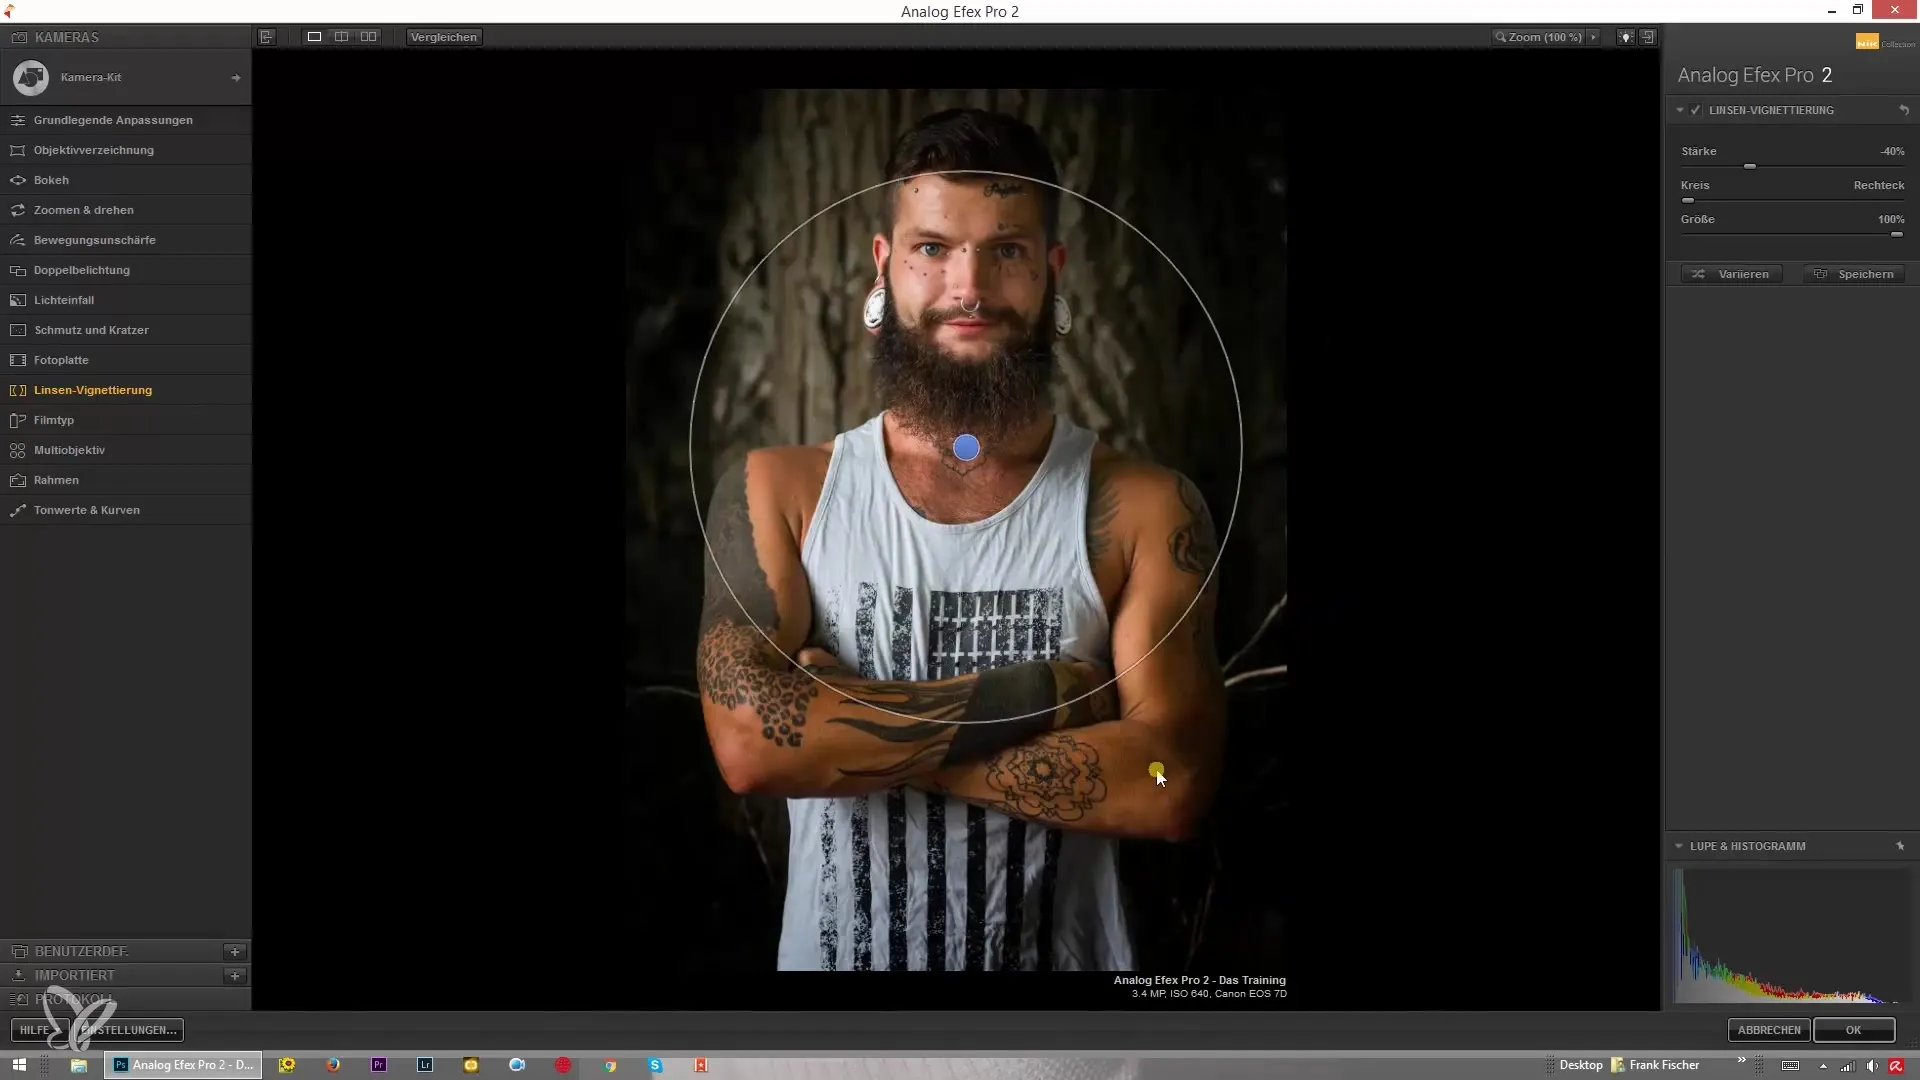
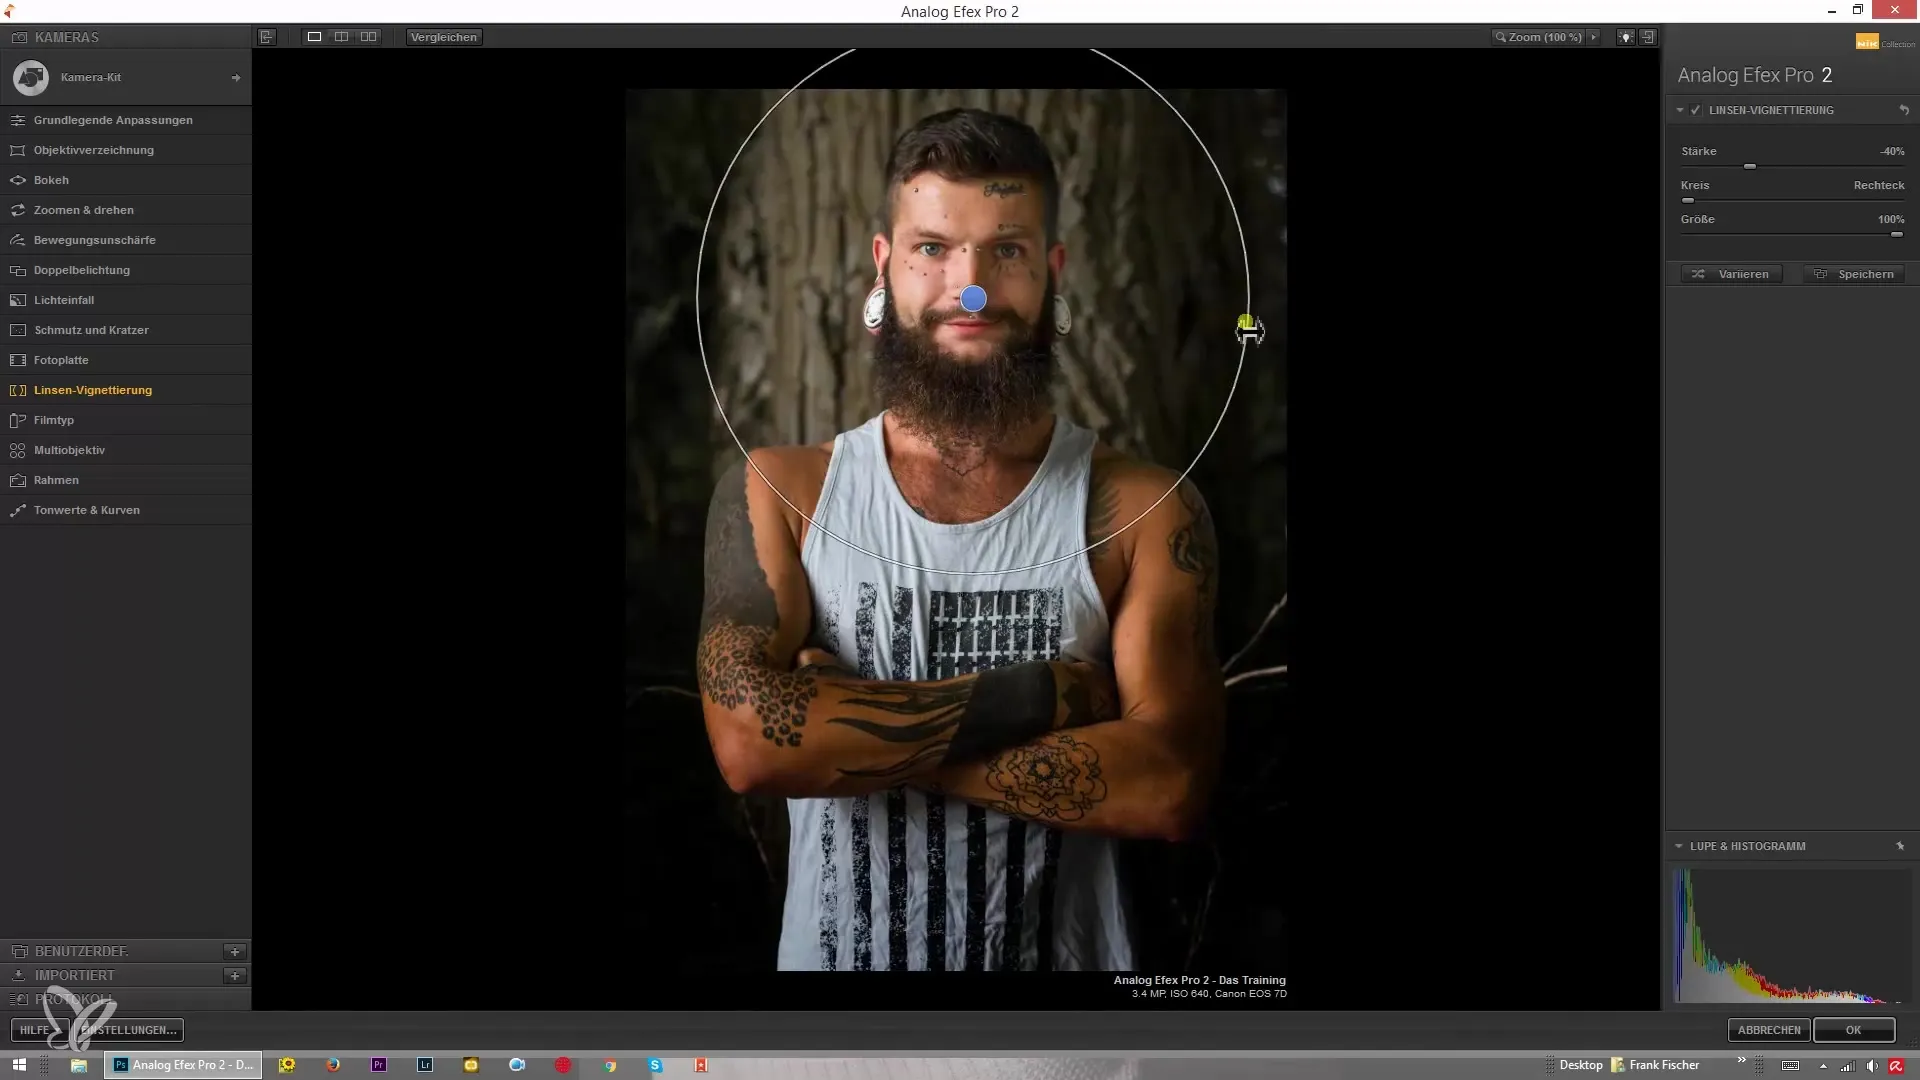
If you want to highlight the main subject in the image, you can change the center point of the vignette. Place it where the focal point should be, such as on a face or a detail of the object.
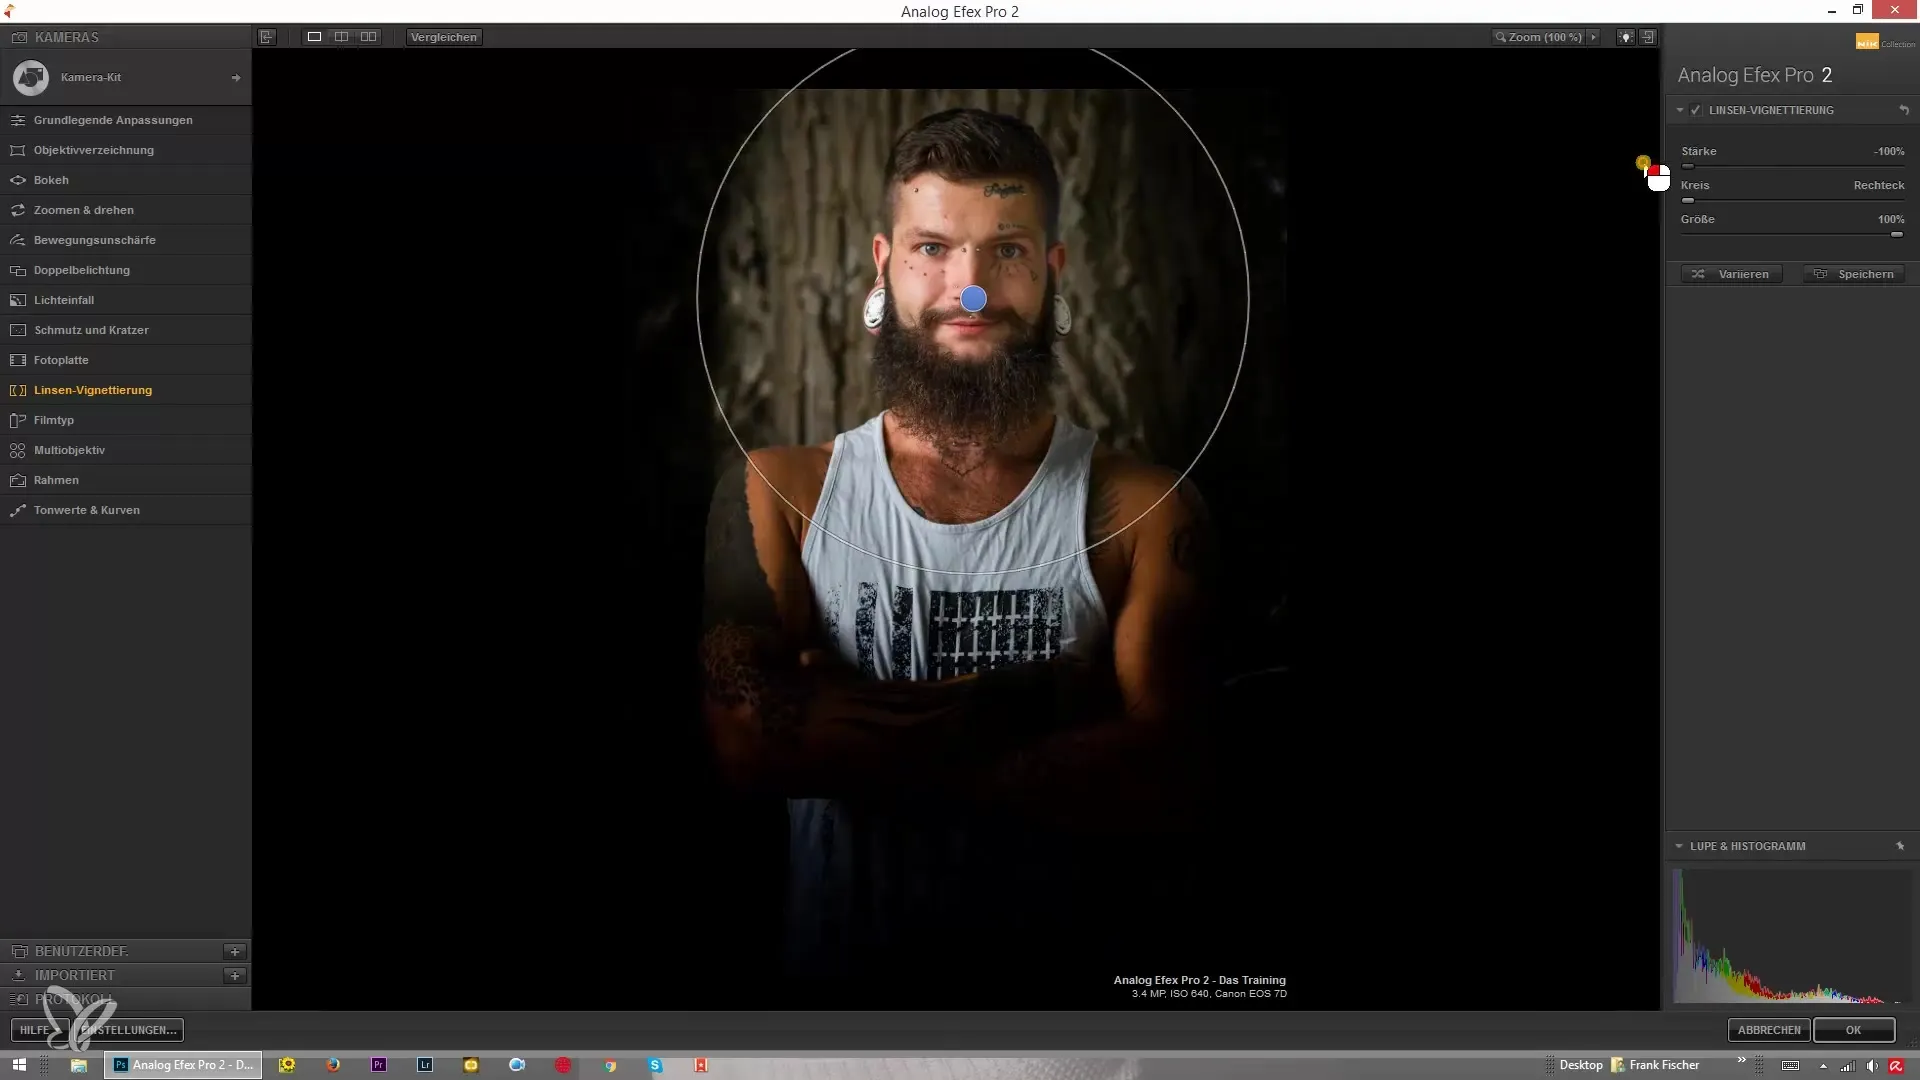
If you achieve a stronger vignette, you have the option to increase the intensity to almost black. This can create a dramatic effect, especially with high-contrast images.
To vary the vignette even further, you can set the color. You have the option to create the vignette in white as well, though this is rarely used. Sometimes, however, a white vignette can be useful for certain creative purposes.

To refine the effect, you can change the shape of the vignette. Drag the sliders to see the differences between a round and a rectangular vignette. This allows you to customize the look of your image even further.
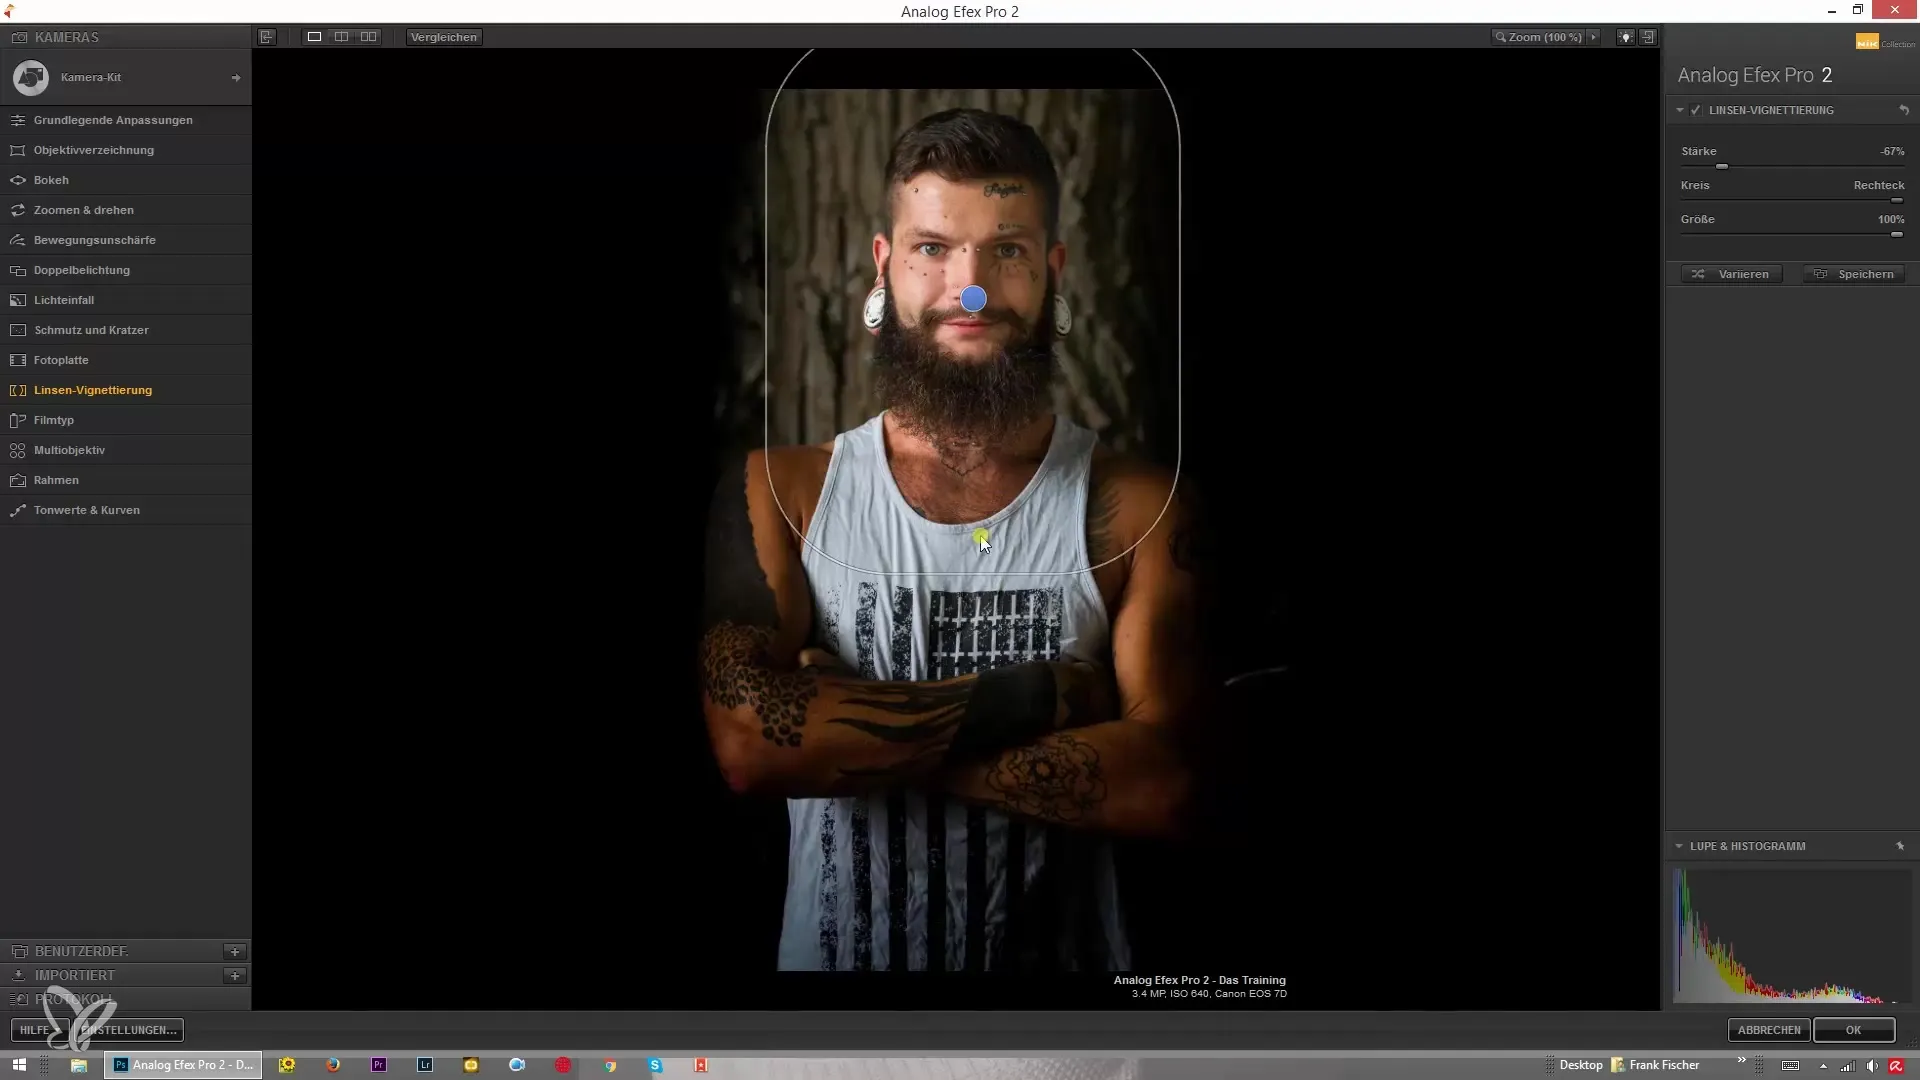
Make sure to keep the vignette subtle. Often, a slight adjustment is enough to enhance the overall image effect. An exaggerated vignetting can make the image look unnatural.

If you're satisfied with the settings, make sure that the entire image composition harmonizes well and the desired effects are achieved. Look at your edited image and observe the overall effect of the vignetting.
Summary – Vignetting with Analog Efex Pro 2: Step-by-step guide
With Analog Efex Pro 2, you can quickly and easily enhance your images through lens vignetting. By adjusting the strength, size, and shape of the vignette, you can direct focus to your main subject and control the image effect precisely. Experiment with different settings to achieve the best results.
Frequently Asked Questions
How do I add a vignette in Analog Efex Pro 2?Open your image in the program and use the effects to set the vignetting.
Can I change the color of the vignette?Yes, you can create both dark and light vignettes, depending on the desired effect.
What is the best strength for a vignette?A subtle strength is often most effective to further highlight the main subject.
Is a rectangular vignette possible?Yes, with Analog Efex Pro 2, you have the option to adjust the shape of the vignette.


