

A design alone doesn't yet show how an app feels. Only when individual artboards are linked to each other can you click through the interface, check flows, and show developers or clients how the finished application is supposed to respond. That is exactly what this lesson is about: You will learn how to link artboards in Prototype mode, which triggers and transitions are available, and how to adjust connections later. I will also show you a few tricks that make your prototypes look much more believable.
The video is only loaded from YouTube when you play it – data (including your IP address) is then transmitted to YouTube/Google. More in the privacy policy
Key Takeaways
- You create links in Prototype mode by clicking an element and dragging the connection to another artboard.
- Every connection needs a trigger (for example Tap or Time) and an action (for example a transition).
- XD remembers the most recently used transition settings, which speeds up linking entire flows.
- Small clickable areas can be enlarged with a transparent rectangle without changing the design.
- Fixed elements remain visible while scrolling, and timed transitions run entirely without interaction.
Step-by-Step Guide
Step 1: Prepare and distinguish two artboards
First, create a second artboard by pressing the A key. So that you can immediately recognize which area is which when linking, place a colored rectangle on both artboards using the Rectangle tool (R). On the first artboard it will be blue. You can simply copy the rectangle and paste it onto the first area again, so the design stays consistent.

Step 2: Create a hotspot for the interaction
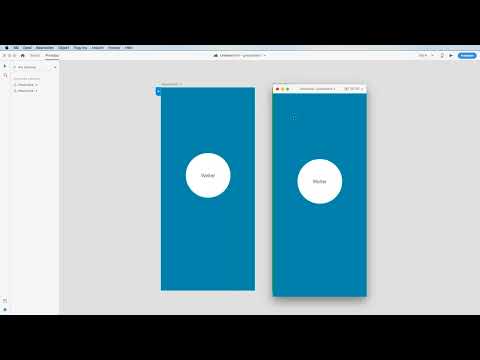
For a user to be able to click anything at all, you need a trigger on the interface. To do this, draw a circle in the middle of the artboard with the Ellipse tool and label it using the Text tool, for example with "weiter" (next). Then center the circle and copy it to the second artboard. On this area you additionally place a back button so that you can get back to the first page later.

Step 3: Switch to Prototype mode and link
Switch to Prototype mode at the top. The interface becomes noticeably tidier because the design tools fade into the background. Now click the circle and drag a connection line from its edge that looks like a rubber band. If you release the mouse over another artboard, the menu for the link opens. Once the connection is set, XD displays the element differently in Prototype mode, so you can see at a glance which elements are interactive.

Step 4: Define trigger and action
Every link consists of two parts. The trigger determines what activates the connection. Options here include Tap, Drag, or Voice. For our example, you choose Tap. The action determines what happens afterward. With "Transition" you switch to the target area. The "Previous Artboard" option, on the other hand, is the right choice for a back button, because it leads back to the previously displayed artboard.
Step 5: Set transition, animation, and duration
With a transition, you define not only the destination but also the type of animation and its duration. The target page is already preselected if you only have two artboards. With multiple areas, you can select a different one here at any time. You will find the animation in an extensive list of various effects. To begin with, the default animation with the preset duration is perfectly sufficient. However, you can readjust at any time if the flow feels too hectic or too sluggish.
Step 6: Test the prototype in preview
Click the Play button at the top right to start the preview. The first artboard appears, and as soon as you move the mouse pointer over the circle, the cursor turns into a hand with a pointing finger. This is the visible indication that this element is clickable. If you click on it, the prototype switches to the second artboard. Since this one doesn't have a connection yet, the preview stops there. We will change that in the next step.

Step 7: Creating the Return Connection
Go back to the second artboard in Design view and link the Back button with the "Previous Artboard" action. Here a practical feature of XD becomes apparent: the software remembers the settings from your last link. If you connect several artboards in a row, you therefore don't have to define the transition anew each time. XD automatically takes over the animation for the way back from the forward movement.
Step 8: Editing and Deleting Connections
Changes are possible at any time. In Prototype mode, simply click on the connection to adjust the destination, trigger, or animation. If you want to remove a connection, drag the connection point to the center of the element until it disappears. A practical example: you realize that the animation slide left should rather be slide right. Then you open the connection and replace the effect. Afterwards, you start the preview and can jump back and forth between the elements.
Step 9: Setting the Home Screen
In Prototype mode, you will find a house icon that marks the home screen. By default, the preview always starts on the artboard that carries this marker. If, for example, your first artboard only shows a style guide, but you want to start the prototype on the second artboard, you click on it, set the house icon, and start the preview again. This way you save yourself the unnecessary click with every test.
Step 10: Enlarging Small Tap Areas
On a smartphone screen, a hamburger icon is often too small to hit comfortably with a finger. You can solve this without changing the design. Draw a rectangle over the icon, set the fill to no color and the opacity to 0 percent. You then link this invisible rectangle in Prototype mode. In the preview, the area now reacts as soon as the cursor comes near. This trick is especially helpful with densely packed elements, such as a selection of shoe sizes.

Step 11: Using Scrolling and Fixing Elements
If the content of an artboard is longer than the visible area, the navigation should remain in place. To do this, enlarge the artboard in Design mode and add some content so that you can check the scrolling behavior. Group the elements of your header with Command+G, that is, the background, company name, and icon. Then activate the option "Fix position when scrolling" on the right in the properties. In the preview, the navigation now stays at the top, no matter how far you scroll. In addition, you get a soft blur effect that elegantly covers the content behind it.

Step 12: Setting Up a Timed Transition Without Interaction
Not every transition needs a click. This is typical for a splash screen that disappears automatically after the app starts. To do this, drag a transition from the artboard itself, that is, without clicking an element, to the target artboard. Choose "Time" as the trigger and set the duration to two seconds. After this time, XD loads the next screen automatically.

Step 13: Fine-Tuning the Automatic Transition
For a splash screen, a sliding movement often seems too intrusive. A gentle fade fits a logo better. Therefore, choose "Dissolve" as the animation and set the duration to about 0.6 seconds. Start the preview and lean back: after two seconds, the screen fades in automatically. Especially with welcome screens, you notice here how strongly small details shape the overall picture.
Summary – Adobe XD Prototyping: Linking Artboards and Designing Transitions
With Prototype mode, you connect artboards into a clickable flow in just a few steps. You define triggers and actions, choose suitable transitions, and keep track of things via the home screen and the editing functions. With enlarged tap areas, fixed elements, and timed transitions, you make your prototypes significantly more realistic. It's best to practice the steps on a small project before tackling larger flows with dozens of artboards.
FAQ
Can I link several artboards at the same time?Yes, you connect each element individually, and the destination can be selected anew for each connection.
Why does a connection disappear after moving it?If you drag the connection point to the center of the element, the link is removed. You can set it again at any time.
Do I have to set the animation anew for every Back button?No, XD takes over the settings of the last link as long as you work within a row.
How can I see which connections exist in my project?Press Command+A (Ctrl+A on Windows), and all existing connections will be displayed.
What should I do if an icon is too hard to hit in the preview?Place a transparent rectangle with 0 percent opacity over the icon and link it instead.
Does the navigation really stay in place when scrolling?Yes, provided you have grouped the navigation elements together and activated the option "Fix position when scrolling".

