
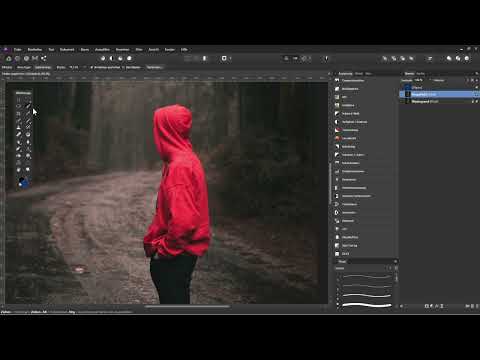
Imagine two objects in your photo are supposed to have the same color, but in reality their tones differ noticeably. Or you want to give a piece of clothing a completely new color without the shadows and highlights looking artificial. That's exactly what I'll show you in this tutorial with a workflow in Affinity Photo.
The video is only loaded from YouTube when you play it – data (including your IP address) is then transmitted to YouTube/Google. More in the privacy policy
You'll learn how to roughly select an area with a Quick Mask, how to define color values via sample points in the Info panel and match them to each other with Curves. In the second part, we'll use the Quick Selection Tool, a Fill layer, and Refine Mask to completely recolor a hoodie. All steps are built on non-destructive layers, so you can go back and readjust at any time.
Key Takeaways
Key Takeaways
- Always work on a copy of the layer so the original image remains untouched.
- With the Quick Mask, you can quickly and roughly mark areas, which you can then refine afterward.
- Sample points in the Info panel connect the source color with the target color. Choose areas of the image with similar brightness.
- Curves only affect an area in a targeted way if you attach them as a clipping mask to the appropriate layer.
- For recoloring, a Fill layer in Hue mode is well suited, as it preserves the structure and shadows of the original.
Step-by-Step Guide
Step 1: Create and Name a Layer Copy
Open your photo in Affinity Photo. If the original is a background layer, first create a copy by selecting the layer and duplicating it with Ctrl + J. This way the original image is preserved in case you want to undo something later. It's best to give the new layer a meaningful name right away, for example "Match Color", so you keep an overview in the Layers panel.

Step 2: Roughly Mark the Area to Be Changed with the Quick Mask
Activate the Quick Mask by clicking the corresponding icon at the top or simply pressing the Q key. Then select the Paint Brush. To start, opacity and hardness of 100 percent each are sufficient, with white selected as the paint color. Now paint roughly over the area whose color you want to change. Accuracy doesn't matter much at this point, because you can do the fine work later. With Q you leave the Quick Mask again, and the painted area is adopted as a selection.

Step 3: Convert the Selection into a Layer Mask
With the selection active and the layer selected, click the mask icon at the bottom of the Layers panel. Then deselect the selection with Ctrl + D. The mask ensures that the following adjustments only affect the marked area. The marching ants you may still see are, by the way, just a display glitch. Zoom in once and out again, and they disappear. What matters is that the mask covers the right area.

Step 4: Set Sample Points in the Info Panel
Open the Info panel via the View menu and set it to float freely if necessary. In the Info panel menu, click "Add New Sample Point". Then take the small target, hold down the left mouse button, and drag it onto the color tone you want to change, for example the dark red tone. In the same way, place a second sample point on the target tone, such as the orange.
On the left you then see the starting values, on the right the desired values. The sample points can be repositioned at any time with the Move Tool. Make sure to choose spots with similar brightness. A point in deep shadow and one in bright highlights doesn't make a meaningful comparison.
Step 5: Use Curves as a Clipping Mask
At the bottom of the Layers panel, choose a new adjustment layer of the Curves type. This layer initially sits above all other layers and would affect the whole image. To prevent that, you create a clipping mask. To do this, drag the Curves layer directly onto the "Match Color" layer. The blue bar in the Layers panel is displayed shifted to the right as soon as the clipping mask is active. If the bar isn't continuous, you've only changed the order. Then click the layer again and make sure the offset appears.

Step 6: Match Red, Green and Blue individually
Now the measurement points come into play. In the Curves menu, set the channel to "Master" and then work your way through channel by channel. In the red channel, drag the lower left handle upward until the value for red matches the target value. In the example, that was a value of about 212. Then switch to the green channel and increase the value to roughly 120. In the blue channel, drag the handle to the value that corresponds to the target tone.
Since you are only using a single pixel as a reference, it can be useful to switch back to the Master channel afterwards and fine-tune the shadows. To do this, drag a handle a bit to the right. Then close the Curves window.
Step 7: Refine the shadows with the blend options
If you want to make the shadows look even more natural, open the blend options of the Curves adjustment. To do so, click the small gear icon. There you will find the compositing ranges. With them, you can blend the shadows below the curve back into the image a little. First, deliberately drag the upper left handle down too far so that you can see the original shadows. Then drag it back to a sensible level. You don't have to restore the original values exactly; what matters is a coherent overall image.

Step 8: Prepare and select the hoodie
The second example is about recoloring an object. First, create a circle with the Ellipse Tool and fill it with the desired color. This circle serves only as a placeholder for the color; it could also be a photo or a vector graphic. Then duplicate the original image with Ctrl + J and name the copy, for example, "recolored".

Now choose the Quick Selection Tool and zoom in close to the hoodie. Simply paint over the area. Affinity Photo detects the contours and selects them mostly correctly. If you hold down the Alt key, you can subtract areas that were selected by mistake. You can add missed spots by simply painting again.

With the selection active and the layer selected, create a mask using the mask icon. Deselect the selection with Ctrl + D.

Step 9: Add a fill layer as a clipping mask
In the Layer menu, choose the option "New Fill Layer". It is automatically filled with the currently selected color, in this case white. Then drag the fill layer onto the "recolored" layer as a clipping mask so that the color appears only on the hoodie.

In the next step, you pick the target color with the eyedropper. To do so, click the colored field of the fill layer at the top, activate the eyedropper, and drag it onto the desired color in the circle or in any photo. A click picks up the color. The fill layer is now filled with this shade of blue, and you can hide the ellipse.

Step 10: Refine the mask
Zoom into the image and you will see that the mask is very hard at the edge. To fix this, right-click the mask and choose "Refine Mask". Deactivate the option "Follow Contrast Edges" and set the preview to "Transparent" so that you can see the background. Reduce the border width to smooth the edges a little. With the edge sharpness, you determine how soft the transition becomes. In my example, a slight blur of about 2.4 pixels worked well. If remnants of the red original are still visible at the edge, enlarge the mask using the expansion. Then confirm with "Apply".

Step 11: Choose the blend mode for natural shadows
Select the fill layer and try out the different blend modes. Depending on the image, Color or Hue look different. In the example, I liked the Color mode for the highlights, but the shadows looked unnatural with it. The Hue mode delivered the most coherent result, because it adopts the hue but leaves the brightness structure of the original intact.

Note that the blue can look intense compared to the background. In the original image, the red also glows distinctly. If you want to make the overall image look cohesive, adjust the color mood of the rest of the photo afterward.
Summary ??? Matching and Recoloring Colors in Affinity Photo: Step by Step
In this tutorial, you learned how to match two similarly colored areas to each other in Affinity Photo. You worked with the quick mask and a layer mask, set measurement points, and reached the target value with curves in the individual color channels. Afterward, you refined the shadows using the blend options.
In the second part, you saw how to isolate an object, here a hoodie, with the Quick Selection Tool, use a fill layer with a desired color, and refine the mask. The Hue mode ensures that the structure of the original is preserved. With this workflow, you can both correct photos in which objects look different and present products and clothing in new colors.
FAQ
Can I undo the color adjustment if I don't like the result?Yes. Since all adjustments are on their own layers and masks, you can hide, delete, or edit any layer at any time afterward. The original image remains unchanged thanks to the layer copy.
Why do I still see marching ants in the image after the selection?This is a display glitch in Affinity Photo. Zoom into the image once and back out, and the lines will disappear. What matters is that the mask correctly covers the desired area.
Why does my curve affect the whole image?Probably no clipping mask is active. Check in the layers panel whether the blue bar is shifted to the right. If it is continuous, drag the curve onto the target layer again.
Which measurement points should I choose for the color matching?Choose spots with similar brightness. A measurement point in deep shadow and one in the highlights leads to unusable results because the values are not comparable.
What does the Hue blend mode do for the fill layer?The mode takes on the hue of the fill and retains the brightness of the original. As a result, wrinkles, shadows, and textures in the fabric are preserved.
How can I soften the edges of a mask?Right-click the mask and select "Refine Mask". There you can adjust the border width, the edge sharpness, and the expansion.
Can I use a photo instead of a color area as a color reference?Yes. You can set the fill layer to any color of an image or another layer using the eyedropper. The ellipse in the tutorial only serves as a placeholder.


