
A portrait straight from the camera looks impressive on screen, but is usually far too large for the internet. A profile picture with an edge length of several thousand pixels loads slowly and gives you no advantage. In this tutorial you will learn how to prepare a photo for the web in Affinity Photo. You crop it to a square, reduce it to a sensible size, sharpen it selectively, adjust the contrast, choose the right color profile, and finally export a file that loads quickly and still looks good.
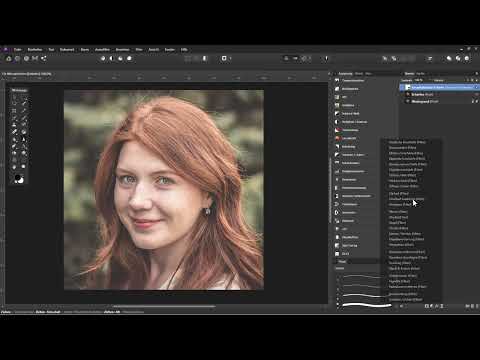
The video is only loaded from YouTube when you play it – data (including your IP address) is then transmitted to YouTube/Google. More in the privacy policy
This tutorial is based on the video "Fotos verbessern in Affinity Photo: 17 | Für Web optimieren" by video trainer Marco Kolditz. All you need is Affinity Photo and a portrait photo that you want to edit yourself.
Key Takeaways
Key Takeaways
- For profile pictures online, 800 x 800 pixels is usually enough. A camera photo is much larger and should therefore be reduced.
- 72 dpi is sufficient for on-screen display. Around 300 dpi is standard for print.
- In the Crop Tool, set the mode to 1:1 so that the crop is guaranteed to be square.
- Sharpen subtly and selectively. With filter layers and masks you stay in control and avoid unnatural results.
- For the internet, you convert images to the sRGB color profile, because it is displayed correctly by almost all devices and programs.
- Export via "File > Export", not via "Save As". For photos, the JPEG format with a quality of about 90 percent offers a good balance between file size and image quality.
Step-by-Step Guide
Step 1: Check Image Dimensions and Resolution
Before you change anything, get an overview of the current state. In the example, the original image is about 2700 x 4000 pixels. You can find the exact values under "Document > Resize Document". There you see not only the pixel dimensions but also the resolution in dpi. In the example it is 72 dpi, which is entirely sufficient for monitors and the internet. If you want to print the same image later, you should set a value of about 300 dpi here. For your web project, you stay at 72 dpi. Then close the dialog without changing the values.

Step 2: Set a Square Crop
Select the Crop Tool and look at the options bar at the top edge. There, the mode is set to "Unconstrained" by default. In this mode you can drag the frame freely, which is not suitable for a square profile picture. So open the menu and select "1:1". Now the frame can only be resized proportionally, and the format stays square the whole time. Move the section so that the face is optimally placed. With a double-click in the grid you apply the crop.

Step 3: Check the Crop
A crop does not shrink the image, it merely removes the edges. This is easy to verify: set the view to 100 percent by double-clicking the magnifier icon. The resolution remains unchanged; in the example, the image now has an edge length of about 1903 pixels. That is still far too large for a profile picture, which is why the reduction follows in the next step.

Step 4: Reduce to 800 Pixels
Open "Document > Resize Document" again. In the middle of the dialog there is a small lock icon. When it is active, width and height remain proportionally linked. Enter 800 pixels for the width and press the Tab key. The height is then automatically set to 800 pixels as well. Confirm with "Resize". At a view of 100 percent, you can check in the header bar that 800 x 800 pixels are now displayed. These dimensions are excellent for most profile pictures.

Step 5: Sharpen Selectively with the Sharpen Tool
After reducing the size, an image often looks a bit softer. In a separate video, Marco Kolditz shows various methods for sharpening. Here you concentrate on one of the variants. First create a copy of the background layer with "Ctrl + J" and name it, for example, "Sharpen". Then select the Sharpen Tool. Set the opacity to about 50 percent and the hardness to around 41 percent. Then carefully paint over the eyes, eyebrows, and mouth. The iris, eyelashes, or freckles can also be subtly emphasized. Avoid the edge of the lips or contours. Otherwise, light halos appear, which quickly look unnatural. It's better to work with several light strokes than with a single strong brush stroke. You can adjust the size of the brush at any time.

Step 6: Apply basic sharpening with "Unsharp Mask"
Next, you apply a basic sharpening to the entire image. Click the small icon for filter layers at the bottom of the layers panel and select "Unsharp Mask". Make sure the new layer is at the very top, and name it, for example, "Basic Sharpening". The strength of the sharpening is controlled via the radius and the factor. As a rule of thumb, divide the dpi value by 150. At 72 dpi, that gives 72 / 150, so roughly 0.5. Set the radius accordingly. Then play with the factor and judge the result mainly on the skin and the hair. On men, pores can be slightly visible, while on women this often looks too harsh. Don't overdo it, because even a subtle value changes the image noticeably.

Step 7: Selectively sharpen details with a mask
Now create a second "Unsharp Mask" filter layer and name it something like "Sharpen Details". Again make sure the layer is not created as a clipping mask, and drag it to the top if necessary. Set the radius to 0.5 again and, when choosing the factor, concentrate on the eyes, eyebrows, and mouth.
So that the sharpening only takes effect in the desired areas, you work with a mask. Select the layer, hold down the Alt key, and click the mask icon. The mask is now black, and the sharpening is therefore completely hidden. Next, select the paintbrush and set the color to white. Reduce the opacity to about 30 percent, choose a very soft hardness, and enlarge the brush a little. Then paint on the mask only where the sharpening should appear, that is, mainly on the eyes, the eyebrows, and the mouth.
If you have painted too much, switch to black with the X key and take the effect back at that spot. You can treat the hair only in the front area of the focus; in the rear area there is already a natural blur due to the wide aperture. In the example, you then reduce the opacity of the layer to about 80 percent so that the result looks natural overall.

Step 8: Perform a before-and-after comparison
To see clearly what your sharpening achieves, hold down the Shift key and select both sharpening layers. Then click the visibility icon of one of the selected layers. Both layers are hidden at the same time, and you can compare the original state with the edited image. Repeat showing and hiding until you are satisfied with the result.
Step 9: Increase contrast with a curves adjustment
For this example image, a bit more contrast is also a good idea. To do this, create a curves layer via the adjustment layers and name it "Contrast". Then draw a classic S-curve. Beforehand, you should lock the midtones with a click so that they remain unchanged. Afterwards, raise the highlights slightly and darken the shadows a little. The image already looks clearer and more vivid. Compare the result regularly with the original image so that you don't overdo the contrast.

Step 10: Control color saturation via the layer mode
Increasing the contrast often also intensifies the color saturation. If that is too strong for you, you can switch the curves layer to the "Luminosity" layer mode. This way, the adjustment affects only the brightness, and the colors remain largely unchanged. In the example, however, the increased saturation looks good, which is why the mode stays on "Normal" there. So decide according to your taste which look suits your image.

Step 11: Check the color profile and convert to sRGB
On the internet, the sRGB color profile has become established as the standard. Adobe RGB does offer a larger color space, but most monitors cannot display it fully. In addition, browsers and many programs treat images without a profile as sRGB. That is why sRGB is the safe choice for web images.
To check your image's profile, select the hand icon and look at the header bar. The dimensions and the embedded color profile are displayed there. If it says sRGB, you can continue directly. If it says Adobe RGB, however, you convert the image via "Document > Convert ICC Profile". Select sRGB as the target profile and confirm with "Convert". This way, you ensure that the colors are displayed correctly on most devices.

Step 12: Export the image
Do not save your image for the web via "Save As", because this command only saves in Affinity's own format. Instead, choose "File > Export". In the dialog you will find the current dimensions and a setting for quality. The PNG format is suitable for graphics with clear areas and logos. For photos like this portrait, the JPEG format is the better choice.
The quality determines how strongly the image is compressed. The lower the value, the smaller the file, but the more artifacts may become visible. In the example, the file is about 800 KB at 100 percent quality. At 90 percent, the size drops to around 200 KB, and a visible loss of quality hardly occurs. Marco Kolditz uses this value most of the time. Then click "Export", choose a save location, and upload the file.

Summary – Optimizing Photos for the Web with Affinity Photo: Step by Step
You have seen how a large portrait becomes web-ready in Affinity Photo in just a few steps. First you check the image dimensions and resolution, then you crop the image to a 1:1 ratio and reduce it to 800 x 800 pixels. Next comes sharpening, which you apply subtly and in a controlled way with the sharpen tool, filter layers, and masks. An adjusted contrast, the sRGB color profile, and an export as JPEG with about 90 percent quality round off the workflow. With this sequence, you get images that load quickly and look good on almost any device.
FAQ
Why should I reduce the size of a profile picture if it is high-resolution?Large files load more slowly, and profile pictures online are usually displayed at only a few hundred pixels, so the additional pixels bring no visible benefit.
What dpi value do I need for the internet?72 dpi is sufficient for screen display, while about 300 dpi is common for print.
Why do I choose the 1:1 mode when cropping?This mode ensures that the crop always remains square when shrinking and dragging the handles.
Does cropping change the resolution of the image?No, cropping only removes edge areas. The resolution only changes when reducing the size via the document size.
How can I tell whether my image uses the sRGB color profile?Select the hand icon and look at the header bar, where the embedded color profile is displayed.
Why shouldn't I export via "Save As"?This command saves in Affinity's own format. For the web, you export via "File > Export" as PNG or JPEG.
Which format is suitable for photos online?For photos, the JPEG format is usually the best choice, while PNG is particularly suitable for graphics with clear areas.
Which quality level makes sense for JPEG export?A quality of about 90 percent generally offers a good balance between image quality and file size.

