
Noise is often seen as a flaw, yet it can also give an image character. In composites made from photos taken independently of one another, a fine grain ensures that all parts work together harmoniously. It also unifies the surface after heavy skin retouching or the application of makeup. On the other hand, luminance and color noise quickly become distracting in low-light shots. In this guide, you will learn how to do both in Affinity Photo: remove noise, specifically correct stubborn color noise, and deliberately add noise.
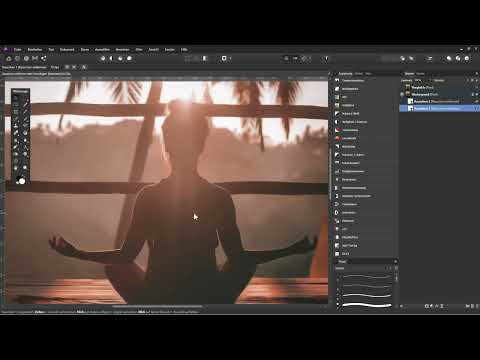
The video is only loaded from YouTube when you play it – data (including your IP address) is then transmitted to YouTube/Google. More in the privacy policy
Key Takeaways
- The "Remove Noise" live filter separates luminance noise (grain) and color noise and can be fine-tuned with several sliders.
- The "Extreme" option allows exceptionally high values. The "Details" slider protects structures, but often leaves noise behind as well.
- Color noise can be removed selectively using a fill layer in Hue mode and a mask.
- After a high-pass detail layer, the "Add Noise" filter is well suited to subtly unifying an image.
Step-by-Step Guide
Create a Comparison Layer
Before you change anything in an image, you should save the original state. To do this, duplicate the background layer with Ctrl + J (Cmd + J on macOS) and name the copy, for example, "Comparison". You do not continue working with this layer. Hide it afterwards so that you can conveniently switch between before and after later.

Add the "Remove Noise" Filter
Now select the background layer. Click the live filter icon at the bottom of the Layers panel and choose "Remove Noise". A dialog box opens. Rename the filter, for example, to "Noise 1". Numbering is worthwhile as soon as you stack several filters on top of one another.
Adjust Luminance Noise
In the dialog you will find luminance noise, that is, the grain, and color noise. Start with the grain and drag the slider to the right. At a value of 50 percent, hardly anything often changes in heavily noisy images. If you activate the "Extreme" option, the slider jumps back to the left, but the value of 50 percent is retained. From there you can keep dragging to the right. In the example, the sensible range is around 600 percent. Beyond that, even zooming in no longer shows any visible improvement.

Remove Color Noise
Color noise appears as greenish, bluish, or magenta blotches, usually in dark areas. There is a separate slider for this. Drag it until the blotches disappear without the image looking unnatural. Here, too, it is worth checking an enlarged view.

Protect Details
With the "Details" slider you preserve fine structures in the image. If you drag it all the way down, details tend to be preserved, but so does the noise. Therefore, test at which value you find the best compromise. In the example, a single filter is not enough to remove the noise completely. So you close the dialog and apply a second filter.
Apply a Second Filter
Create another "Remove Noise" filter layer and name it, for example, "Noise 2". Place it above the previous layer. Moving it can be a bit fiddly, but with a little patience it works. In the dialog, set the luminance noise to "Extreme" and set the value to about 370 percent. Since a slight color noise is still noticeable, increase the color noise slider to around 40 percent. Drag the "Details" slider down again.

Check the Result and Weigh Your Options
Now show the comparison layer and look at before and after. Be aware that removing noise almost always costs details, such as fine hair structures or textures in the background. If the image looks too smooth to you, reduce the opacity of the filter layers, in the example to about 70 percent. This brings back some of the noise and details. Decide which compromise is right for your image.

Combating Extreme Color Noise
In the second example, heavy color noise dominates, showing up in the green leaves as blue and magenta tones. First, duplicate the background layer again for comparison. Then apply the "Noise Reduction" filter to the background layer. You leave the luminance noise unchanged, set the color noise to "Extreme" and drag the slider up as far as possible. In the example, it ends up at 1500 percent. The "Details" slider is then set back to 0 percent.

Creating a Fill Layer with a Hue
The color noise is now significantly reduced, but still visible in some areas. A fill layer is suitable for these spots. Click on the background layer and choose "Layer", "New Fill Layer". The layer sits above the background layer and is initially filled with white. Click on the color field to choose a tone, or use the eyedropper and pick a green tone directly from the image. Then you switch the layer mode to "Hue". The layer thereby adopts the hue, while the brightness and structure of the image are preserved. The color noise disappears, but the entire image is tinted green.

Applying the Hue Layer Mode
You select the layer mode in the Layers panel at the bottom of the dropdown menu. Here you can see how strongly the color change alters the image. The leaf that is supposed to keep its original color also looks green. You solve this problem in the next step.

Creating a Black Mask
So that green isn't visible everywhere, you add a mask to the fill layer. Hold down the Alt key and click on the mask icon. This creates a black mask that hides the layer completely. The image therefore initially remains unchanged.

Making Targeted Corrections with the Paint Brush
Select the mask and the Paint Brush with white color. Set the hardness to 0 percent and the opacity to, for example, 30 percent. Paint over the areas where the color noise is bothersome. Leaves that are supposed to keep their original color are simply left out. Difficult spots can be painted over several times, or you can increase the opacity. Make sure you don't tint any unwanted areas.
Alternative with a White Mask
You can also use a white mask. Then the color change is initially visible everywhere, and you take it back where the original colors should remain. To do this, you paint with black. For checking, you hold down the Alt key and display the mask. Black areas remain unaffected, while white or gray areas show the color tint. Painting over the entire image does take longer, but it offers you more precision.

Removing Compression Artifacts
The third example is a JPEG image in which small squares can be seen at high magnification. These are not individual pixels, but compression artifacts. Again create a comparison layer and switch to the background layer. Apply the "Noise Reduction" filter there, this time without the "Extreme" option. Drag the slider for the luminance noise to the right until the squares disappear. In the example, about 40 to 50 percent is enough.

Recovering Details with the High Pass Filter
Since the filter also smooths fine structures, you want to sharpen the lips and hair a bit again. To do this, create a merged layer with Ctrl + Alt + Shift + E and name it, for example, "Details". Apply the High Pass filter to it, in the example with a radius of about 15 pixels. The image initially looks gray, which is normal. Since the High Pass sits as a clipping mask on the detail layer, it only affects this layer.

Choosing a Layer Mode for Contrast Enhancement
Set the layer mode of the detail layer to a contrast-enhancing mode, such as Soft Light or Hard Light. In these modes, mid-gray becomes transparent. In the example, Soft Light looks good. You can reduce the opacity; here it stays at 100 percent.

Deliberately adding noise
Finally, you add a targeted grain over the image. To do this, choose a live filter "Add Noise". This is automatically created as a clipping mask to the detail layer. Drag the layer above the detail layer so that it doesn't only affect its area. In Monochrome mode, you increase the intensity. In the example, 20 percent works well, but this depends heavily on the image. Then, if needed, reduce the opacity so that the noise blends with the original image.

Summary ??? Affinity Photo: Removing and deliberately adding noise
You have seen how to separate luminance and color noise with the live filter "Remove Noise" and fine-tune it with the sliders. With a fill layer in Hue mode and a mask, you correct stubborn color noise in a targeted way. You use the high pass filter to emphasize details again after noise reduction. And with the "Add Noise" filter, you deliberately add grain to an image. Always remember that every noise reduction comes at a price, and choose the compromise that suits your image.
FAQ
How do I distinguish luminance noise from color noise?Luminance noise appears as light and dark grain, color noise as colored blotches, usually in dark areas of the image.
Why does the slider jump to the left after activating "Extreme"?The scale is extended so that higher values are possible. The previous percentage value is retained, and you can then drag the slider further to the right.
What does the "Details" slider do?It protects fine structures in the image. At the same time, this often also preserves noise.
Why is the "Add Noise" filter automatically created as a clipping mask?A filter created directly above a layer is by default placed as a clipping mask on that layer. Simply drag it above the detail layer to prevent this.
Can I also remove the noise on a separate layer?Yes, that is possible. You can then fine-tune the filter layer via its opacity and thus recover more details.


