
A scanned family photo often has more charm than flaws, yet dust spots and fine scratches immediately draw the eye away from the subject. Especially with digitized photos from drawers and albums, these defects show up regularly because dust clings to the original, scratches arose during development, or the scanner surface was not completely clean. In this tutorial you will learn how to remove such defects in Affinity Photo in a targeted and non-destructive way. It is based on the video tutorial by Marco Kolditz, whose approach I am preparing for you here step by step.
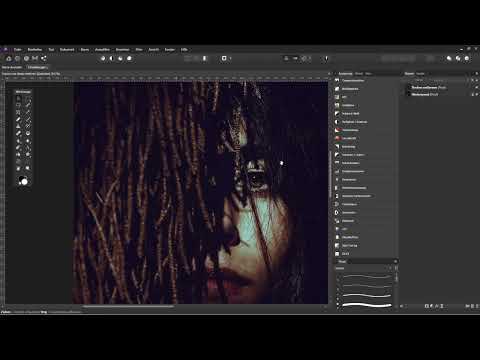
The video is only loaded from YouTube when you play it – data (including your IP address) is then transmitted to YouTube/Google. More in the privacy policy
Key Takeaways
Key Takeaways
- Always work on a separate, empty layer so that the original image remains unchanged.
- With the Healing Brush and the Blemish Removal tool, always set the source to "Current Layer and Below", otherwise nothing will be corrected.
- Choose the appropriate tool depending on the spot: Healing Brush for targeted corrections, Blemish Removal for clearly defined areas, and Inpainting for quick results on small spots.
- Check your work with a Levels adjustment, because many spots are barely visible at normal brightness.
- For scratches and widespread dirt, the Dust and Scratches live filter is suitable, which you apply selectively with a mask.
Step-by-Step Guide
Step 1: Create an empty layer as a workspace
Before you even start retouching, you should protect your original image. You could work directly on the original layer, but every correction would then be permanent. It is much better to create a transparent, empty layer above the image. To do so, click the icon for a new empty layer at the bottom of the Layers panel. Then rename it, for example to "Remove spots", so that you keep track of things in more complex projects. You make all the following retouching on this layer.

Step 2: Configure the Healing Brush correctly
Now select the Healing Brush from the toolbar. The most important step, however, does not happen on the image, but in the tool settings at the top under "Source". By default it says "Not current layer". Change the option to "Current Layer and Below". This is crucial, because it determines where the image information for the correction comes from. If you chose only the current layer instead, the source would be your empty layer, which contains no image content at all. The result would be that nothing is corrected. So make sure to check this setting every time you open a new document.
Step 3: Set source points and transfer areas
With the Healing Brush, you determine which area of the image serves as the replacement. To do so, hold down the Alt key and click on a suitable spot near the blemish. A small crosshair appears, marking the source. Then you simply paint over the damaged area, and the correction is applied. Caution is required with areas containing shadows or clear structures. If you pick up a bright area there, the copy will be noticeable later. A trained eye will then quickly recognize that retouching was done here. Therefore, set several source points if necessary and vary them so that the transitions look natural.

Step 4: Working with the Blemish Removal tool
The Blemish Removal tool works differently. Here you first define the area you want to correct, and only then choose the source. Outline the spot with the mouse button held down, release, and then move the mouse pointer to an area in the image that is to serve as a template. Another click applies the correction. Here too: set the source to "Current Layer and Below". If you don't like the result, you can choose a different area at any time and carry out the correction again.

Step 5: Combine tools and use Inpainting
The tools can be combined very well. If a spot looks artificial after the first attempt, simply set an additional source point in a different surrounding area and paint over it again. This way you vary the texture until the transition is no longer noticeable. The Inpainting tool is the simplest variant with the least control. You merely paint over the faulty areas, and Affinity Photo automatically finds similar areas as a replacement. Here too, you must switch the source to "Current Layer and Below". For small spots, a brush with low hardness is particularly well suited. You can decrease or increase the hardness as needed, and with a smaller brush you work more precisely.

Step 6: Editing Difficult Areas Such as Lips and Hair
Not every spot can be corrected cleanly with the automatic tool. On lips, restoring sometimes works surprisingly well, but sometimes not at all. In that case, go back a step, undo the correction, and try a different source area. With hair, you need to pay particular attention to the flow of the strands. If a strand breaks off at some point, the result quickly looks unnatural. Here it helps to first mark the area with the Blemish Removal tool and then choose a suitable source from a neighboring spot. Sometimes it is also worthwhile to move an entire section of the image in order to get a better area to use as a template. Afterwards, you can use the Healing Brush to even out the remaining color differences.

Step 7: Checking the Result with a Levels Adjustment
Many spots are not noticeable at normal image brightness but are clearly visible in a brighter display. So that you don't overlook them, create a Levels adjustment layer above all layers and drag the sliders far enough that the image is strongly brightened. Now small imperfections become visible, which you can then touch up on your Blemish Removal layer with the Healing Brush or the Inpainting tool. Make sure that here, too, the source is set to "Current Layer and Below". When you are finished checking, hide the Levels adjustment again or drag it to the trash so that the image retains its original brightness.

Step 8: Using the Dust and Scratches Live Filter
For images with many uniform scratches or dust particles, a different approach is suitable. Affinity Photo has the Dust and Scratches live filter for this. To use it, create a new live filter layer above the image and select the filter. It is automatically applied to the image as a clipping mask. The filter has two sliders: Radius and Tolerance. First drag the Radius up until the disturbing spots disappear. However, make sure that the image becomes increasingly mushy in the process. In your example, a value of about 18 was a good starting point. Afterwards, you can reduce the Tolerance so that fine structures become visible again. A value of about 3 percent produced a good balance between removed spots and preserved structure.

Step 9: Applying the Filter Selectively with a Mask
Since the filter changes the entire image, you should not apply it across the board to everything. First hide the layer completely by holding down the Alt key with the layer active and clicking on the mask icon. This creates a black mask that completely hides the effect. Now select the Brush tool and set the opacity high. With white on the mask, you bring the effect back selectively, only where scratches or spots are actually located. If you are working with a graphics tablet, you can configure the pen pressure in the brush settings so that the stroke width or opacity depends on how hard you press. This way, the natural structure is preserved, especially in faces and fine details.

Step 10: Retouching Large Spots and Edges
Not every imperfection can be fixed with the filter. A large spot, for example, that is clearly too large for the radius, has to be handled with a different method. In that case, fall back on the Inpainting tool, work with low hardness, and set the source back to "Current Layer and Below". This way, dark or light edges at the image border or along contours can also be removed cleanly. Feel free to take your time with this fine work. Especially with digitized images, the effort is worthwhile, because such photos often carry memories that you can bring out once again with careful editing.

Summary ??? Removing Scratches and Dust in Affinity Photo: Step by Step to Clean Digitization
You have seen that Affinity Photo offers you several ways to remove dust and scratches. An empty layer protects your original, the Healing Brush and the Blemish Removal tool enable precise corrections, and the Inpainting tool is suitable for quick results. For widespread imperfections, you use the Dust and Scratches live filter selectively with a mask. At every step, pay attention to the source setting "Current Layer and Below" and check your result with a Levels adjustment. With a bit of patience, your digitized photos will in the end look the way they deserve to look again.
FAQ
Do I always have to create an empty layer?No, you can also work directly on the image, but then your changes are permanent. A separate layer is much more flexible because you can hide or undo corrections at any time.
Why isn't the Healing Brush working for me?Most likely the source is set to "Current Layer" instead of "Current Layer & Below". There is no image information on the empty layer, so nothing gets corrected.
What is the difference between the Healing Brush and Blemish Removal?With the Healing Brush, you first define the source and then paint over the flaw. With the Blemish Removal tool, you first mark the flaw and then select the source.
When should I use the Inpainting tool?It is suitable for small blemishes where you need little control. Affinity Photo automatically searches for similar areas as a replacement, so you only have to paint over the spots.
Why do I only see blemishes after brightening?Many imperfections are in the dark areas of the image and are barely visible at normal brightness. A Levels adjustment as an adjustment layer helps you find them reliably.
What do Radius and Tolerance do in the Dust and Scratches filter?The radius determines how large the areas are that get removed. The tolerance controls how much structure in the image is preserved. A radius that is too high quickly makes the image mushy.
Why should I use the filter with a mask?The filter affects the entire image and can also blur details such as faces or fine hair. With a mask, you bring the effect back only where scratches or dust are actually present.
Do I need a graphics tablet for this work?A tablet is not strictly necessary, but it makes fine mask work much easier. With a mouse you can perform the same steps, but you have to work with smaller brush sizes and more patience.


