
Without the pixel, OpenAI only learns that your ad was clicked. Whether that resulted in an inquiry, an order, or a subscription remains hidden. Conversion tracking closes exactly this gap. In this guide, you will set up the OpenAI pixel on your website, create a data source and a conversion event in the Ads Manager, and place the code so that it fires at the right spot. You will also learn when the Conversions API is a useful addition.
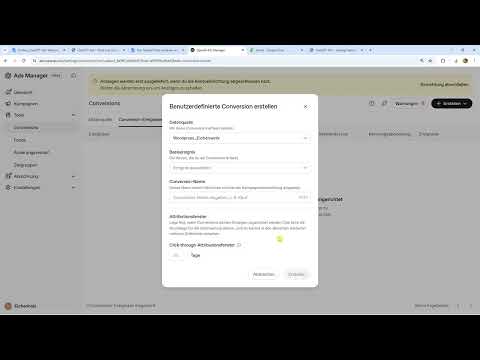
The video is only loaded from YouTube when you play it – data (including your IP address) is then transmitted to YouTube/Google. More in the privacy policy
Key Takeaways
- The pixel is the prerequisite for sales, leads, and other actions on your website to be recorded as conversions.
- Without conversion tracking, you cannot use the "Conversions" campaign goal in a meaningful way.
- The JavaScript pixel can usually be installed yourself, but it is vulnerable to ad blockers and rejected cookies.
- The Conversions API runs server-side via your backend and is less prone to disruption, but usually requires a day of development.
- The snippet belongs in the head of your website, and the event goes where the conversion actually takes place, such as on the thank-you page.
Step-by-Step Guide
Step 1: Open Conversion Tracking in the Ads Manager
Log in to the Ads Manager and open the Tools section. There, under Conversions, you will find the Conversion Tracking item. Here you manage both your data sources and the individual conversion events you want to analyze. Before you start, disable your ad blocker, as it may otherwise trigger error messages when working with OpenAI interfaces.

Step 2: Create a Data Source and Define the Origin
A data source describes where the data comes from. So you choose, for example, Web for your website or App if you run a mobile application. For this example, Web is the right choice. The data source is the container in which all events from your website will later come together.
Step 3: Understand the Possible Events
After choosing the data source, you will see a selection of events that can be measured. These include, for example, App Opened, App Installed, Checkout Started, Subscription Created, Page Viewed, Order Created, Lead Created, Item Added to Cart, or Content Viewed. Think in advance about which action really counts for your business. For an online shop, the order is usually the most important metric. A contact form or a lead would accordingly be a different event.

Step 4: Weigh the JavaScript Pixel Against the Conversions API
There are two ways to transmit data to OpenAI. The JavaScript pixel reads events via cookies that visitors must accept. It is quick to set up, but it can be blocked by ad blockers or end up doing nothing if cookies are rejected. The Conversions API, on the other hand, runs on your own server and sends data directly from your backend. For this, you have to pass along the click reference and assign the conversion cleanly. This route is significantly more robust, but usually requires a developer. For getting started, the pixel is usually enough. The API is worthwhile if you lose many conversions or need particularly reliable data.

Step 5: Name the Data Source and Secure the Pixel ID
Give your data source a unique name that is immediately recognizable later, such as the name of your website or your shop. After creating it, a pixel ID is displayed to you right away. Save it in a safe place, because you will need it for the integration and for later checks. You will also receive a setup code, that is, an HTML script.

Step 6: Insert the Setup Code into the Head of Your Website
Copy the script and insert it into the head of your website. The head is the invisible area at the very top of a page's source code. Visitors see nothing there; the script runs in the background. Once it is integrated, OpenAI can read your website. Detection sometimes takes a while, so you should not give up immediately if the data source does not yet show any activity. How you integrate it depends heavily on your site builder or store system, such as Wix, WordPress, or Magento. If in doubt, the documentation of your system or a quick look at the theme settings will help.

Step 7: Define the Conversion Event
Once the data source is set up, you create the actual event. In the example, you select Order Created, meaning the moment someone buys something on your website. You give this event a clear name, such as Product Purchase or Shop. That way, you will immediately recognize what is being measured in the reports later.
Step 8: Check the Click Attribution Window
With the attribution window, you determine how long a click on your ad remains valid. In the video, 30 days is set. This means: if someone clicks on the ad today, puts the product in the shopping cart, and only buys ten days later, the sale is still attributed to this ad. This way, the event always belongs to the right data source. For longer purchase decisions, consider whether this time period fits your offer.
Step 9: Insert the Event Code at the Conversion Point
The snippet in the head only records that a visitor visits your page. For the specific conversion, you additionally need the pixel event call. It belongs where the conversion happens. This is usually the thank-you page after an order or the completion of an ordering process. The call is only inserted after the base code has been installed. Then test whether the event actually arrives in the Ads Manager by placing a test order yourself.

Step 10: Consider the Alternative with Codex
If the manual route is too time-consuming for you, ChatGPT offers the option of setting up the setup with Codex. Codex is OpenAI's coding tool, with which you can install a conversion plugin. However, this option is only available to users of the Pro version. If you do not use it, the manual route with snippet and event code remains.

Summary – ChatGPT Ads: Set Up the OpenAI Pixel and Measure Conversions
You have now laid the foundation for measurable conversions. You know why the pixel is necessary, have created a data source, saved the pixel ID, and embedded the snippet in the head of your website. In addition, you have defined a conversion event, checked the attribution window, and placed the event code in the right spot. This creates the prerequisite for making sensible use of the Conversions campaign goal. If it later turns out that events are missing, first check ad blockers and cookie settings. Only after that is it worth taking the step to the Conversions API.
FAQ
Do I need the pixel if I only want to measure impressions and clicks?No. Impressions and clicks are also recorded without a pixel. However, the pixel is necessary for sales, leads, and other actions on your website.
When is the Conversions API worthwhile in addition?It is worthwhile when ad blockers or declined cookies cause conversions to be lost. Since it runs server-side, it is less prone to interference, but it usually requires a developer.
Do I have to turn off my ad blocker?When working in the Ads Manager and when testing, yes. Otherwise, error messages may occur or certain areas may not work properly.
How long is a click attributed to a conversion?In the video's example, the attribution window is 30 days. Everything that happens within this period is attributed to the event of the data source.
Where does the pixel code belong?The base snippet belongs in the head of your website so that it runs on all pages. The event call belongs at the point where the conversion takes place, for example on the thank-you page.
Can I also carry out the setup without programming knowledge?With the JavaScript pixel, this is usually possible even without developer knowledge, provided you have worked with your website before. However, the integration depends on the respective store system.
What is the alternative via Codex?With Codex and a conversion plugin, the setup can be simplified. However, for this you need the Pro version of ChatGPT.


