
Do you want to draw people's attention to your product or brand before they actively search for it? Then a brand awareness campaign is exactly what you need. It does not aim at immediate sales, but at building reach and anchoring your brand's name in the minds of potential customers.
The video is only loaded from YouTube when you play it – data (including your IP address) is then transmitted to YouTube/Google. More in the privacy policy
In this guide, I walk you through the entire process in Google Ads: from choosing the campaign goal, through location, bidding, and budget, to audiences, ad format, and ad copy. The example is a display ad for a website that I set up in the video as example.com. You can apply the steps directly to your own offering.
Key takeaways
- A brand awareness campaign prioritizes reach and visibility, not direct sales.
- Location, language, and audience determine who sees your ad in the first place. Choose them deliberately and to match your ad copy.
- With bidding, you decide between more impressions and high-quality traffic. For click optimization, the "High Quality Traffic" option is suitable.
- A daily budget of at least 10 to 20 euros makes sense so that the ad can collect enough data.
- An image, a meaningful headline, and a clear description with a call to action form the core of your ad.
Step-by-step guide
Step 1: Create the campaign and set the goal
Open your Google Ads account and click "New campaign". In the next window, you select the goal "Brand awareness and reach". This signals to Google that you care about visibility and not about conversions or sales. This later influences how the system serves the ad.

Step 2: Select the ad format
Next, you decide on the ad format. Options include display ads, which appear for example on the right side of a website, or video ads, which run for example before or between YouTube videos. In the example, I choose a display ad. Afterwards, you enter the business website you want to promote. In the video, that is example.com. Confirm the entry with "Continue".

Step 3: Set the campaign name and location
Now you assign a meaningful campaign name. In the example, it is called "Brand Awareness and Reach Display No. 1". A clear name helps you tell multiple campaigns apart later.
After that, you set the location. You can select an entire country such as Germany, the USA, or France. In addition, individual places can be specifically excluded. In the video, for example, I exclude Paris while keeping all of France. To do this, you search for the place, select it, and click "Exclude". The place then appears in the list of excluded locations.


Step 4: Align language and target country
Next, you choose the language of the target audience. It should match your ad copy. In the video, I initially chose French, but then decided against it because I barely speak French myself and have to write the text later. The consequence is clear: choose a language you master yourself or can formulate confidently. In the example, it stays with German and Germany.


Step 5: Set the bidding strategy
In the "Bid optimization" section, you decide what the system should optimize for. You have two main options: as many impressions as possible or high-quality traffic. With the first option, you usually pay somewhat less per ad contact; with the second, somewhat more, but the visitors tend to come from more relevant sources. In the example, the choice falls on "High Quality Traffic". The ad is then optimized for as many clicks as possible.
Step 6: Plan the budget realistically
Now you enter your daily budget. In the video, I initially use one euro as an example so as not to waste anything. For a meaningful brand awareness campaign, however, I would recommend at least 10 to 20 euros per day. Google shows you a forecast, such as the expected number of clicks, impressions, the average cost per click (CPC), and the click-through rate (CTR). These values are estimates, but they help you put the scale of your budget into perspective.

Step 7: Set Ad Rotation
Under "Ad rotation" you determine how Google rotates your ads. The option "Optimize: Prefer best performing ads" lets the system serve the best variants more often. Alternatively, you can have ads rotate evenly without optimizing them. To get started, the default option is usually the better choice, since Google controls delivery based on performance.

Step 8: Set Schedule and Frequency Cap
In the next section you determine when your ad runs. You can select specific days of the week or times of day, for example only Friday or only the evening hours. You also specify a start date. An end date is optional. If you leave it out, the campaign continues running indefinitely. In the video, for example, I set a period from the 18th to the 19th of the month.

Next comes the frequency cap. Here you determine how often the same person should see your ad at most. You can leave the decision to Google, which I personally usually recommend, or set a fixed limit per day or per campaign. A limit that is too high can irritate users, so it's worth taking a look at this setting.

Step 9: Select Audiences and Keywords
In the ad group you define who exactly should see the ad. You can enter your own keywords or have suggestions displayed. In the example, I sell skateboards and therefore enter "skateboard". Google then suggests related topics such as scooters, accessories, or winter sports. These suggestions are so-called audiences for in-market segments, meaning people who are actively interested in a topic.
For each audience you also see the estimated size in Germany. This helps you identify segments that are too large or too small. If you enter a topic that doesn't fit your offering, you can simply choose a different audience there.


Step 10: Adjust Demographics and Targeting Expansion
Before you refine the audience further, you can edit the demographics. Here you set gender, age group, parental status, and household income. In the example, I leave it at all genders and a wide age range. If you target your product at a specific group, you can deliberately narrow the selection.
Next comes the targeting expansion. If you activate it, Google also reaches people outside the defined audience with your ad, provided the system sees potential. This increases reach but can dilute the quality of hits. For brand awareness, this is often a desired effect, but you should decide on it deliberately.

Additionally, you can set a maximum CPC for the ad group. In the video, I set it to 2 euros so that the cost per click doesn't get out of hand. This upper limit protects you from unexpected costs.

Step 11: Create a Responsive Display Ad
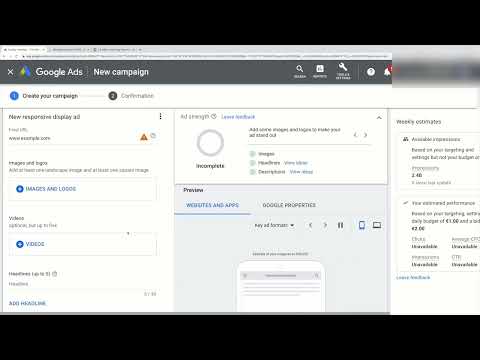
Now you create the actual ad. Click on "New ad" and select "Responsive display ad". This ad type automatically adapts to different placements and formats. You only provide the ingredients, and Google combines them.

First, you enter the target URL, meaning the page visitors should land on. Make sure the address begins with "https://". This lets the user and Google know that it is a secure connection.

Step 12: Add Images and Logos
In the next step you upload images. You can use your own photos, use stock images, or have images adopted that Google pulls from your website. In the video, the suggestions initially come from the website. But I upload my own photo, since the suggested image doesn't fit my topic. When uploading, make sure the image meets the required aspect ratios. You may need to crop it before it is accepted.

At the top right of the ad you can see the "Ad strength". A high value shows that your ad is built with enough variety. Aim for a good to excellent rating if possible by adding more images, headlines, and descriptions.
Step 13: Writing Headlines and Descriptions
Now comes the text. Choose a core message that fits your target audience and your image. In the example, I decide on "Consulting" or "Unternehmensberatung" (business consulting), because the person pictured looks like they could work in this field. The headline is short and concise, for example "Unternehmensberatung".

Below that, you add a call to action, for example "Book an appointment now". A long headline may contain more keywords, such as "Consulting for businesses: Increase your revenue now". In addition, you need a description with a clear call to action, such as "Book your free appointment now".

Finally, you enter your company name, in the example "XYZ Consulting". Make sure that the text and image match. An ad whose image does not fit the message quickly seems untrustworthy.

Step 14: Saving the Ad and Launching the Campaign
When all fields are filled out, you click on "Add ad group". Then you create the campaign via "Create campaign". This sends it straight to review and then to serving. The setup is not overly complicated: if you fill out all the fields the way Google expects, the campaign gets started quickly.

Summary ??? Creating a Brand Awareness Ad in Google Ads: Step by Step
A brand awareness campaign in Google Ads is built from a few, but well-considered decisions. You choose the reach goal, set the format, location, language, and bidding strategy, and define budget, schedule, and target audiences. Then you create a responsive display ad with a suitable image, headlines, description, and company name. Pay particular attention to making sure that location, language, target audience, and ad text match, because only then will your brand reach the right people.
FAQ
Which campaign goal do I choose for brand awareness?In Google Ads, choose the goal "Brand awareness and reach". This way Google optimizes for visibility rather than direct sales.
What should my minimum daily budget be?For a meaningful campaign, I recommend at least 10 to 20 euros per day. With just one euro, the ad collects hardly any usable data.
What is the difference between "Impressions" and "High Quality Traffic"?With impressions, Google aims for as many ad views as possible. With High Quality Traffic, the system optimizes for clicks and usually charges somewhat more per click.
Why should I choose the language of the target audience deliberately?The language should match your ad text. If you don't have a secure command of the language, writing the text is difficult and the quality suffers.
Do I have to upload my own images?No, you can also use stock images or images from your website. However, your own photos usually fit your brand and your offering better.
What does ad strength mean?Ad strength shows how varied your ad is. The more images, headlines, and descriptions you provide, the higher the value.


