
Building your own funnel sounds technical, but Funnel Cockpit guides you through the entire setup in just a few steps. You create the funnel, design individual pages, link them together, and check the result in the preview. A hair salon that wants to win new customers online serves as the example. However, the steps can be applied to any other offer.
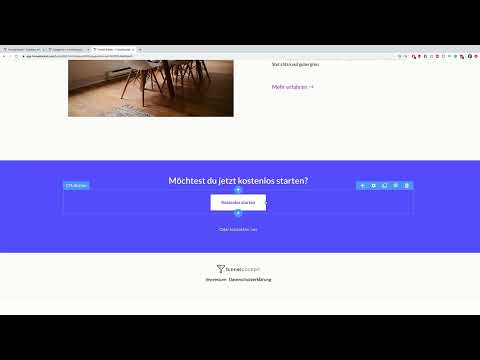
The video is only loaded from YouTube when you play it – data (including your IP address) is then transmitted to YouTube/Google. More in the privacy policy
Key Takeaways
- A funnel consists of several pages that are linked together one after another.
- When creating it, you set the name, optional domain, and category. You can change the domain and category at any time.
- The page type (sales page, lead page, thank-you page, or clean landing page) determines the basic structure of your page.
- Forms, texts, and elements can be edited, added to, or deleted at any time.
- You link buttons to follow-up pages so that visitors are forwarded automatically.
- Before launching, you save the funnel and test it in the preview.
Step-by-Step Guide
Step 1: Create Your Own Funnel
In Funnel Cockpit, open the menu item "Funnels" and click "Create funnel" on the right-hand side. You will now see three options. Choose "Custom funnel" and confirm with "Select". This starts you with an empty structure that you can design entirely yourself.

Step 2: Choose a Meaningful Name
Now give your funnel a name that is easy to understand later in the overview. For our hair salon, "Hair Salon Funnel" is a good fit. But you could just as well choose "Ebook Funnel" or "Opt-in Funnel". Once the name is set, click "Next step".
Step 3: Optionally Configure a Domain
In the next window, Funnel Cockpit asks whether you would like to set up a subdomain or your own domain. If you already have your own address, such as www.beispiel.com, enter it here. If you are not ready for that yet, simply skip this step. The setting is optional and can be adjusted at any time later.
Step 4: Define a Category
Next, you can assign a category to your funnel. This is helpful if you manage several funnels later, because in the overview under "Funnels" they are sorted by category. For the hair salon example, you can initially assign a general category such as "Example funnel". Then click "Create funnel".
Step 5: Select the Right Page Type
Now the actual building begins. You choose which type of page you want to create first. The options are sales pages, lead pages, thank-you pages, custom pages, and clean landing pages. A clean landing page is well suited for getting started, especially if visitors are supposed to leave their email address, for example for a newsletter, a tripwire product, or online coaching. Select the template, click "Select", and then "Edit page".

Step 6: Adjust the Form and Headline
On the right-hand side of the template, you will find a form that asks for name, email address, and inquiry. The form can be edited, replaced, or removed. Then adapt the headline to your target audience, for example: "Do you want a new look? Send us a message with your request." Make sure the headline is worded specifically, because it decides whether visitors keep reading.

Step 7: Improve the Text Design
With long texts, it is worth taking a look at the formatting. Justified text quickly looks uneven with short paragraphs, and font sizes that are too large overwhelm the layout. So try out different alignments and reduce the font size until the result looks harmonious. Confirm each change with "Done" so that it is applied.

Step 8: Insert Additional Text Blocks
Below the form, you can place another text block that sets expectations. One example would be: "Send us your request. We will get back to you by email within 24 hours." Whether you additionally need a call-to-action button depends on the goal of the funnel. If you only need the message itself, you can remove the button. The form is then sufficient, and the details go directly to your email program.

Step 9: Add More Elements
Via "Add element" you add further building blocks to the page, for example a video. A short introduction video in which you present your services builds trust before visitors fill out the form. After being added, the elements can be freely moved and resized.

Step 10: Save and Check the Preview
Click "Save" at the top and then "Preview". This way you can see what the page will later look like to visitors. You don't have to perfect every detail right away. Work your way forward step by step and optimize the page bit by bit once you have seen it in preview mode.

Step 11: Create a Thank-You Page for the Confirmation
Now you need a follow-up page that appears after the form is filled out. In the funnel, click "Create funnel page" and name it, for example, "Thank-You Page". Choose a template and adjust the text. A suitable confirmation could read: "Thank you, that worked. Your email address has been successfully confirmed." If the page makes no sense in the funnel because there is only a single form, you can delete it again. In that case, it is a one-page funnel.

Step 12: Set Up an Opt-in Page as the Second Stage
If you want to build the funnel in a more complex way, you create another funnel page, for example with the name "Opt-in". A lead page on which prospects leave their email address is suitable here. You can choose a simple template, adjust the headline and content, and replace or supplement the video from the first page. The goal is for prospects to be forwarded step by step.

Step 13: Connect Buttons to the Follow-up Pages
This is the key step that turns your funnel into a coherent system. Open the page with the button, such as "Book appointment", and remove forms that are no longer needed there. Instead, write a note like: "If you want to book a service, click the button below." Then select the button, choose the opt-in page as the target, and save. As soon as visitors then click "start for free" or a similar button, they are automatically taken to the opt-in page.

Step 14: Design the Final Thank-You Page
After the data is entered, a final confirmation should appear. Create a third page for this and choose a simple template such as "Basic Thanks". In the text you can write, for example: "Thank you for your successful registration. Now follow three steps to complete your request and check your email inbox." Save the page and link it to the previous opt-in page.

Step 15: Test the Complete Funnel
Finally, you check the entire process. Open the "Book appointment" page, click "Edit page" and then "Preview". Then press the button and follow the path to the thank-you page. If all redirects and texts are correct, your funnel is ready to use. Even if the setup seems unfamiliar at first, you will become more confident with each run-through.

Summary ??? Creating a Funnel: Step-by-Step Guide
You have learned how to create your own funnel in Funnel Cockpit, set the name, domain, and category, and select suitable page types. You have also seen how to adjust headlines, forms, and elements, create thank-you pages and opt-in pages, and link buttons to each other. The last step is the test in the preview. It is best to work your way forward step by step, try out variations, and adapt the funnel to your target audience.
FAQ
How do I create a new funnel in Funnel Cockpit?Open the menu item "Funnels", click "Create funnel", select "custom funnel", enter a name, and click "next step".
Can I still change the domain and category later?Yes, both settings are optional and can be adjusted at any time.
Which page types are available?You can use sales pages, lead pages, thank-you pages, custom pages, and clean landing pages.
How do I link a button to another page?Open the page, select the button, choose the desired funnel page as the target, and save the changes.
What happens to the information from a form?The information is forwarded directly to your email program so that you receive the messages immediately.
How do I test my funnel before launch?Save all pages, open the preview, and click through the entire process to the final thank-you page.


