
A flow that pursues the same goal message after message quickly reaches its limits. As soon as you want to address customers differently depending on their answer, you need branches. That is exactly what you build in this guide: a second, much larger Condition Flow that reacts to answers, assigns tags, builds in waiting times, and guides users to different offers depending on their stated gender. You work your way through the process from the first welcome text to the final preview.
The video is only loaded from YouTube when you play it – data (including your IP address) is then transmitted to YouTube/Google. More in the privacy policy
Key Takeaways
- Every answer can be saved via buttons and tags, and it is exactly these tags that later control the further course of the flow.
- Conditions check whether a user has a certain tag and direct them into the appropriate branch.
- Smart Delays determine when the next message is sent, thus ensuring a natural conversation flow.
- A preview shows you whether all branches work correctly before you set the flow live.
Step 1: Create a new flow
Open the Flows area and click "New Flow". Assign a unique name, in the example "Conditions Flow Number 2". This way you keep an overview when you manage several flows in parallel. Then confirm with "Create" so that the empty flow opens and you can start building.

Step 2: Write a welcome message with personalization
Start with a personal greeting. To do this, insert the personalization that automatically takes over the recipient's first name. A message like "Hi Leon, how are you today?" feels much closer to the customer than a generic standard text. You insert the personalization at the position of the name so that the system outputs the correct first name for each recipient.

Step 3: Create answer buttons and assign tags
Below the greeting you create two buttons: "doing well" and "not doing well". Each button should later save information about the user. To do this, you attach a tag to the actions of each button. In the actions area, select "Action" and then "Add Tag". For the first button, store the tag "doing well", for the second the tag "not doing well". As soon as the user clicks a button, they have the matching tag.

Step 4: Set up a follow-up message with user input
After the user has answered, you send another message, for example: "What shoe size do you have?". So that the answer is also captured, you add a User Input below this message. The input is linked to the message, so the flow waits for the user's input before continuing. Make sure that both branches, i.e. the "doing well" button and the "not doing well" button, lead to this message.

Step 5: Set a condition for the further course
Now comes the actual branching. Insert a Condition after the User Input. The condition checks whether the user has the tag "doing well". If so, the flow continues in the positive branch. This logic forms the heart of the flow, because it decides which message each customer receives.

Step 6: Implement the gender question with buttons and tags
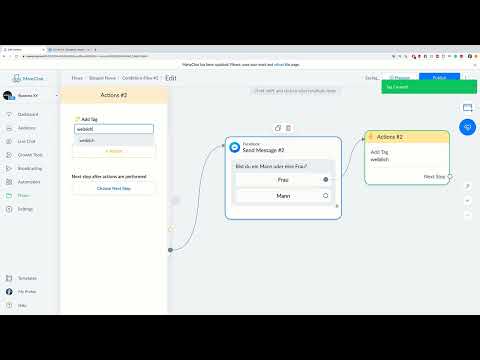
In the positive branch, you now ask a new question: "Are you a man or a woman?". For this you again need two buttons, "Woman" and "Man". Create a new tag for each button. Give the "Woman" button the tag "female" and the "Man" button the tag "male". You create the tags in the management area before assigning them to the actions. This way you can later distinguish precisely which target group sees which offer.

Step 7: Send a confirmation message
After the user has made their selection, a short confirmation follows. A text like "Thank you for your honesty, we are very happy to have you as a customer" keeps the contact warm. You can use the same text for both tags because the message fits regardless of gender. The confirmation is therefore played out in both branches as soon as the respective tag has been set.

Step 8: Add a Smart Delay for time-delayed messages
To keep the conversation from feeling rushed, you add a Smart Delay. For example, specify that the flow waits one day before continuing. During this time nothing happens, and the user receives the next message only after the defined pause. The Smart Delay is especially useful when you want to place offers at a later point in time.

Step 9: Define conditional offers for male customers
After the delay, a new Condition checks whether the user has the tag "male". If so, they receive a message with an offer, for example: "Hey Leon, we currently have a big sale on men's shoes. Click the link below to get your discount." The personalization with the first name is retained here as well. This way the offer feels personal and not like a mass message.

Step 10: Add a button with a link to the offer page
Below the offer text, you add a button labeled "Click here". As the action, you choose "Open Website" and enter the target address, for example a page with the path for men's shoes. The button takes the customer directly to the offer, without them having to search for the product themselves.

Step 11: Create an alternative branch for female customers
The Else branch applies when the Condition for the tag "male" is not met. This is where a message for female customers goes, for example: "Hey Leon, we currently have a big sale on women's shoes." For this, too, you create a button with a link that leads to the corresponding page. Copy the structure of the male message and adjust only the product name and link. This keeps your flow clear and consistent.

Step 12: Add the missing shoe size question
During a run-through, you often notice that a question is missing. In this example, the question about shoe size was only added later. In the appropriate branch, insert a message, for example: "Hey Leon, what shoe size do you have?", followed by a User Input. Make sure the order of the messages stays logical, so that the customer first provides their shoe size and only then receives the matching offer.

Step 13: Test the flow with the Preview
Before you activate the flow, you should test it thoroughly. Start the Preview and send yourself a test message. Then go through all the branches: reply once with "going well", once with "not going well", select "man" once and "woman" once. While doing so, check whether the correct tags are assigned, whether the Condition selects the right branch, and whether the links are correct. This test uncovers errors that are easily overlooked during the build.


Summary ??? Creating Condition Flows: Branched Sequences Step by Step
You have now built a flow that evaluates responses, assigns tags, works with Smart Delays, and directs customers to different offers via Conditions. The basic principle always stays the same: a user action sets a tag, and the Condition decides the further path based on that tag. Once you have understood this logic, you can add as many branches as you like and refine your customer communication step by step.
FAQ
What is a Condition Flow?A Condition Flow is a sequence that takes different paths depending on user behavior or stored information.
What are tags used for in a flow?Tags store information about a user, for example their answer to a question. A Condition can later check these tags and control the sequence accordingly.
What does a Smart Delay do?A Smart Delay sets a waiting time before the next message is sent. This creates time-delayed messages that feel more natural.
What is the Else branch of a Condition for?The Else branch applies when the condition is not met. This way, every user receives a suitable message, even if they do not belong to the original target group.
Why should I test a flow before activating it?With the Preview you check all branches, tags, and links. This way, errors are noticed before real customers experience the flow.


