
Before you start editing your first photos in Capture One Pro, it's worth taking a look at the preferences. There you set the language, viewer behavior, hardware acceleration, catalog backups, and much more. If you set up these options sensibly once, you'll save yourself many clicks and detours later. The settings are neatly distributed across several tabs, but at first they can quickly seem overloaded. That's why in this guide I'll go through the most important areas step by step, explain what they are for, and show you which default values you can safely keep or adjust.
The video is only loaded from YouTube when you play it – data (including your IP address) is then transmitted to YouTube/Google. More in the privacy policy
Key Takeaways
- You can find the preferences via the "Edit" menu under the item "Preferences".
- The zoom function via mouse wheel is active by default and makes working in the viewer much easier.
- Hardware acceleration is set to "Auto" and uses your graphics card when needed.
- A regular catalog backup protects you from data loss in case of program crashes.
- The dark viewer background is well suited for helping you concentrate on the image.
- The preview image size determines how well images on external drives remain editable even without the hard drive connected.
- Via plugins and the list of applications, you customize which programs you can open from within Capture One.
Opening the Preferences and Choosing the Language
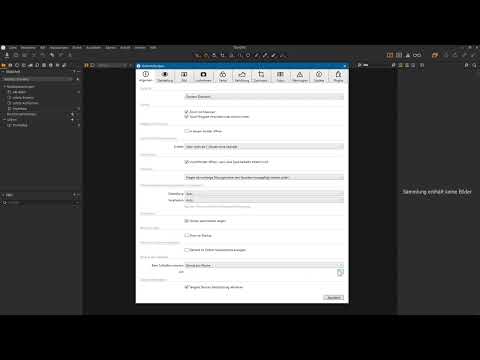
Open the preferences via "Edit" and then select "Preferences". A comprehensive dialog window with several tabs appears. Don't let the abundance scare you off, because you don't have to change every option. It's best to begin in the general area with the language of the user interface. On a German-language Windows system, German is usually already preselected. However, you can switch to English or another available language at any time if you feel more comfortable with the software in a different language.

Zooming in the Viewer with the Mouse Wheel
In the "Viewer" area, you'll find a setting that can save you a lot of time: the zoom function via mouse wheel. It is enabled by default and should stay that way. You zoom into an image by moving the mouse wheel forward, and zoom back out by moving it downward. Without this option, you would always have to work with the magnifier or the various zoom levels. That is more cumbersome, and especially when checking fine details, you would miss the quick switch. If you know programs like Photoshop, you'll feel right at home here.
If you work on a touchscreen, there is also an additional option for touch input. It determines whether you can pan or zoom with gestures. This function is also enabled by default.
Automatic Import When Inserting a Memory Card
In the "Import" area, you can specify that the import window opens automatically as soon as Capture One detects a connected memory card. This is practical if you want to transfer your shots directly after a shoot. You then no longer have to search manually for the import and save yourself a work step.
Setting Hardware Acceleration Correctly
Hardware acceleration determines whether your graphics card helps with certain tasks. These include, for example, calculating filters as well as zooming and panning images. The option is set to "Auto" by default. In this mode, Capture One uses the graphics card if the system supports it. If, on the other hand, you do not want to involve the graphics card at all, you can select "Never". For most users, the automatic setting is the right choice. However, if you notice display errors or performance problems, it's worth testing with the "Never" setting.
Enabling or Disabling the Resource Hub
The Resource Hub informs you at program startup about updates and free tutorials. The function is enabled by default. Especially if you are still at the beginning with Capture One, it can be helpful. If the notifications become too much for you, you can disable the option at any time.
Integration into Windows Explorer
Via the Explorer integration, you can add an entry to the context menu of folders. A right-click on a folder in Windows Explorer then shows an entry for Capture One. Through it, you open the folder directly in the program or import its contents. In addition, the folder can be set as a capture folder. Note that some areas in Capture One Pro are not yet translated and this entry may appear in English. If you don't need the integration, you can remove the entry again. For this, you have to briefly confirm the change. Afterwards, the entry has disappeared from the context menu.

Setting Up Catalog Backups
The catalog contains all your metadata, ratings, and edits. Losing this data would be annoying. In the "Catalog" section, you therefore specify how often a backup is created automatically, for example once a week or once a month. You also determine the storage location. A backup on an external hard drive is a very safe solution, because it remains intact even if the computer fails. If the program crashes or suddenly nothing works as usual anymore, you can restore the backed-up catalog at any time.
Customizing the Display and Background of the Viewer
In the "Appearance" tab, you determine the color of the background in the middle area, where you review your images. By default, a very dark background is set. It is not very distracting and helps you concentrate on the image. A white background, on the other hand, can distort the perception of brightness and color. However, you can freely adjust the color, for example from very dark to light. Take your time to try out which setting you like best.

In the "Viewer and Browser" section, you also specify how selected images are marked. A click on an image, for example, creates a frame whose color you can change. The color of the comparison variants can also be adjusted. This is helpful when you want to compare two images with each other.
Masks and Preview Settings
You need masks when you want to edit only individual areas of an image. The introduction to working with masks follows in a separate tutorial. The settings for them can already be found here: You can define the color of the displayed mask. By default, it is red. You also determine whether the mask is displayed fully opaque or semi-transparent. Semi-transparent is the default setting, and for most users it is the right choice.
In the "Image" section, you set the size of the preview images in pixels. By default, a value of 2560 pixels is preset. This option is particularly important if you import images from an external hard drive without copying them to your computer. Capture One automatically generates preview images of this size during import. If the hard drive is not connected later, you can still work with the preview images. As soon as you reconnect the hard drive, Capture One accesses the original files, for example when exporting to a JPEG file.
File Extensions and Color Management
In the "File Extensions" section, you choose how the files you create with Capture One and a connected camera are named. Two variants are available. In the "Color" section, you control color management, that is, how color profiles are converted. Here, the rendering method "Perceptual" is activated by default. It is suitable for most photos and should be kept for getting started.
Warnings for Exposure and Cropping
In the "Exposure" section, you specify which color is used to display exposure warnings. By default, this is red. In the "Crop" section, you determine how the mask is displayed when cropping. You can specify whether it is shown always, never, or only outside of dragging. You also control the opacity of the cropped area. This way, you can still see the original image in the cropped portion.

Setting Up the Focus Mask
The focus mask is a useful tool for checking sharpness. Capture One analyzes the image and automatically detects which areas are sharp and which are not. The sharp areas are marked in a bright green by default. You can adjust this color and the display to your needs.
Managing Warnings and Dialog Windows
In the "Warnings" section, you see all the dialog windows that Capture One displays for certain actions. For example, if you want to delete images from the hard drive, a warning appears beforehand. If such a notice bothers you, you can deactivate it. If you later want to restore the default values, simply click "Default". Then all settings in this section are reset to their initial state.

Updates and Plugins
In the "Update" section, you specify how often the program automatically checks for updates. I recommend triggering the search manually if you want to stay in control. Alternatively, you can set daily, weekly, or monthly checks. At the bottom of the window, you can also see the installed version, in the video's example 12.1.4.

The "Plugins" section is new in Capture One Pro 12. There you can install extensions. By default, a plugin for opening with other applications is already available. If you right-click an image, you can open it in one of the listed programs, for example in Photoshop, and continue editing it there. Via the "Load more plugins" link, you get to the official website of Phase One, the developer of Capture One Pro. There you will regularly find new helpful extensions.

Under "Allowed Applications" you can see the programs that are installed on your computer and are eligible for handing off images. Programs like Word, Paint, or Firefox make little sense for images. You can therefore deactivate them and make the list clearer.
Summary ??? Capture One Pro Presets: The Most Important Settings at a Glance
The preferences in Capture One Pro offer you many options to make your work more pleasant and safer. You set the language, use the mouse wheel to zoom, determine when import windows appear, and control hardware acceleration. A regular catalog backup protects your data, and the viewer background can be adapted to your viewing habits. You also control thumbnails, color management, warnings, updates, and plugins. Take some time at the first launch, go through the tabs once, and adjust the options step by step. This way, you lay a solid foundation for your image editing from the very beginning.
FAQ
Do I have to change all the preferences before I start editing?No, the default values are usually sufficient to get started. Only adjust the settings that you miss or that bother you in your daily work.
How do I create a backup of my catalog?In the Catalog section, specify how often the backup should be created and where it is saved. An external hard drive is a good choice for this.
What happens if I want to restore the default values?Click "Default" in the respective section. The settings in that section will then be reset to their original values.
Can I edit images if the external hard drive is not connected?Yes, you can continue working with the thumbnails. As soon as the hard drive is connected again, Capture One accesses the original files.
How can I open an image from Capture One in Photoshop?Right-click the image and select the desired program from the list of plugin applications.


