
The image is developed, the white balance is right, and the colors are accurate. All that's missing now is the finished file for clients, emails, or the website. This is exactly what Capture One Pro's export function is for. In this tutorial, you'll learn how to convert one or more Raw images into a JPEG, set the quality, color profile, and size, and create your own processing recipes that you can reuse with just a few clicks the next time you export.
The video is only loaded from YouTube when you play it – data (including your IP address) is then transmitted to YouTube/Google. More in the privacy policy
Key Takeaways
- You can export individual images or multiple images at once from the library.
- Processing recipes bundle format, quality, color profile, size, output folder, and file names into a reusable setting.
- For JPEG, a good compromise between file size and image quality is usually between 80 and 90 percent.
- With scaling by the long edge, you adapt images to their intended use, such as 1500 pixels for web or email.
- You can select several recipes at the same time and thus create different versions in a single run.
Step-by-Step Guide
Selecting Images in the Library
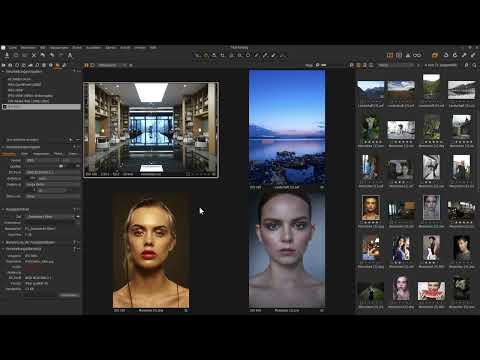
Before you export, select the desired images in your library. You select a single image with one click. For multiple images, hold down the Control key and click on each shot one after another. In the example, there are four images that are to be exported together.

Opening the Output Tab
Switch to the "Output" tab at the top. This is where you'll find the processing recipes. A recipe is a saved package of settings that you can apply to your selection at any time. The recipes in the list affect the tools below, in which you adjust the details.

Checking the Existing Default Recipe
Capture One Pro already comes with ready-made recipes, for example "JPEG sRGB". Select it and take a look at the settings. There you'll see a quality of 100 percent, the sRGB color profile, and a 1:1 scaling that retains the original resolution. You can use this recipe directly if it suits your project. For your own requirements, it's better to create a new recipe.
Creating Your Own Recipe
Click the plus icon at the bottom of the recipe list. An unnamed recipe is created, which you can rename immediately. In the example, it's called "J" as an abbreviation for JPG. Confirm the name with the Enter key. Note that all selected recipes are processed during export. If you only want to work with your new recipe, deselect the default recipe in the upper area so that no unwanted images are created.
Setting the Output Format
Now take a closer look at the "Processing Recipe" tool and determine in which format the images will be saved. For web and email, choose JPEG with 8 bit. Alternatively, TIFF, PNG, or Photoshop are available, which you can use for other purposes if needed.
Adjusting the JPEG Quality
The quality determines how strongly the image is compressed. At 100 percent, the quality is optimal, but the file is large. If you reduce the value to 90 percent, the file becomes significantly smaller without visible loss. If the value drops even further, unsightly artifacts appear. In practice, values between 80 and 90 percent have proven effective. In the example, it stays at 90 percent.
Setting the Color Profile and Resolution
As the color profile, you can choose Adobe RGB or the standard sRGB profile. For images that are used on the internet or sent by email, sRGB is the safe choice, since most screens and browsers work correctly with it. Leave the resolution in DPI or PPI at 300 pixels per inch.

Scaling the Size by the Long Edge
In the Scaling area, you decide whether the original dimensions are retained or the image is reduced. For sending by email or publishing on the internet, choose "Long Edge" and enter the desired value in pixels, in the example 1500 pixels. The value always refers to the longer side of the image, regardless of whether it is in landscape or portrait format. Since you save the recipe, you don't have to make this setting again with every export.
Setting the Output Folder and Subfolder
In the Output Folder section, click the field and choose the destination on your hard drive via "Select Folder". In the example, it is the folder "Exportierte Bilder". You can also define a subfolder, such as "klein" (small), so that the downsized versions stay separate from the original exports. The preview immediately shows you the full path.

Customizing the File Names
By default, Capture One Pro uses the image name, for example "Menschen 2". However, you can add a suffix such as "klein" so that you can recognize the file immediately in the file system. With the three dots next to the name field, you open further automatic presets and adjust the structure. The preview shows you what the result will be called, for example "Architektur_1500Pixel.jpg".
Checking the Processing Summary and Exporting
Before you start, it is worth taking a look at the processing summary. There you can see all images, presets, destination folders, and file names at a glance. If everything is correct, click "Process". Capture One Pro then processes all selected images using the active presets.
Checking the Result in the File System
After the export, open the output folder on your hard drive. In the subfolder "klein" you will find the downsized versions of your images. A look at the file properties shows you whether the long edge measures 1500 pixels as desired. This also applies to landscape images, where the width reaches that value.

Using Multiple Presets at the Same Time
You can select multiple processing presets at the same time. This way, in a single pass you can create, for example, a JPEG version with 90 percent quality and a long edge of 1500 pixels as well as a second version. This saves you many individual exports and is especially handy when an image is needed for different channels.
Creating a Second Preset with Smaller Dimensions
For an even smaller variant, you create another preset, again in JPEG format, this time with a long edge of 500 pixels. Also define an output folder with a subfolder for it and name the file clearly, for example with the suffix "klein". Then you select both presets and click "Process" again.
Comparing the Results
Both variants are now created in the output folder. Since both files have the same name, Capture One Pro automatically adds a sequential number so that nothing is overwritten. This way you keep an overview, even if you process many presets at the same time.

Considering Other Formats and Output Paths
The same principle works with PNG, Photoshop, or TIFF in different dimensions. You can have all variants output at the same time, either into a shared folder or into different destination folders. For recurring tasks, it is best to create ready-made presets, so you save a lot of time on your next project.
Summary – Exporting from Capture One Pro: Setting Up JPEG Presets and Scaling Images
You have learned how to select images in Capture One Pro, create your own processing preset, and define format, quality, color profile, and scaling there. You also know how to define output folders and file names and how to process multiple presets in one pass. With saved presets, every future export becomes a single click.
FAQ
Which JPEG quality should I choose?For most use cases, values between 80 and 90 percent are a good compromise between image quality and file size. At 100 percent the file becomes very large, and below 80 percent artifacts may become visible.
What does the long edge mean when scaling?The long edge is the longer side of the image, regardless of whether it is in landscape or portrait orientation. If you specify 1500 pixels, the longer side is brought to this value and the shorter side is calculated accordingly.
Which color profile is suitable for sending images over the internet?For images that are sent by email or published online, sRGB is the safe choice, as it is displayed correctly by most screens and browsers.
Can I export multiple presets at the same time?Yes, you can select multiple processing presets. Capture One Pro then creates a separate version of the selected images for each preset.
What happens if two files receive the same name?Capture One Pro automatically adds a sequential number so that no file is overwritten.
How can I save my settings for future exports?Create your own processing preset using the plus icon, name it, and adjust the settings. The preset is then available to you for all future exports.


