
An image management program is only as good as the photos that end up in it. That is exactly why it is worth setting up the import properly from the start. If you click without thinking, you quickly find yourself with duplicate files, moved folders, or images that are suddenly marked as offline.
The video is only loaded from YouTube when you play it – data (including your IP address) is then transmitted to YouTube/Google. More in the privacy policy
In this tutorial, you will walk through the complete import process in Capture One Pro: from creating a new catalog, through the important settings in the import dialog, to handling external storage media. You will also learn how to manage files safely later on.
Key Takeaways
- A new catalog is created with its own name and storage location. It stores references, ratings, and metadata.
- With the "Current Location" option, the images stay where they are, and no copies are created.
- "Exclude Duplicates" prevents photos that have already been imported from ending up in the catalog a second time.
- You should rename, move, or delete files within Capture One so that no references point to nothing.
- With "Synchronize," the program detects changes you have made outside of it.
Step-by-Step Guide
Create a New Catalog
A catalog is the database in which Capture One Pro stores all information about your images. You create it via the plus icon or via "File" and "New Catalog." Assign a meaningful name, such as Test Catalog. Then you choose the storage location, for example a folder in the Catalogs area. Clicking "OK" creates the catalog and displays it in the overview on the left.

Open the Import Dialog
You can reach the dialog via the large "Import Images" button, the icon in the top bar, or via "File" and "Import Images." The dialog is organized from top to bottom, and it is worth going through it section by section. Enlarge the window if necessary so that the preview and settings remain clearly arranged.

Define the Source
In the upper area, you select the source, that is, the location from which you want to import. Click "Choose Folder" and navigate to the desired directory. In the example, the folder RAW is located on a hard drive in the Images area. Capture One immediately shows you a preview of the files it contains.

Include Subfolders
Many photographers sort their shots by theme, for example into a People folder with subfolders for portraits, or into a Plants folder. To ensure that all images in the structure are captured and not just those located directly in the main folder, you activate the "Include Subfolders" option.
Exclude Duplicates
This option is particularly useful with memory cards. Suppose you have already imported some of the images but did not empty the card and then took more shots. With the option activated, only the new files are imported, and the known ones are left out.
Determine the Storage Location
Under "Import To," you specify where the files go. With "Current Location," the images stay in their place on the hard drive, and no duplicate files are created. The "In Catalog" option copies the images into the catalog folder, which can quickly become confusing with very large collections. Personally, I prefer to work with "Current Location." Alternatively, you can specify any target folder via "Choose Folder."
Check Storage Space and Backup
The dialog shows you how much space is still free on the target drive. In the example, it is only 7 GB, so it is important to take a look at it. Under "Backup," you can also specify that a backup copy is automatically created in a chosen folder during import. This is a safety net in case something goes wrong during import.
Set Naming and Metadata
File naming can be adjusted with "In Catalog" or with a target folder. With "Current Location," this is not possible, since the files keep their place. In the Metadata section, you can, for example, enter the copyright with your name or add a description that applies to all imported images. Under "File Info," you can see the file name, capture date, camera, size, and resolution for a selected image.
Select single or multiple images
Clicking an image selects it, and you can then import only that one. While holding the Ctrl key (Command on a Mac), you can add individual additional images. While holding the Shift key, you select a contiguous range from the first to the last image. Clicking an empty area between the thumbnails cancels the selection, so that "Import All" appears again at the bottom.
Assign styles and start the import
In the "Styles" section, you can assign a preset directly during import. If you don't want to do that, leave the selection set to "None". Then click "Import All". The process goes quite quickly. Afterwards, the left side under "All Images" shows the number of imports, 69 in the example, and on the right in the browser you can scroll through all the photos.

Show folder hierarchy
By default, Capture One hides folders that you have not imported. If you want to see the complete structure of your hard drive, right-click in the folder area and select "Show Folder Hierarchy". With "Hide Folder Hierarchy" you return to the slim view with the imported folders.

Distinguish between physical and virtual folders
Folders directly under your hard drive are physical, meaning they exist as real directories on the storage medium. The areas above them, such as Albums or Smart Albums, are virtual and exist only in the catalog. A Smart Album can fill itself automatically: for example, you specify that only images with at least three stars are displayed. This way you get selections without moving a single file.
Add more sources
You can import additional folders at any time, whether from the same hard drive, an external drive, or a USB stick. To do this, choose a new source via the icon, confirm the subfolders, and click "Import All". The new images appear under "Recent Imports" with date and time. In the example, two images were added, so the catalog then contains 71 images.

Use offline media and preview images
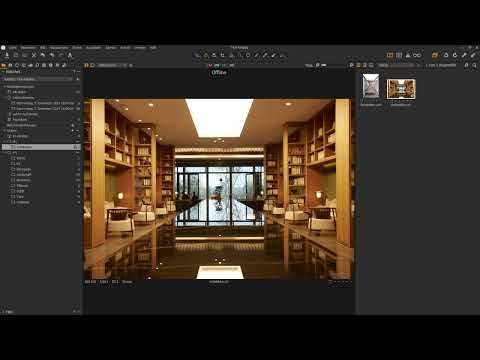
If you disconnect a USB stick or an external hard drive, Capture One reports the status "offline". However, the preview images are retained, provided they were created during import. You set their size under "Edit", "Preferences" in the "Image" section under Cache; in the example it is 2560 pixels. With the previews, you can still review, rate, color-tag, and adjust metadata. However, changes to the original files are only applied once the medium is reconnected.

Recognize the status of storage media
A small line in front of a folder in the folder area shows you its status. Green means the files are available. Red with a warning triangle signals that Capture One currently cannot access the files. This way you can see at a glance whether an archive drive is connected.

Archive images sensibly
When you import images from a memory stick or a card, I recommend setting a folder on your hard drive as the destination. That way your collection remains usable even without the stick. You can likewise move finished edited photos to an archive hard drive. If it is disconnected, the previews continue to work. As soon as the drive is connected again, the status changes from red to green.

Rename files in Capture One
If you rename an image within Capture One, the program also changes the file name on the hard drive. If you rename outside of it, on the other hand, you create a gap: Capture One looks for the old file, doesn't find it, and shows the image as offline. Therefore, you should get into the habit of always doing renaming within the program.

Use "Synchronize" to reconcile the folder
If an image has been renamed externally or a new file is in the folder, a right-click on the folder and the "Synchronize" option will help. Capture One re-reads the contents, finds the renamed image again, and can remove missing entries from the catalog. New images that you copied directly into the folder are also detected.
Removing images from the catalog
If you select an image and press the Delete key, it initially disappears only from the folder in the catalog. The file then ends up in the catalog's trash. If you remove the image again, Capture One asks whether it should be deleted only from the catalog or from the hard drive as well. Only with "Delete from hard drive" is the file permanently gone. Therefore, always delete files within the program to avoid inconsistencies.
Merging catalogs and sessions
If you have already worked with several catalogs or sessions, you can merge them into one catalog. To do this, select "File" and then "Import Catalog" or "Import Session". Catalogs from Capture One Media Pro or Lightroom can also be imported this way.

Summary ??? Importing images correctly in Capture One Pro
You have seen that a clean import involves more than clicking "Import All". A dedicated catalog, the right source, the "Exclude duplicates" option, and the choice of storage location lay the foundation. After that, you take care of metadata, backups, and the management of external media. If you consistently rename, move, and delete files within Capture One, your library stays reliable and free of images reported as offline.
FAQ
Do I have to create a new catalog for every import?No. A catalog can hold any number of images from different sources. A new catalog is mainly recommended if you want to keep projects or collections strictly separate.
What happens if I import images with "Current Location"?The images stay in their original storage location on the hard drive, so they are not copied or moved. Capture One manages them via references in the catalog.
Can I remove a USB stick after the import?Yes, if you have previously imported the images into a folder on your hard drive. Otherwise, the files remain visible but cannot be edited until the medium is connected again. Thumbnails still allow you to review them.
Why is an image displayed as offline?Usually the file was renamed or moved outside of Capture One, or the storage medium is not connected. Right-clicking the folder and selecting "Synchronize" can often restore the connection.


