
A photo looks flat even though the exposure and subject are actually fine? Then it's worth taking a close look at the tone curve in Color Efex Pro 4 from the Nik Collection. If you have already worked with Photoshop, Lightroom or Affinity Photo, you probably already know the basic principle. However, the possibilities of this tool go further than you might think at first glance.
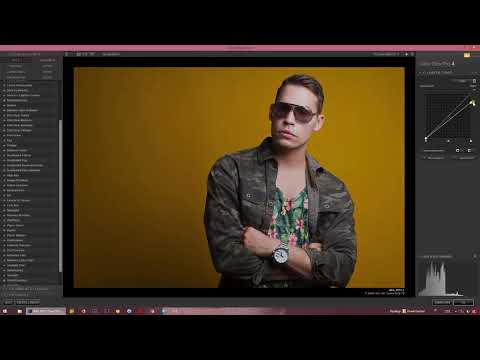
The video is only loaded from YouTube when you play it – data (including your IP address) is then transmitted to YouTube/Google. More in the privacy policy
You won't find the tone curve under an entry called "Tone Curve" or "Curves", but in the Levels and Curves area. This is exactly where this guide starts. You will learn how to build image contrast with an S-curve, adjust midtones, set the black and white points in a controlled way, and shift individual color channels in a targeted manner. In the end, you will know how to reduce the strength of the effect and save it as a favorite for later use.
Key Takeaways
Key Takeaways
- The tone curve is located in the Levels and Curves area and not under an entry named "Curves".
- An S-curve increases contrast: the highlights become brighter, the shadows darker.
- Double-clicking a curve point removes it again.
- If you clip the black or white point, color information is lost. If you instead set the point outward or inward, detail is preserved.
- In Luminance mode you only change the brightness; in RGB mode the colors change as well.
- Using the individual color channels, you can specifically create or remove color casts.
- The opacity of the effect can be reduced afterwards without editing the curve again.
Step-by-Step Guide
Step 1: Open the Tone Curve
In the filter area of Color Efex Pro 4, open the Levels and Curves entry. As soon as you click it, the tone curve appears as a diagonal line in a diagram. This line shows the brightness distribution of your image from black at the bottom left to white at the top right. Every change to this line has a direct effect on the image.

Step 2: Create an S-Curve for More Contrast
To give the image more contrast, you create an S-curve. To do this, drag a point in the upper area of the line upward and a point in the lower area downward. This makes the bright areas of the image brighter and the dark areas darker. Make sure to apply the change in moderation, because an S-curve that is too steep quickly makes details disappear.

Step 3: Remove Curve Points and Adjust Midtones
Double-clicking a curve point deletes it. You need this procedure when you want to get rid of a point you don't like. Afterwards, you can control the midtones in a targeted way. To do this, select a point in the middle of the curve and drag it down to darken the midtones slightly, or up to brighten them. Another double-click resets the adjustment if you are not happy with the result.

Step 4: Clip the Shadows
With the lower end of the curve you determine the shadows. If you set the black point so that it lies directly on the baseline, everything darker becomes pure black. The histogram shows you that the shadow areas are being cut off. The downside is obvious: in these areas, color information is irretrievably lost. Turn the clipping warning on or off to make the affected areas visible.

Step 5: Set the Black Point Outward
If you don't want pure black in the image, deliberately pull the black point slightly outward, that is, beyond the area where the curve actually begins. The program then assumes that black lies further down, and the image no longer contains a completely black pixel. As a result, the shadows retain their detail, which is especially useful for shots with fine structures in dark areas.

Step 6: Clip or Reset the White Point
At the upper end of the curve you control the highlights, and the same principle applies here as with the shadows. If you pull the white point to the top edge, bright areas become pure white and lose their detail. If you instead set it slightly inward, the highlights retain detail and you avoid blown-out areas. Here too, the clipping warning helps you find the right balance.

Step 7: Choose Luminance or RGB
With the selection at the top of the window, you determine what the curve affects. In Luminance mode, you change only the brightness of the image, while the colors remain unchanged. If you switch to RGB, the curve affects both the brightness and the colors. For a pure contrast correction, you should therefore usually choose Luminance to avoid unwanted color shifts.

Step 8: Edit Color Channels Selectively
If you work in the individual color channels red, green, or blue, you can influence color casts in a targeted way. If you pull the curve down in the red channel, you remove red from the image, and a green cast results. If you pull it up, you add red. In the green channel, removing green leads to a magenta cast, while adding green leads to a green cast. In the blue channel, removing blue creates a yellow cast, while adding blue creates a blue cast. Work your way slowly toward the desired color mood and check the result regularly against the overall image.

Step 9: Create an S-Curve in the Blue Channel
The techniques from the previous steps can also be combined. For example, you can create an S-curve in the blue channel and thus emphasize the blue tones differently in the highlights and shadows. Especially in landscape shots with cool shadows and warm highlights, this produces appealing color effects. Try out different combinations until the mood of the image matches your vision.

Step 10: Adjust the Opacity of the Effect
If you basically like the effect of the curve but it turns out too strong overall, you don't have to set it up again. The opacity of the effect can be changed directly in the filter. If you reduce the opacity, the effect weakens without the black and white points being lost. This way you can keep the style and still adapt the intensity to your image.

Step 11: Save the Setting as a Favorite
If you have found a combination that you want to use more often, it is worth taking the step of saving it as a favorite. You can add the Levels and Curves option as a favorite in the selection on the left. This way you will find the tool faster in future projects and won't have to search through the filter list every time.

Summary – Mastering the Tone Curve in Color Efex Pro 4: Controlling Brightness and Colors Precisely
The tone curve in Color Efex Pro 4 is a versatile tool with which you control contrast, shadows, highlights, and colors precisely. With an S-curve you give the image depth, and with the endpoints you decide whether you lose or preserve information. Switching between Luminance and RGB as well as working in individual color channels allow you to make fine adjustments to brightness and color mood. Don't forget to use the opacity and to save the setting as a favorite so that you reach your goal faster with the next image.
FAQ
Where do I find the tone curve in Color Efex Pro 4?You can find it in the Levels and Curves section, not under an entry named "Gradationskurve" or "Curves".
How do I increase the contrast with the tone curve?Create an S-curve by pulling the upper part of the line up and the lower part down.
How do I remove a point on the curve?Double-clicking on the point deletes it.
What happens if I clip the black point?All very dark areas become pure black and lose color information in the process.
How do I avoid pure black in the image?Deliberately move the black point outward so that the program only assumes black further down.
What is the difference between Luminance and RGB?In Luminance mode, only the brightness changes; in RGB mode, the colors change as well.
How do I create a green cast?Pull the curve down in the red channel to remove red, which creates a green cast.
Can I change the strength of the effect afterwards?Yes, you reduce the effect via the opacity of the effect without having to readjust the curve.
How do I find Levels and Curves again more quickly?Add the tool as a favorite, and it will be available more quickly in the selection on the left.


