
At first glance, a vignette seems inconspicuous, but it reliably draws your viewer's eye exactly where you want it. In Color Efex Pro 4 from the Nik Collection, you'll find extensive settings for this. You can remove existing vignettes, create your own dark or colored vignettes, and freely set the center point. This tutorial guides you step by step through all the important options.
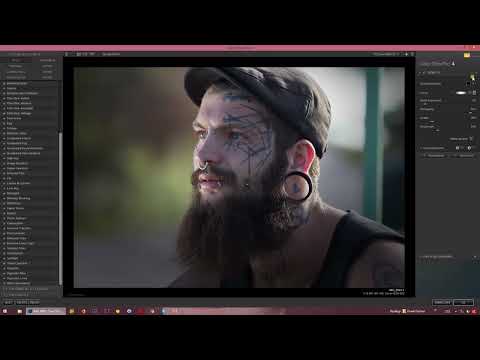
The video is only loaded from YouTube when you play it – data (including your IP address) is then transmitted to YouTube/Google. More in the privacy policy
Key Takeaways
- The vignette offers adjustment options for edge, transition, size, opacity, and shape.
- A soft, round vignette with a small size looks natural in most images.
- The center point can be set freely and is a powerful tool for guiding the viewer's eye.
- Colored vignettes require a delicate touch so the image doesn't look too colorful.
- Black vignettes are generally the safer choice.
Step 1: Finding the Vignette Option
Open your image in Color Efex Pro 4. At the bottom of the filter selection, you'll find the category for vignettes. Select the Vignette entry there to open the settings. From this moment on, you can watch every change directly in the preview image, which makes your work much easier.

Step 2: Adjusting Edge and Transition
The edge settings determine how far the darkening reaches inward. If you drag the slider further, the darkening moves deeper into the image. Below that, you control the hardness of the transition. With very soft values, the darkening is barely noticeable, while high values create a sharp edge. For most subjects, I recommend a soft transition, since hard edges quickly look artificial.


Step 3: Setting the Size
With the size slider, you determine the bright area in the center of the image. The larger the value, the larger the unaffected area and the smaller the area that gets darkened. If your image looks too heavily darkened, reduce the bright area and make the transitions softer at the same time. This keeps the effect subtle.

Step 4: Adjusting the Opacity
With opacity, you determine how strongly visible the vignette is overall. You can increase the value up to 200 percent if you need a significantly darker effect. However, you should proceed carefully, especially with high values. Too much opacity quickly pushes away the details at the edges of the image. Usually a moderate value is enough, one that directs attention without overpowering the subject.

Step 5: Choosing the Right Shape
Color Efex Pro 4 offers different shapes for your vignette. Besides the round variant, more angular shapes are available, in which the darkening looks more rectangular. You can also simply darken the edges without creating a classic circle. Try out the options on your image and pay attention to which shape suits the composition. Angular shapes are suitable for architectural subjects, for example, while round shapes usually look more harmonious in portraits.

Step 6: Creating a Soft, Round Vignette
For most photos, a round vignette with a soft transition and a relatively small size is the best solution. It gently guides the eye to the center without the effect being immediately noticeable. So combine a soft transition with a moderate size and then adjust the opacity. This way, you get a subtle effect that looks pleasantly natural, especially in portraits and landscapes.

Step 7: Setting the Center Point
A special advantage of Color Efex Pro 4 is the ability to set the center point of the vignette separately. Simply click on the desired spot in the image, and the bright area of the vignette moves there. If you want to emphasize a person's eye, for example, you set the center point exactly on it. In the example shown, the center point is a bit higher up, which enables targeted guidance of the viewer's eye. This option gives you a creative possibility that is missing in many other vignette tools.

Step 8: Changing the Vignette Color
Besides black vignettes, you can also create colored ones. To do this, click the small button next to the color option. Then choose a color, adjust the saturation, and confirm with OK. The result shows you a colored vignette that gives your image a special look. Pay attention to the saturation: even a slightly too high setting can make your subject look unnaturally colorful. Therefore, use colors sparingly and take your cue from the tones that already appear in the image.

Step 9: Choosing a White or Black Vignette
White vignettes are not the right choice in every case. They can be helpful if you want to compensate for strong lens distortion in your image caused by the lens or camera, since they provide a counterbalance to the distortions. In most other cases, however, I recommend a black vignette. Depending on your image idea, though, a colored variant can also be suitable. It's best to look at your image several times in different variants and decide based on the result.

Step 10: Hiding the Vignette in Individual Areas
Finally, you can hide the vignette in various places or show it only in certain areas. This is done using so-called control points, which have their own function in Color Efex Pro 4. A separate video on the Nik Collection explains these tools in more detail, so you can find further details there.

Summary – Using the Vignette in Color Efex Pro 4 Purposefully
The vignette in Color Efex Pro 4 offers you many options for controlling the image's impact. You adjust the edge, transition, size, and opacity and choose a suitable shape. With the freely placeable center point, you direct the viewer's gaze specifically to important areas of the image. You use colored or white vignettes deliberately, while black vignettes are the most reliable option for most subjects. Take your time trying out the settings and compare different variants until the result suits your image.
FAQ
Can I remove an existing vignette in Color Efex Pro 4?Yes, you can remove existing vignettes by adjusting the corresponding settings or hiding the effect.
How do I get a particularly soft transition?Drag the slider for the hardness of the transition toward soft. At low values, the darkening is gradual and looks more natural.
What is the center point of the vignette used for?With the center point, you determine where the bright area of the vignette is directed. This way, you can, for example, specifically highlight an eye.
How do I set a colored vignette?Click the small button next to the color option, choose a color, adjust the saturation, and confirm with OK.
When should I use a white vignette?White vignettes are mainly suitable when you want to compensate for strong lens distortion in your image. For most other subjects, a black vignette is better suited.
Why should I set the saturation carefully for colored vignettes?Too high a saturation can make the subject look unnaturally colorful. Therefore, take your cue from the colors already present in the image.

