
If you have ever worked with the Transpose tool in ZBrush, you know how tedious it is to move, rotate, or scale a mesh precisely. Since ZBrush 4R8, the Gizmo 3D has given you a much more convenient transformation tool. It combines moving, scaling, and rotating in a single control element and also lets you create duplicates. In this tutorial, I will guide you through the most important functions, from the first steps to cutting with DynaMesh.
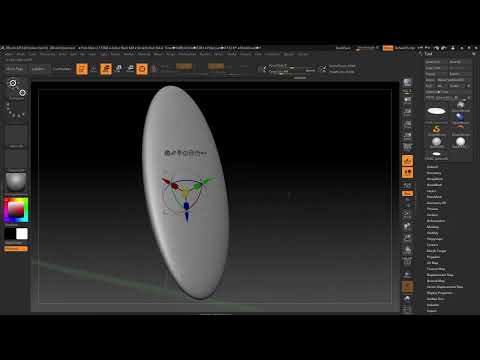
The video is only loaded from YouTube when you play it – data (including your IP address) is then transmitted to YouTube/Google. More in the privacy policy
Key Takeaways
- The Gizmo 3D replaces the old Transpose tool as a modern transformation aid and can be activated via icons or the W or Y key.
- With the W key, you directly access the rotation tool without having to switch in the toolbar.
- By holding the Shift key, you rotate in clean 90° steps.
- Combining the Ctrl key and dragging on the Gizmo creates duplicates, and by holding the mouse button you can even create several at once.
- Masks let you restrict the Gizmo to a specific area of the mesh, and with Ctrl and Alt you invert a mask in a single step.
- In combination with DynaMesh, you can subtract areas using the Ctrl and Alt keys and thus quickly make clean cuts.
Preparation: Creating a sphere and preparing the mesh
Start with any sphere from the Tool palette. The shape itself doesn't matter for practicing. Then switch to Edit mode so that you can edit the mesh. It is easiest if you briefly deactivate PolyMesh3D, since this way you work with a clear foundation.


Activating the Gizmo 3D
As soon as you click one of the transformation icons (Move, Scale, or Rotate), the Gizmo 3D appears directly on the mesh. Previously, you only selected the editing modes there; now you get a kind of control element with axes and handles. Many users compare it to the transformation aid from other 3D programs, and this expectation is met well.
Making spatial orientation easier
To orient yourself better in space, it is advisable to show the floor. Afterwards, the view looks much more three-dimensional, and you immediately see how the X, Y, and Z axes run. With the Z axis you move the mesh forward or backward, with the Y axis up and down, and with the X axis sideways.


Showing and hiding the Gizmo
If you have accidentally activated the Gizmo even though you don't need it, simply press the Y key. This takes you back to the old Transpose tool, which has been visually revised but works the same as before. The icon is then no longer highlighted in orange. If you press Y again or click the icon, the Gizmo reappears.

Moving and scaling
In Move mode, you move the mesh along the axes. If you want to scale uniformly in all directions, use the yellow square in the center of the Gizmo. To scale in only one direction, drag the corresponding cube on the respective axis. This way you keep control over the proportions.


Rotating with the W key
You don't have to constantly switch between tools. In my experience, the W key puts the Gizmo directly into rotation mode while you are modeling. You recognize rotation by the bands or circles that lie around the mesh. You can rotate along the colored rings.


Undoing the rotation and centering the mesh
If you don't want a rotation, you'll find a round arrow on the Gizmo. With it, you rotate the object back to its original orientation. If the mesh has been moved too far by the movement, the house-shaped icon brings you back to the axis. This way you keep track of things, even when you experiment a lot.


Rotating the view or rotating the mesh: understanding the difference
Here is an important peculiarity. The white elements of the Gizmo only change the view, not the actual mesh. This is handy for looking at the model from a different angle. However, be aware that rotations via the white center or the corner points can appear greatly displaced. For a clean rotation of the mesh, you should use the colored bands. If you really want to rotate the mesh, stick with the colored rings.


Adjusting Gizmo settings in the Preferences
The Gizmo 3D can be customized to your liking in the Preferences under Gizmo 3D. There you'll find various options with which you can change its appearance and behavior. You can, for example, adjust the size of the Gizmo. I would leave the Info settings unchanged at the beginning, since the basic functions already offer many hints. In the Deformer section, you can also change the length of the modifiers. With Reset, you set everything back to the default.


Precise rotations with the Shift key
When rotating, the Gizmo shows you numbers, for example 32 or 33 degrees. If you need a clean alignment, hold down the Shift key. The rotation then snaps in fixed steps, and you can rotate exactly 90 degrees. This saves a lot of time when you want to align an object straight.


Working with masks
The Gizmo can also be combined with masks. Previously, you had to laboriously invert masks by holding down the Ctrl key, masking the area, and then clicking again. Since version 8, you do this in one step: press Ctrl and Alt at the same time, and the mask is inverted. As a result, one side of the mesh is masked and the other is free. This shortcut saves a lot of time, especially in long workflows.

With the Gizmo, you then edit only the unmasked side. The result in this example is admittedly not optimal, but it shows the possibilities of the Gizmo in combination with masks very well.

Creating duplicates
With the Gizmo, you can create copies of your mesh. Hold down the Ctrl key and drag the arrow, and a duplicate is created. This works similarly to the Transpose tool, but is much more convenient. It gets even more practical when you want to create several copies at once. To do this, hold down Ctrl, drag the Gizmo, and keep the mouse button (or the pen) pressed. Then release the Ctrl key. You can create as many duplicates as you like. If the screen is too small, simply drag up or down in between until the spacing fits.

For larger arrangements, an Array Mesh is often better suited. For a few quick copies, however, the Gizmo method is perfectly sufficient.

Making Cuts with DynaMesh
Finally, I'll show you how the Gizmo works together with DynaMesh. To do this, convert your mesh into a DynaMesh via the Geometry palette. It's not much effort. With Ctrl you can create duplicates again. With Ctrl and Alt, however, you subtract areas, and this works only in DynaMesh mode.


The subtraction can be adjusted afterwards. If you edit the DynaMesh again and drag with Ctrl once more, you will see the change. In this way, you can make a clean cut relatively quickly with the Gizmo and DynaMesh. Of course, you can polish the result afterwards, but the basic shape is already in place.


Summary – Gizmo 3D in ZBrush 4R8: Step-by-Step Operation
The Gizmo 3D is a noticeable improvement over the Transpose tool. You activate it via icons or the Y and W keys, move, scale and rotate meshes with just a few clicks, and thanks to view and mesh rotation you stay in control. With the Shift key you achieve exact 90° steps, and masks can be inverted in a single step with Ctrl and Alt. You create duplicates with Ctrl, and in combination with DynaMesh, areas can be subtracted with Ctrl and Alt. Practice the steps on a simple sphere before working with more complex models, and you will quickly find your way around.
FAQ
How do I activate the Gizmo 3D?You activate it via one of the transformation icons (Move, Scale or Rotate). Alternatively, you can use the W key for rotation or the Y key to switch between the Gizmo and the old Transpose tool.
How do I deactivate the Gizmo again?Press the Y key. This takes you back to the classic Transpose tool.
How do I rotate the mesh in exact 90° steps?Hold down the Shift key while rotating. The rotation will then snap in fixed steps.
What is the difference between the white and the colored rotation?The white elements only change the view, not the actual mesh. For a clean rotation of the mesh, you should use the colored bands.
How do I create several duplicates at once?Hold down Ctrl, drag the Gizmo and keep the mouse button pressed. Then release the Ctrl key, and you get as many copies as you like.
How do I invert a mask in one step?Press Ctrl and Alt at the same time. Since version 8, this is possible in one step.
Can I also subtract areas with the Gizmo?Yes, but only in DynaMesh mode. With Ctrl and Alt you subtract areas, which can then still be edited afterwards.


