
If you have ever modeled straps, hoses or fabric strips by hand in ZBrush, you know the effort of placing every curve cleanly. With the new features in the Curve Brush, a lot of that work is taken off your hands. In this tutorial you will get to know the two new modes Elastic and Liquid, learn how to shape bands with the Curve Strap Snap, and see how to rotate curves after the fact.
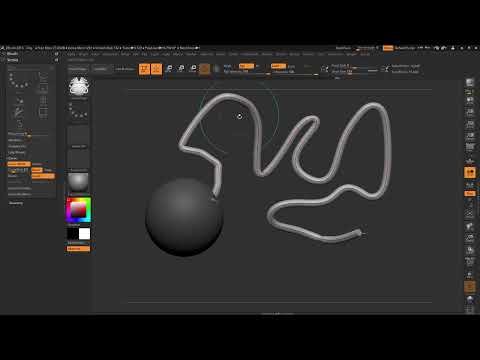
The video is only loaded from YouTube when you play it – data (including your IP address) is then transmitted to YouTube/Google. More in the privacy policy
Key Takeaways
- The Curve Brush still works with Draw Size, curve editing and the 6 key for smoothing, but handling has become more flexible.
- The Elastic mode behaves like a rubber band: you pull out the end or a point in the middle of the curve while the start stays fixed.
- Liquid deforms the curve softly and adds extra geometry in the process, instead of just stretching it.
- With the Curve Strap Snap you create flat, rectangular bands, and with the Control key you rotate the curve around its own axis.
Setting Up the Starting Point
Before you get started, you need a base. To do this, create a sphere and make it editable by converting it into a PolyMesh3D. On this surface, the Curve Brush draws its curves directly onto the surface. Next, select the Curve Tube from the brush palette and draw a first curve on the sphere. This basic step is not new, but serves as a reference for everything that follows.

Controlling Size and Fineness
You determine the width of the curve as usual using the Draw Size slider. At the end of the curve, you can smooth the entire line with the 6 key. This is handy when the curve looks uneven. To do this, hold the key down and move over the curve until the shape is more uniform. The size can also be expanded afterwards if needed.

Editing Curves Afterwards
If you click on the red-black line of the curve, you can modify it. With the blue cursor you move points, while the red cursor grabs the curve differently at that spot. This way you edit two levels at the same time. If you hold the spacebar, you see a larger area that changes evenly. Here too, you can smooth again with the 6 key until the line runs cleanly.

Setting the Stroke Mode to Band
You reach the actual new features via the Stroke menu. Open it, select the Curve option and set the mode to Band. This setting is the default so that the curve can be moved at all. Only after that are Elastic and Liquid available to you.

Elastic: Pulling the Curve Like a Rubber Band
The Elastic mode works like an elastic band or adhesive tape. When you activate it, the Lock Start and Lock End points are displayed in gray. This means you can no longer select them directly. Instead, you grab the end of the curve and pull it out. The rubber effect remains visible: the curve follows your pull in a straight, slightly angular shape, like a taut band.
You can pull the band up or down, depending on which direction you want to guide it. This is especially helpful when you want to work a tube into an existing model.

Elastic is not limited to the start of the curve. You can also start in the middle of the curve and pull there. The curve then reacts at that spot without the rest shifting. This opens up possibilities for shapes that do not begin at one end.

Liquid: Liquefying the Curve
Liquid is basically the opposite of Elastic. Here the start and end of the curve largely stay in their position. The rest of the curve, however, you deform as if you were moving liquid material. You can pull within the model and liquefy the line into the desired shape. Be careful not to twist too much, because the curve reacts sensitively. If you have gone too far, simply go back a step and adjust the strength.

One advantage of Liquid becomes apparent as soon as you pull the curve out further: the curve gets new geometry. So the geometry is not simply stretched, but additional polygons are created. In my tests, the polygon count rose from about 15,000 to almost 16,000. You should keep this in mind if your model is already heavy.

Smoothing locally
The 6 key smooths the entire curve. If you only want to soften a specific area, you can do that locally. To do so, hold down the Shift key and run the brush over the areas you want to smooth. The effect is limited to the areas under your cursor. The geometry is not compressed, but smoothed evenly, provided there are enough polygons. If you repeat the process, the curve becomes even smoother at that spot.
Shaping straps with the Curve Strap Snap
For fabrics, belts, or straps, you often need a flat, rectangular shape instead of a round tube. To do this, activate the Curve Strap Snap. The strap becomes flat and gets a rectangular profile. Increase the thickness until the strap has the desired strength. Make sure you adjust the size of the blue cursor, otherwise the rotation will look uneven. If you want to reduce the size again later, this is just as easy using the slider.

Rotating curves with the Control key
One of the most useful new features is the rotation of the curve. Click on the curve and hold down the Control key. Now you can rotate the curve around its longitudinal axis. This is ideal for garments where straps should not hang straight down, but fall twisted. The rotation also looks natural when you continue editing the strap later.


Splitting curves and reusing them
With the Split on Mask Point option, you can split a strap at a mask point. This creates two parts that you can continue working on independently. For example, you can add a second, smaller curve on the sphere and also give it a mask point. The resulting masks can then be used to play around with Booleans.

The curve remains in place until you delete it. When you no longer need it, you remove it using the Curve Function.

Combining two straps
A practical approach is to create two straps with the same curve and then combine them. If you work with Dynamic Subdivision, the straps get a smooth surface. This makes the twist look especially nice. For garments, this is a very useful technique.

With Booleans, the straps can also be subtracted from one another. To do this, move the parts downward until you get the desired cutout. This creates openings or slits that can be used well in clothing design.


Summary ??? ZBrush Curve Brush: Elastic, Liquid, and Twist in a Practical Overview
The Curve Brush in ZBrush 2018 and 4R8 offers significantly more control than before with Elastic, Liquid, and rotation via the Control key. Elastic is suited for straight, taut shapes, Liquid for soft deformations with additional geometry. With the Curve Strap Snap you create flat straps, and with Split on Mask Point as well as Booleans you can combine the results further. It is best to try out the modes on a simple sphere before using them in more complex models.
FAQ
What is the difference between Elastic and Liquid?Elastic pulls the curve like a rubber band, creating straight lines, while Liquid deforms the curve smoothly and adds new geometry in the process.
How can I tell that Elastic mode is active?The Lock Start and Lock End points are displayed in gray and can no longer be selected directly.
Can I also deform a curve in the middle of its course?Yes, with Elastic you can start at any point within the curve and pull there.
How do I make a strap flat instead of round?Activate the Curve Strap Snap and then adjust the thickness of the strap.
Which key do I use to rotate the curve?Hold down the Control key, click on the curve, and rotate it around its longitudinal axis.
How do I smooth only part of the curve?Hold the Shift key and run the brush over the areas that should become smoother.
How do I delete a curve I no longer need?Remove it using the Curve Function.


