
Imagine modeling a character and never having to worry about the polygon count of your mesh again. That's exactly what Sculptris Pro makes possible. The feature comes from Pixologic's free program Sculptris and has also been available in the full version since ZBrush 2018 with update 4R8. Sculptris Pro automatically increases the resolution where you are currently working and reduces it in areas you are not editing. In this tutorial, you'll learn the basics: from activating the mode and controlling the resolution with the brush size to the most important settings in the Stroke menu.
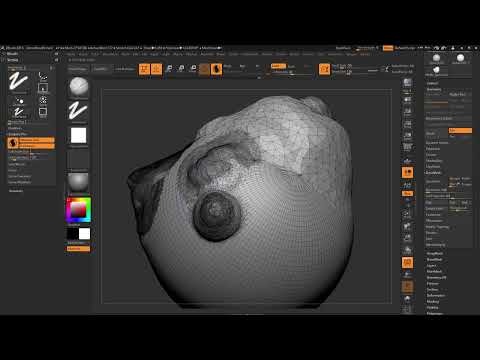
The video is only loaded from YouTube when you play it – data (including your IP address) is then transmitted to YouTube/Google. More in the privacy policy
Key Takeaways
- Sculptris Pro adjusts the resolution dynamically. You don't have to set Subdivision Levels or DynaMesh resolutions manually.
- The brush size determines where and how strongly the mesh is refined. Small brushes create fine details, while large brushes reduce the resolution within their area of effect.
- With the Shift key, you smooth the surface while the resolution continues to be adjusted.
- Brush sizes can be saved, which significantly speeds up switching between coarse and fine modeling.
- Sculptris Pro is only of limited suitability for pipeline workflows with UV mapping or high polygon counts.
Step-by-Step Guide
Step 1: Prepare the Starting Object and Show Polyframes
Start with a sphere and convert it into an editable Polymesh. Then activate Polyframes so you can see the individual polygons. You can turn off the color display if the colors bother you, or show only the Polygroups by deactivating the lines. This way you can immediately see how coarse your mesh still is.

Step 2: Recognize the Problem with the Standard Brush
When you work over the coarse mesh with the standard brush, fine details quickly go missing. The mesh has too few polygons to represent depressions or small structures cleanly. This is exactly where the various solutions you should know about come in.

Step 3: Increasing Subdivisions as the First Option
A classic solution is to increase the Subdivision Levels. This creates a lot of detail, and you can still clearly see the rough forms. However, the subdivision is increased evenly everywhere, even where you don't need any details. The method works, but it is not very flexible for targeted work.

Step 4: Using DynaMesh as the Second Option
With DynaMesh, you create an evenly dense mesh that rebuilds itself freely as you model. This is practical for sketches, but it has a catch: the resolution is equally high everywhere, even though you only need it at a specific spot. If you lower the DynaMesh resolution again, fine details are lost.

Step 5: Working with Clay Buildup in DynaMesh
Now use the Clay Buildup brush to draw details into the DynaMesh. Note that with a large brush you quickly lose track of things if the resolution is too low. With a smaller brush you can add details, but here too fine structures disappear again with later changes. These limitations lead to the actual innovation: Sculptris Pro.

Step 6: Activate Sculptris Pro
Activate Sculptris Pro mode via the icon in the top bar. Then you can draw directly on your model. The resolution increases only in the area where you are working. The rest of the mesh remains coarse, which keeps the polygon count low and preserves performance.

Step 7: Controlling the Resolution via Brush Size
The brush size (Draw Size) is the most important lever. A brush with a size of about 100 creates a medium resolution in the center. If you go into finer areas with this brush, the mesh becomes finer. If you make the brush smaller, the polygons there become coarser. So you refine and coarsen at the same time, depending on how you set the brush tip.

Step 8: Smooth drawing with the Shift key
Hold down the Shift key to work in Smooth mode. The Draw Size takes over the values from your previous setting, and you can deform the surface smoothly. In addition, the mesh is refined, so that smooth surfaces are created. With Shift mode, you can therefore smooth and increase the resolution at the same time, without switching brushes.

Step 9: Saving brush size and switching between tools
A new feature that simplifies work considerably is saving the Draw Size for a brush. For example, select the Move Brush and set a large brush size. Save this setting via the corresponding icon. If you then switch back to Clay Buildup, it keeps its fine size. You handle large shape changes with the Move Brush and fine work with Clay Buildup. This saves a lot of time because you don't have to readjust the size and brush every time.

Step 10: Understanding dynamic brush size in the Stroke menu
In the Stroke menu, you will find the Dynamic option. It ensures that the brush size on the screen remains constant, no matter how close or far you are working with the model. If the option is turned off, the brush's effect changes significantly depending on the zoom level. This setting can also be saved. Dynamic is enabled by default, but you can adjust it depending on your way of working.

Step 11: Enabling and understanding Adaptive Size
In the Stroke menu, you will also find the Adaptive Size setting. It is enabled by default and ensures that ZBrush adjusts the resolution at the edge of the editing area in a targeted way. Without this option, unsightly edges often appear at the borders. However, you can remove these edges again with the Smooth tool.

Step 12: Using Combined and Divide Mode correctly
Combined Mode automatically refines and coarsens the mesh, depending on which brush size you are working with. If you increase the brush from 62 to 132, the mesh becomes coarser again. If you disable Divide Mode, the subdivision remains, and the mesh is only inflated. The combination is enabled by default, and you should keep it in most cases.

Step 13: Setting the factor for the resolution
With the factor, you determine how strongly the resolution responds to a certain brush size. A factor of 1 is the default. If you set the size to 100 and lower the factor to 0.5, the resolution doubles, since the values influence each other. For the Divide process, the default factor is 1.25. With this value, you control how finely the mesh is resolved again with larger brushes. The setting is especially important when you are working with different resolutions.

Step 14: Temporarily turning off Sculptris Pro
With large shape changes using a large brush, Sculptris Pro can change the resolution unintentionally. In this case, you briefly turn the mode off, carry out the rough editing, and then reactivate Sculptris Pro. You then continue working with the finer brush without losing all of your geometry.

Limitations and sensible areas of use
Sculptris Pro is particularly suitable for intuitive modeling, for example when designing characters starting from a sphere. You don't have to worry about topology, and the result can also be presented directly in Keyshot. However, in a pipeline with UV mapping or many polygons, the method quickly reaches its limits. The mesh is often messy, materials are difficult to transfer, and the polygon count grows to several million in a short time. In addition, Sculptris Pro only works with a base mesh without subdivision levels. For 3D printing, on the other hand, the method is practical: you reduce the object with the Decimation Master and then add details in a targeted way with Sculptris Pro.

Summary – ZBrush Sculptris Pro: Automatically Controlling Resolution – Basics
Sculptris Pro is a tool that lets you increase the resolution in ZBrush only where you need it. You control it via the brush size, the Shift mode, the saved brush settings, and the Dynamic, Adaptive Size, and Combined options in the Stroke menu. The mode is ideal for free, intuitive modeling, but less suitable for pipeline workflows with many polygons. In the next video, the author shows further uses of this mode.


