
Imagine you have a finished object in front of you and want to change its shape without editing every point individually. That's exactly what the deformers in ZBrush are for. They bend, stretch, cut or extend existing meshes, and up to a certain point the change remains fully reversible. In this tutorial, you will get to know the most important deformers of update 4.1 in ZBrush 2018 with 4R8. You will find out where to find them, how to align the Gizmo correctly and how to use symmetries for clean results.
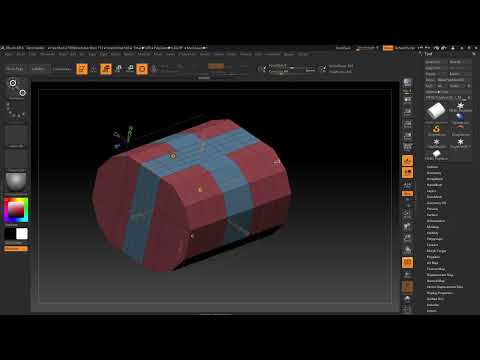
The video is only loaded from YouTube when you play it – data (including your IP address) is then transmitted to YouTube/Google. More in the privacy policy
Key Takeaways
- The deformers are hidden behind the small gear icon. They are sorted alphabetically, not by purpose.
- The orientation of the Gizmo determines the direction of the deformation. Always check it before you begin.
- The Extender creates new polyloops. The resolution can be adjusted per axis, and creasing can be switched on and off.
- With Reset and Full Reset you can experiment safely and return to the initial state at any time.
- The symmetry settings (0 none, 1 parallel, 2 mirror-symmetric) save a lot of work on symmetrical models.
- Bevel, Bend and Lattice extend the palette. It is best to use the Bevel deformer only at the end.
Step-by-Step Guide
Step 1: Choose a simple starting object
Don't start with a complex polymesh, but with a simple basic shape. A polycylinder is well suited because the effect of the deformers can be seen clearly on it. Pay attention to the resolution of the object. Too many polygons make the preview sluggish and make orientation more difficult.

Step 2: Find the deformer menu and understand the list
You will find the deformers behind the small gear icon. In the 2018 version, 27 entries are available to you, whereas in R8 there were only eight. The list is sorted alphabetically and not grouped by function. That's why similar tools such as Multi-Slice and Slice are far apart. Take a moment to go through the names. That way you will find the right tool faster later on.

Step 3: Start with the Extender
The Extender is a good starting point because it shows the basic principles of all deformers. Select it, and the object is displayed with its Gizmo and the setting options. If different values appear for you, don't let that confuse you. You can adjust the settings at any time.

Step 4: Rotate the Gizmo in the right direction
Before you make changes, you should align the Gizmo. The axes must match the orientation of your scene, otherwise the result will shift in an unexpected direction. With the Alt key, the Gizmo can also be dragged to the desired size. Rotate it so that it fits the shape, and check the preview before you continue.

Step 5: Use axes, symmetry and resolution
The colored cones in green, blue and red are used to control the axes. At the corner points you will also find settings for the symmetry and the resolution in the individual axes. The area you want to modify can be addressed specifically via the axes. If you pull a piece out, the Extender extends the object and creates a clean polyloop structure in the middle.

Step 6: Control resolution in the X direction and creasing
The resolution can be adjusted separately in each direction. So you can not only insert one polygon, but, for example, four right away. However, when pulling, a kink is created by default, so-called creasing. If you don't want it, you switch it off via the yellow cone with Apply Creasing. After that you get a uniform structure without edges.

Step 7: Adjust size, inflate and center
The size of the deformation can be changed via the Gizmo settings. With Inflate you can additionally inflate the pulled-out area. You can recognize the center of the deformer by the blue dot. It can be moved to steer the deformation in all directions. Make sure to hit the dot and not the cone. To do this, you often have to place the pointer slightly to the side.

Step 8: Using Reset and Full Reset
With Reset, you undo changes, but the settings are retained. If you want to reset everything, including the resolution and the creasing, use the gear icon and select Full Reset. After that, the deformer jumps back to its default values, for example to resolution 1. This way you can start from zero without having to create anything anew.

Step 9: Using the Multi-Slice
The Multi-Slice creates new cuts in your object. You determine how many cuts are created and where they are located. With the blue cone, you can move or extend the cuts in one direction. This way, cuts can also be placed beyond the edge. For a clear starting point, it is best to reset the deformer beforehand with Full Reset.

Step 10: Preparing Polygroups for the Bevel
For a more interesting shape, using Polygroups is worthwhile. This works particularly well with an object with few polygons. Select the Polygroup All option in the menu so that one part of the object can be pulled out in a targeted way and another part can be pushed in. After that, the shape that you apply later already looks significantly more lively.

Step 11: Setting Up the Bevel Deformer
With the Bevel deformer, you create bevels on the edges. You determine the width of the bevel and the number of subdivisions. You also specify how many polygons are affected. If you pull the object apart accordingly, only a bevel remains on the edges. The Bevel is especially suitable at the end of a workflow, since it can produce unattractive shapes if you continue working later. If needed, you can combine it with dynamic subdivision.

Step 12: Bending the Object with the Bend Deformer
The Bend deformer bends your object in the desired direction. You pull out the angle and specify which side it bends toward. Then you adjust the radius and can additionally twist the bend. The cones help you with rotating and moving. The results are often surprising, so it is advisable to simply try out different cones.

Step 13: Deforming Based on a Grid with the Lattice Deformer
The Lattice deformer is known in other programs as FFD or lattice deformation. A grid encloses your object, and you change the shape via the points on the grid. You set the resolution by pulling the grid in the corresponding direction with the orange arrow. This is very flexible, since the entire object can be controlled via a few control points.

Step 14: Understanding the Symmetry Values
With the red or blue cone, you set the symmetry. If the value is 0, there is no symmetry. At 1, a parallel symmetry is created, in which the deformation is repeated on the other side, but shifted in parallel. At 2, true mirror symmetry is created. For most symmetrical models, you need the value 2.

Step 15: Selecting Multiple Points at Once
You can also edit multiple points at the same time. To do this, hold down the Ctrl key and select the desired points. Then you move them either individually or together with the arrow. You can also rotate them. Since the changes are carried over to the other side via symmetry, you save a lot of time.

Step 16: Cleaning Up the Result with Remesh
If you need to be quick, you can rebuild a deformed object with Remesh. The command creates a new, even topology that you can continue working with. This method is practical if you want to keep editing the object anyway. Alternatively, you can keep all the settings and continue using the deformers.

Summary ??? Understanding ZBrush Deformers: Basics for Flexible, Non-Destructive Modeling
You now have an overview of the most important deformers in ZBrush 2018 with 4R8. You know where to find them, how to align the Gizmo correctly, and how to control the resolution and the creasing. You also know the functions of Multi-Slice, Bevel, Bend, and Lattice, as well as the meaning of the symmetry values. With Reset and Full Reset, you can go back at any time and experiment without risk. The video also gives a preview of Project Primitives. This deformer is considered particularly powerful and will be covered in the next part of the series.
FAQ
Where do I find the deformers in ZBrush 2018?They are hidden behind the small gear icon in the Deformer area and are sorted alphabetically there.
Why do I see different deformers than in the video?The number of deformers differs depending on the version. In ZBrush 2018 there are 27 entries, while in R8 there were only eight.
What does non-destructive mean for deformers?The changes remain reversible up to a certain point. You can go back with Reset or Full Reset without losing the original.
Why should I align the Gizmo before deforming?The direction of the Gizmo determines in which direction the object is deformed. Incorrect alignment leads to unexpected results.
What does creasing do with the Extender?By default, a kink is created when pulling. With Apply Creasing via the yellow cone, you turn it off to obtain a uniform structure.
When should I use the Bevel deformer?The Bevel is best used at the end of the workflow, as it can create unattractive shapes in later steps.
What symmetry values are there?The value 0 means no symmetry, 1 means parallel symmetry, and 2 means mirror symmetry. For most symmetrical models, you use the value 2.


