
With ZBrush 2018 and the 4R8 update comes a new feature that significantly speeds up your work on organic figures: 3D alphas. While until now you could only create depressions and elevations in one direction with flat grayscale images, you can now work entire body parts, scales or horns into your model with a single brush stroke. To do this, the new brushes work with so-called Vector Displacement Meshes (VDM).
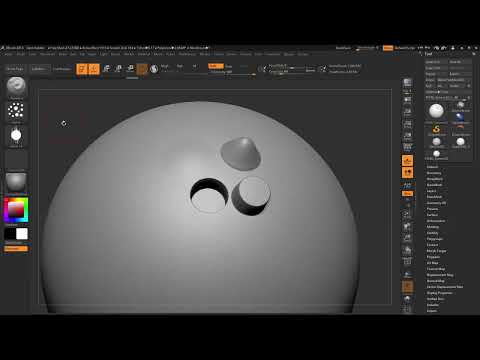
The video is only loaded from YouTube when you play it – data (including your IP address) is then transmitted to YouTube/Google. More in the privacy policy
In this tutorial, I will first show you how the familiar 2D alphas work so that you understand the logic behind them. Afterwards, we will switch to the 3D variants, examine their limits and clarify the difference from Insert Multi Mesh. Keep ZBrush open so you can follow each step directly.
Key Takeaways
- 2D alphas only displace the mesh along the surface normals: white has maximum effect, black has none at all.
- For details, you need a mesh with enough subdivision levels, for example around two million polygons.
- A 3D alpha works with vectors in three directions and can therefore also create overhanging areas.
- Chisel brushes with the Vector Displacement icon are the fastest way to 3D details such as mouths, eyes, scales or horns.
- With heavily distorted polyframes, it is worth critically checking the geometry before you continue working.
- Insert Multi Mesh adds a new mesh and only works on subdivision level 1 or without levels. VDM brushes, on the other hand, deform the existing mesh.
Step-by-Step Guide
Step 1: Prepare the starting object and build up subdivision levels
Start with a simple sphere. Drag it out, convert it into an editable object using the Edit button, and activate PolyMesh3D. This gives you a base that you can edit.
Before you work with alphas, you need enough polygons. In the example, the mesh starts at around 8,000 points. Increase the subdivision levels step by step until you reach about two million polygons. Only then are fine alpha details clearly visible.


Step 2: Understand how a 2D alpha works
Choose a brush and load a normal alpha, for example Alpha 14. With Drag Rectangle, you can see the alpha clearly in the brush preview. The principle is what matters: white areas of the alpha change the mesh strongly, black areas leave it untouched. Grayscales in between produce correspondingly weaker effects.
The mesh is always edited along its normals. So you can only push in or out, but nothing can be shifted sideways.


Step 3: Adjust intensity and Focal Shift
With C Intensity, you control how strong the effect is. If you increase the value, significantly more details appear. If the transition between the elevation and its surroundings looks too harsh, change the Focal Shift. A positive value makes the edge softer, a negative value has the opposite effect. This way you can specifically determine where the brush takes effect.


Step 4: Choose the alpha mode and understand direction
Whether an alpha works outward or inward is decided by the sign of the intensity. With a positive value, you push the mesh outward; with a negative value, inward. Note that a 2D alpha always works in only this one direction. You go in or out, nothing more. This seems simple, but it is very effective for skin textures, wrinkles and pores.
Step 5: Adjust alpha settings
In the Alpha menu, you will find additional settings under Add. The Stroke function is interesting, with which you can add noise to the alpha. With the Spray Stroke, you create fine strokes that make soft alphas more lively. You can adjust the effect with the slider until the result fits. Always look at the preview while doing so, because it shows you early on whether the effect is too strong or too weak. If you remove the stroke again, you immediately see the difference from the original alpha.


Step 6: Reset the brush if a foreign alpha gets stuck
If you have used an alpha in a brush and afterwards want to use the standard brush again, there are two ways. With Reset Current Brush, you reset only the current brush. If you have changed several brush tips, use Reset All Brushes. Especially with Clay Buildup, it often happens that an old alpha remains unnoticed and causes confusion later. With the reset, you save yourself the search for this source of error.


Step 7: Find the 3D alphas and Chisel brushes
The 3D alphas are accessible via the Chisel brushes. We already used these in the previous video. Select Chisel 3D here, for example. You can choose different shapes, and with the alphas you will notice a new symbol. It identifies Vector Displacement Meshes, that is, alphas that do not only act in one direction.


Step 8: Understand how Vector Displacement Meshes work
The name reveals the principle: A Vector Displacement Mesh contains vectors in three directions. As a result, the mesh is displaced in all directions, not just up or down. The great advantage shows in overhanging areas, such as bulges or lips that fold over the base shape. A 2D alpha could not reproduce such structures.


Step 9: Try out typical application examples
Try out different motifs. There are brushes for mouths, eyes, and ears. With Chisel Create Creature, you additionally get scales or horns that already look very true to detail. However, make sure you check the brush effect with every shape. Not every motif fits every spot on the model.


Step 10: Recognize and evaluate distortions
When applying it, you will notice that the mesh can become heavily distorted. This applies especially to the polyframes. With scales, this is often unproblematic, because the geometry is less important for such details. If, on the other hand, you need clean topology, you have to check the result carefully. The next video will show how you can fix such distortions.


Step 11: Correctly distinguish Insert Multi Mesh and VDM brushes
Perhaps you are wondering why you can't do all this with Insert Multi Mesh. That is an important point. Insert Multi Mesh inserts a new mesh, and this only works on Subdivision Level 1 or without any levels at all. If your model is at Level 5, ZBrush will report this limitation.
With VDM brushes, on the other hand, you work on the already existing mesh. So you are not adding a new object, but deforming the existing mesh. This is particularly useful if you have already built up many subdivision levels and still need more detail.


Step 12: Explore the limits and start your own experiments
In the end, an experiment is worthwhile: Test how far you can deform a mesh with a displacement brush until it is no longer usable. This way you get to know the behavior of the brushes well. In the next step, you can then create your own Vector Displacement Meshes.

Summary ??? Mastering ZBrush 3D Alphas: Vector Displacement Meshes Step by Step
You have seen how 2D alphas work and why they only act in the normal direction. With 3D alphas and Vector Displacement Meshes, you extend this logic by three dimensions. Make sure you have enough subdivision levels, use the Chisel brushes for quick results, and check the geometry. If you keep Insert Multi Mesh and VDM brushes clearly separate, you will avoid typical mistakes.


