
Imagine you have an airbrush motif almost finished on the illustration board, and of all things, the shadow at the bottom right has gone wrong. With a brush and airbrush, this mistake can hardly be corrected cleanly anymore. On the computer, however, it is fixed in a few minutes. This is exactly where image editing comes in.
The video is only loaded from YouTube when you play it – data (including your IP address) is then transmitted to YouTube/Google. More in the privacy policy
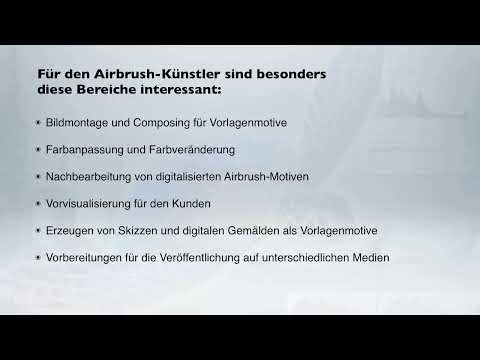
Image editing refers to the computer-assisted editing of digital image content. The range extends from simple color correction through photo montage to digital painting. This field offers many advantages, especially for airbrush artists, because you can visualize motifs in advance, fix mistakes afterwards, and prepare your work for clients, magazines, or print. This guide takes you step by step through the most important possibilities and shows you where you as an airbrush artist benefit the most.
Key Takeaways
- Image editing is the computer-assisted editing of digital image content using specialized software.
- The core areas include color correction, photo montage (compositing), and digital painting.
- For airbrush artists, photo montage, color adjustment, and the post-processing of digitized motifs are especially relevant.
- With Photoshop, you can simulate motifs on walls, tanks, or hoods, create sketches, and prepare files for print.
Step-by-Step Guide
Step 1: Understanding the Term Image Editing
Before you reach for the software, it is worth taking a clear look at the term. At its core, image editing means the computer-assisted modification of digital images. The source material can be a photo, a scan, or a graphic created directly on the computer. What matters is that everything can be changed at the pixel level or in a vector-based structure without destroying the original. If you internalize this basic idea, working with the software later will be much easier for you.

Step 2: Using Color Correction as a Foundation
Color correction is the simplest and at the same time most effective way to get started. With it, you adjust the brightness, contrast, and color mood of an image. Especially with photos of your finished airbrush works, which are often taken under difficult lighting, small corrections can make the difference. You make sure that the colors on the screen look the way they are meant to look on the original. Therefore, always begin with such a basic correction before working with more elaborate techniques.

Step 3: Understanding Photo Montage and Compositing
Photo montage, also called compositing, is particularly exciting for airbrush artists. In it, you merge different image contents into a new composition. For example, you can place your motif onto a photo of a wall or take over a background from another shot. The result is a completely new template that you can use for further work. When creating a montage, pay attention to matching perspectives, lighting conditions, and shadows, because only then will the result look credible.

Step 4: Developing a Template Motif from the Montage
A successful montage often becomes a new template motif. You can use it as the basis for your next airbrush work or implement it as a draft on the illustration board. Especially with large-scale motifs, this preparatory work saves you a lot of time, because you check proportions, composition, and color effect in advance. It is best to save your templates in a clearly organized folder with clear file names so that you can find them again at any time.
Step 5: Implementing Color Adjustment and Color Change
One of the most impressive functions is targeted color change. You can change the color of a single object without touching the rest of the image. The example of a yellow banana that turns blue with a mouse click illustrates the principle very clearly. For your work, this means: you can create color variants of a motif and present different options to clients without repainting each variant. Work with selections and layers so that your changes remain flexible.
Step 6: Post-Processing Digitized Airbrush Motifs
The post-processing of digitized airbrush motifs is often underestimated, yet it is one of the greatest advantages of the digital world. If you made a mistake while painting, it can be corrected on the computer without damaging the original. You can sharpen edges, soften transitions, or retouch disturbing areas. It is important that you first capture the scan or photo cleanly, because a good source file makes all further steps considerably easier.
Step 7: Presenting Motifs in Realistic Environments
If you want to show customers how an airbrush motif looks on a wall, a motorcycle tank or a hood, Photoshop helps you with the visualization. You place your motif into a photo of the respective surface and adjust the distortion and the lighting mood. This way, a customer can get a realistic picture even before the actual execution. That builds trust and makes decisions considerably easier.
Step 8: Creating Sketches and Digital Paintings
In addition to editing existing images, you can also create sketches and digital paintings in Photoshop. These drafts serve as template motifs for later airbrush work. Especially when you want to try out new ideas, a digital sketch is a quick way to test variations without using any materials. Use brush tools and layers for this so you can adapt your drafts flexibly.
Step 9: Preparing Files for Publication and Print
Finally, it's about the output. If you want to publish your motif in a magazine or have it produced as a poster using offset printing, you need to prepare the file accordingly. Pay attention to the right resolution, the appropriate color space setting and the print size. Similar basic rules apply to direct printing on canvas. Photoshop offers you all the necessary tools so that you can present your work professionally.
Summary – Image Editing for Airbrush Artists: Basics, Possibilities and Practice
Image editing is far more than just correcting photos. It encompasses color correction, photo montage, color changes, post-processing and digital painting. For you as an airbrush artist, these possibilities open up new ways to develop motifs, convince customers and output your work professionally. If you practice the basics step by step, you will quickly notice how much time and material you save.
FAQ
What exactly is image editing?Image editing is the computer-assisted editing of digital image content using special software such as Photoshop.
Do I need an expensive graphics tablet for image editing?A graphics tablet is helpful, but a mouse is often enough to get started. A tablet mainly makes digital painting and drawing easier.
Can I correct a mistake in a scanned airbrush motif afterwards?Yes, with Photoshop you can retouch mistakes, sharpen edges and adjust transitions without damaging the original.
What is meant by compositing?Compositing refers to merging different image contents into a new composition, for example when you place a motif onto a photo of a wall.
How can I show customers how a motif looks on a motorcycle tank?You place your motif into a photo of the tank and adjust perspective, distortion and lighting mood so that a realistic visualization is created.
Which file settings are important for offset printing?What matters are a sufficient resolution, the appropriate color space and the correct print size of the motif.
Can I also create sketches with Photoshop?Yes, with brush tools and layers you can create sketches and digital paintings that later serve as templates for airbrush work.


