
Your motif is painted, optimized in Photoshop, and already laid out with text and logo. But before it ends up on paper, a lot gets decided: which print shop fits, which format you set up the file in, and how you export the file. If you skip these steps, in the worst case you end up with white edges at the border or colors that look noticeably different than on the screen. This guide shows you step by step how to prepare your airbrush motif, using the example of a DIN A2 poster for offset printing, from choosing the print shop to the uploaded PDF.
The video is only loaded from YouTube when you play it – data (including your IP address) is then transmitted to YouTube/Google. More in the privacy policy
Key Takeaways
- First choose the print shop and the product, because this determines the possible formats, papers, and prices.
- Set up your document with 1 mm of bleed all around so that no white edges appear when it is trimmed.
- Work with a resolution of 300 ppi so that the motif is printed sharply.
- Export the document as a Photoshop PDF with the color profile coated FOGRA 27 and in the PDF/X-3 format, if the print shop requires it.
- Before uploading, check the motif and the file size in the PDF.
Step-by-Step Guide
Choosing the Print Shop and the Product
It starts with the question of where you want to have it printed. In the video, the print shop flyalarm is used, which offers a large selection of print products. Find a provider whose product range suits your project, and compare quality as well as delivery terms before you commit.

For a poster, you select the Posters category in the product overview. There you can see all available formats and options. Especially with posters, it is worth looking at the product description, because it often states which printing methods and finishes are offered.

Defining the Format and Paper
In the next step, you define the size. For this motif, the choice falls on a DIN A2 poster. Clicking the desired format opens the further options, which you go through one after another in the configuration.

Next, you select the paper type and the paper weight. The paper weight indicates the weight of the paper in grams per square meter. A higher weight feels more high-quality and is particularly suitable for posters that are meant to hang for a longer time. So think in advance about where the motif will be displayed later.

Determining Color Mode and Quantity
Then you specify how many colors are printed. In the example, the poster is printed in four colors on the front, while the back remains unprinted. This information is important because it directly affects the price and shows you whether your motif should be set up in CMYK colors.

The price scale shows that larger print runs clearly pay off. In the example, 100 copies cost 93 euros, while 1000 copies cost 192 euros. The more you print, the cheaper the unit price becomes. So don't decide only based on your needs, but also on whether you might want to use the motif again later.
Checking the Print Shop's Dimension Specifications
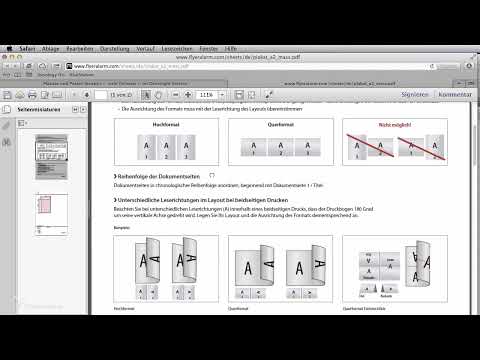
For each product, the print shop provides a guide with dimension specifications as a PDF. Download this document and read it carefully. It states exactly how much bleed margin your motif needs. In the example, it is 1 mm all around. The bleed ensures that the trim comes out clean even if it shifts slightly.

Setting Up the Document in Photoshop
Now it's time for your working document. In Photoshop, open the File command and choose New. Enter 300 pixels per inch as the resolution. In the video, the color mode stays set to sRGB. The later adjustment for offset printing is handled by the color profile during PDF export.

Switch the unit to millimeters, because the print shop specifies its dimensions in millimeters. The size of the A2 format is 420 by 594 millimeters. With a bleed margin of 1 mm on each side, this results in a document 422 mm wide and 596 mm high. Enter these values and confirm with OK.
After confirming, you have a clean foundation for offset printing. The document is large enough to accommodate the bleed, and the resolution is right for a sharp print.

Placing the motif into the poster template
Now you transfer your motif into the prepared template. To do this, select all layers of your motif. With the Move tool, drag the layers into the new document with the poster template.

Then you adjust the position and size so that the motif fits exactly into the shape of the template. Make sure that important elements such as text or signature do not disappear in the later trimming. Move and scale until everything is in the right place.

Saving the document as a Photoshop PDF
Now choose the Save command. In the dialog, set Photoshop PDF as the format. Since the layers are no longer needed for the print shop, you can have them flattened. Confirm this option so that the file becomes smaller and no unnecessary layers are sent along.

In the field for the color profile, you choose coated FOGRA 27. This profile is intended for offset printing on coated paper and ensures that the colors in print stay as close as possible to your original. Confirm with Save.

Selecting the PDF/X-3 standard
When saving, Photoshop asks once more for the desired PDF standard. This depends on the type of printing and the print shop's requirements. In the example, flyalarm requires the PDF/X-3 standard. Select it and click Save. This may take a moment because Photoshop is now fully calculating the file.
Checking the PDF
After saving, the PDF opens automatically. Take another calm look at your motif and check whether the text, image section, and bleed are correct. Also pay attention to the file size shown in the document. If it is within a reasonable range, the file is fine. Very large files often indicate too many layers or too high a resolution.

Uploading and starting the print
If everything is correct, you upload the PDF to the print shop. Afterwards your document is ready for printing, and you can complete the order. Also keep the file in a safe place in case you want to reprint the motif later.

Summary ??? Print preparation for airbrush motifs in offset printing
You have seen that print preparation involves far more than saving a file. First you select the print shop, product, paper, and quantity. Then you set up the document at 300 ppi and 1 mm bleed, transfer your motif into the poster template, and export it as a Photoshop PDF with the color profile coated FOGRA 27 in the PDF/X-3 standard. With a final check, you avoid the most common errors before the file goes into production.
FAQ
Why do I need a bleed margin of 1 mm?The bleed compensates for small inaccuracies during trimming, so that no white edges appear at the border.
Why does the resolution have to be 300 ppi?For printed products, 300 ppi generally ensures sharp contours and fine gradients that look convincing on paper.
What does the color profile coated FOGRA 27 mean?It is a standard profile for offset printing on coated paper and helps to reproduce the colors realistically.
What is the PDF/X-3 standard?PDF/X-3 is a standardized PDF format for printing that standardizes the file for production and reduces typical sources of error.
Do I have to flatten the layers before saving?Yes, in this case it makes sense, since the print shop only needs the finished print file and no individual layers.
Is a larger quantity worthwhile?In the example, one piece costs significantly more at 100 copies than at 1000 copies, so a larger print run is worthwhile if you need the motif often.


