
A digital building often only comes to life once lights, structures, and small details are added. This is exactly where this tutorial comes in. You will learn how to deliberately extract light effects and textures from a photo of a big-city skyline and insert them into your landscape scene. Along the way, you will work with opacity, layer modes, and the eraser, add a waterfall and small mountains to the scene, and finally set highlights with the airbrush brush.
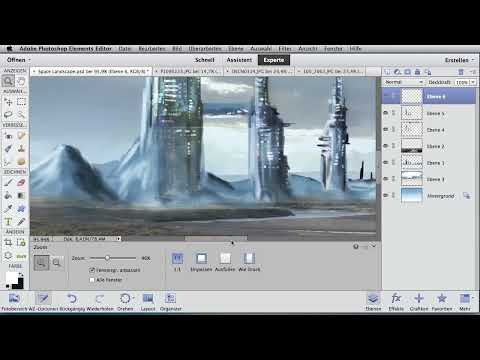
The video is only loaded from YouTube when you play it – data (including your IP address) is then transmitted to YouTube/Google. More in the privacy policy
The technique is well suited for airbrush artists because it feels like classic glazing technique: you apply material layer by layer, reduce it, and decide bit by bit what remains visible.
Key Takeaways
- Photo motifs can be carefully positioned using opacity before you define a suitable section.
- The Multiply layer mode ensures that only the dark areas of the photo become visible and the building is not covered.
- The eraser and selection tools remove overhangs, artifacts, and distracting lights.
- Glow effects are created with a soft airbrush brush in white and various sizes.
- Waterfall, mountains, and shading round off the scene and connect the foreground and middle ground.
Step-by-Step Guide
Preparing the Template and Placing the Photo Motif
The starting point is your prepared Space Landscape template. Load a photograph of a skyline with many high-rise buildings and lights, for example a Tokyo skyline, and drag it into your document using drag & drop. The photo lands as its own layer above your drawings. Make sure the layer is above the building so that you can edit it later.

Reducing Opacity and Finding the Right Section
Now reduce the opacity of the photo layer. This lets you see both the photo and your drawing underneath, and you can move the motif with millimeter precision. Then look in the photo for a section with as many lights and effects as possible. It is important that the shape of the section roughly matches the shape of your building. The better the proportions match, the less you will have to correct later.

Applying the Section and Increasing Opacity Again
Once you have found the section, confirm the transformation with the Enter key or via the green checkmark. Then increase the opacity a little again so that the lights are clearly visible. This way you can see right away which areas of the photo will actually end up in the building later.

Removing Unnecessary Areas with the Eraser
Now take the eraser and delete everything that lies outside the building shape. Work with a soft eraser tip so that the edges do not look hard. This method is very direct and works well when you want to design details freely.

Alternative with Selection and Lasso
You can also mark the overhangs in advance with the selection tool or the lasso and then delete them. This variant is faster when larger areas are affected. For fine transitions, however, the eraser remains the better tool.

Using the Multiply Layer Mode
Copy the photo layer and place it above the building layer. Then set the layer mode to Multiply. This mode makes bright areas disappear and intensifies the dark areas. The result: only the light effects remain visible, and the building appears to shine through the photo texture. This step is the core of the entire technique.

Reworking Distracting Overhangs
Now check the result. Some lights will probably still extend beyond the building edges. Remove them with the eraser. Zoom in closer so that you can edit edges cleanly. If you vary the opacity of the photo layer, you can quickly see what is still disturbing. Plan for some patience, because this step takes time. The result is worth it, though, because the structure ultimately looks convincing.

Transferring Photo Textures to the Remaining Buildings
Drag the image into your scene again and choose another section for the other two buildings. First, place the texture roughly over the building. Then switch the layer mode to Screen. Afterwards, remove the rest with the eraser. You can be a bit more generous with this layer, because the structure is mainly meant to create atmosphere.

Removing Large Areas with the Lasso
The lasso tool is helpful for larger areas. Select the distracting areas, confirm the selection, and press the Delete key. This way you remove artifacts in a single step. Then zoom back in on the buildings and correct any remaining flaws with the eraser, for example at the edges of the skyscrapers.

Reducing the Glow and Adding Shading
At the edge of the building, the glow effect often looks too strong. Reduce it with the eraser or lower the opacity of the layer. On the first building, you can also add some shading to make it look more three-dimensional. Also pay attention to small windows that protrude into the sky. Remove them so that the silhouette stays clean. Finally, adjust the opacity so that the effect is targeted but not dominant.

Creating a Light Glow with the Airbrush Brush
Choose a soft airbrush brush and set the color to white. Click a few times on individual building windows with it. This creates a small light glow that reinforces the impression of illuminated rooms. Vary the brush size so that the lights do not look uniform. Repeat the technique on the other buildings so that the landscape appears more lively overall.

Readjusting Contrasts
Switch back to the building layer and pick up the eraser once more. Often it is only in interplay with the background that you see where the contrasts are off. Correct these spots in a targeted way until the scene looks balanced.

Adding a Waterfall as a New Layer
Create a new layer and move it all the way to the top. With a small brush, start at the spot where the waterfall emerges from the building and pull the color downward. Where the water hits the ground, paint cloudy elements. This creates a river that winds through the image and ties the scene together.

Working Out the Structure in the Waterfall
Choose a dark color tone and paint lines from top to bottom with a very thin, one-pixel brush. Then switch to white and draw more fine lines over them. This combination of dark and light strokes conveys movement and structure in the water.

Cleaning Up the Foreground and Adding Mountains
Remove a few elements in the foreground that make the scene look restless. Then adjust the saturation to match the colors of the front landscape. With a color from this area, paint a small, narrow mountain. It connects the buildings and mountains from the middle ground with the foreground. Add some shading and blur the transitions with the smudge finger so that everything looks harmonious.
Checking the Overall Image
Finally, zoom back out and look at the complete motif. Check whether all layers work together coherently and whether the lights are evenly distributed. Small corrections to opacity and contrast often bring the final improvement.

Summary ??? Digitally Painting a Space Landscape: Refining Buildings with Photo Textures and Light Effects
With photo motifs from a city skyline, you quickly get realistic lights and structures for your digital painting. The Multiply layer mode, eraser, and lasso are key tools for applying the texture precisely. Afterwards, airbrush glow, waterfall, and mountains give the scene depth and movement. If you repeat these steps one by one, you will create your own motif templates that you can develop further with your personal style.
FAQ
Which software is used in the tutorial?The video shows Photoshop. However, the techniques can also be applied in other image editing programs with similar functions.
Why should I use the Multiply layer mode?Multiply makes bright areas of the photo disappear and emphasizes the dark areas. This way, only the light effects remain visible, while the building underneath is preserved.
When is the Lasso more useful than the Eraser?The Lasso is suitable for larger areas that you want to remove with a single click. For fine edges and transitions, the Eraser is the better choice.
How do I create a convincing light glow?Use a soft white airbrush brush and click on individual windows. Vary the brush size so that the lights look different.


